Epoxy coat is additionally of low porosity and is chemical resistant. The surface is very easy to keep and it's powerful to sustain abusive use by commercial or heavy-traffic scale operations. You will quickly realize that epoxy flooring is quite convenient as it meets the majority of the manufacturing needs. These factors assault manufacturing floors regularly in the course of everyday operations.
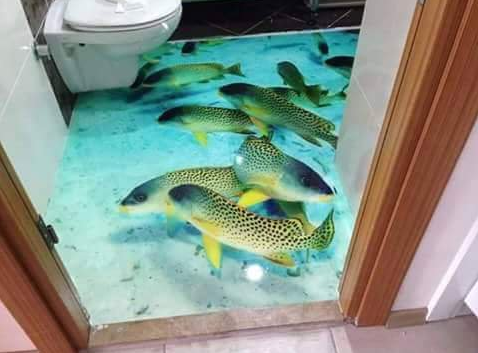
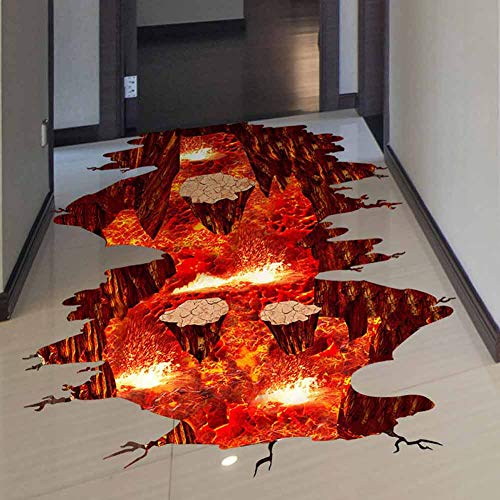
Images about 3D Epoxy Flooring DIY
It is a flexible coat which can suit both your color as well as thickness must have. is the reason why before purchasing it, see to it that you know the way to get it done or a lot better one should ask for guidance. One of the main merits of selecting epoxy flooring is that the majority of tasks can be done by you.
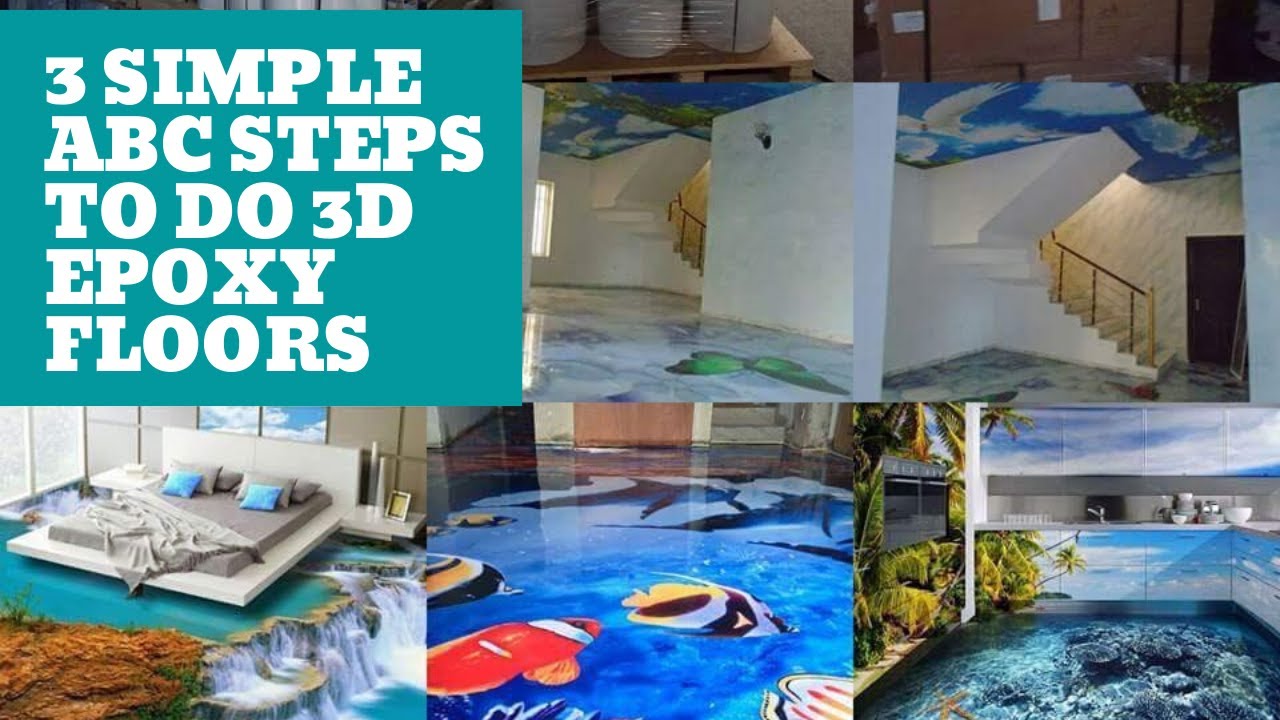
3 Easy steps to make 3d epoxy flooring Installation like ABC quick
To have an epoxy covering applied to their floors a household is able to purchase a package from home improvement stores. Epoxy flooring is a very durable flooring exterior for many shops and garages. They may be utilized on all forms of surfaces including other floor components and concrete and sometimes, even on broken floors.
Epoxy 3D Floor u2013 Everything You Need to Know – Advance Industrial

Epoxy floor surfaces are new-Gen economy strategies you must try during remodeling of your garage any other floor. Cleanup is easy when using epoxy floor coatings, therefore you will not be forced to get worried about damage from spills or accidents. It has become quite popular in the past few years due to it's appeal as well as durability.
3D Epoxy Flooring – How to Make 3D Floor Art With Epoxy Resin

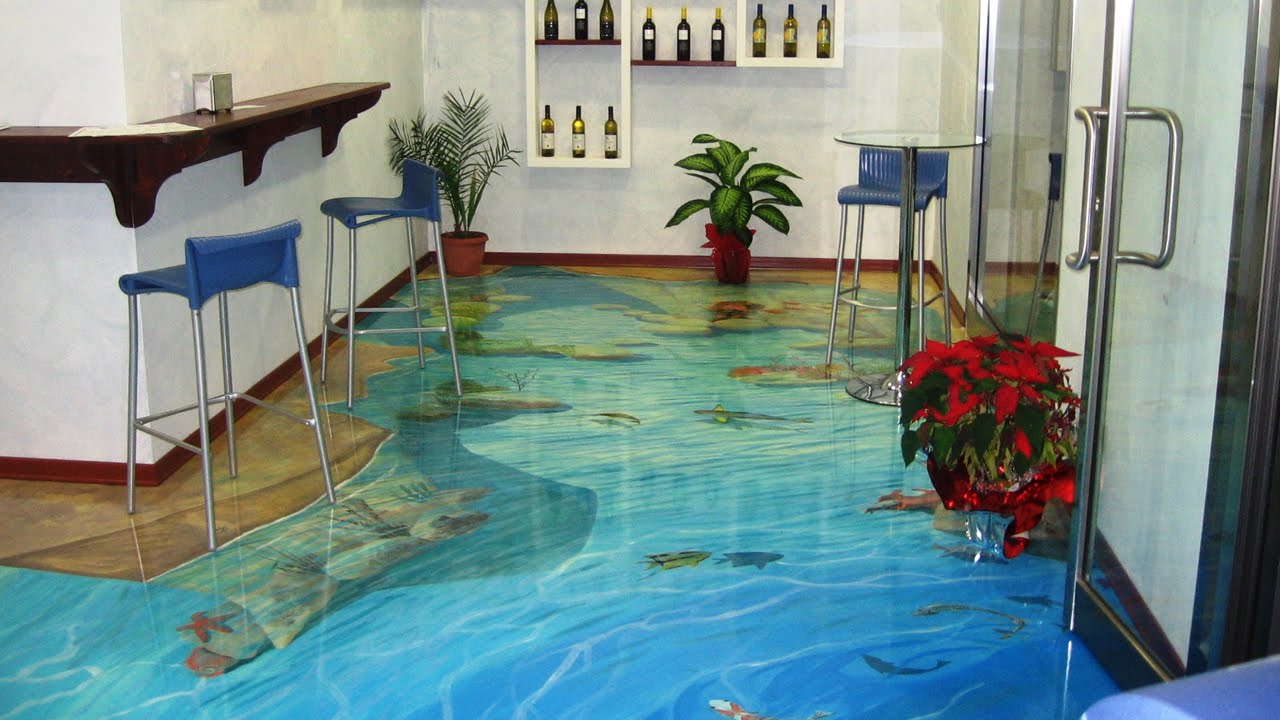
Top 8 of the Coolest 3D Floors Created with Epoxy
Epoxy 3D Floor u2013 Everything You Need to Know – Advance Industrial

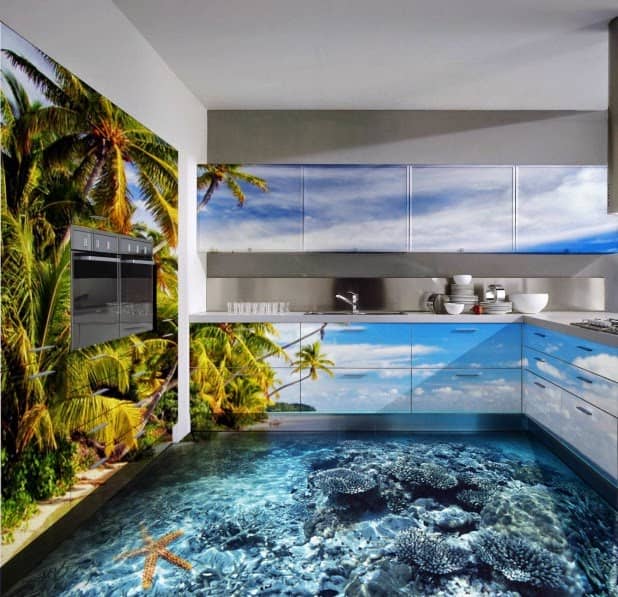
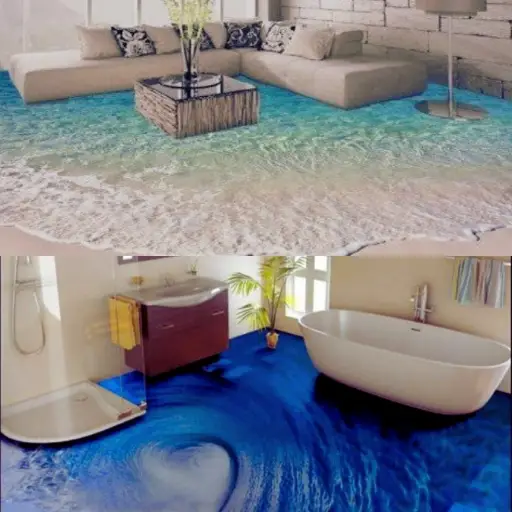
3d Epoxy Flooring for Bedrooms, Kitchens, and Living Areas (Costs)
DIY Custom A da B Epoxy Resin don 3D Floor

3D Epoxy Flooring u2013 How to Make 3D Floor Art

Self leveling epoxy resin floor coating and 3D flooring
how to make an 3D Floor with 2K Epoxy Resin DIY cómo hacer un piso epóxico 3D 2K Epoxid Boden 3D

China 3D Epoxy Flooring Resin 3D Floor DIY Home Office Floor

3D Epoxy Flooring – How to Make 3D Floor Art With Epoxy Resin
Step by step to install 3d epoxy flooring and how to make 3d floor

Related Posts:
- Gray Epoxy Floor
- Epoxy Garage Floor Crack Filler
- Behr Epoxy Floor Paint
- High Build Epoxy Floor Coating
- Cost To Have Someone Epoxy Garage Floor
- Epoxy Shield Floor Paint
- Rustoleum Epoxy Basement Floor Paint
- What Is Epoxy Flooring Systems
- Austin Epoxy Floors
- Alternative To Epoxy Flooring
3D Epoxy Flooring DIY: Transforming Your Space with Stunning Designs
Introduction:
When it comes to flooring options, 3D epoxy flooring has gained immense popularity in recent years. This innovative technique allows homeowners to create stunning and unique designs that bring life and depth to any space. While hiring professionals for this task can be expensive, the good news is that you can now try your hand at creating a 3D epoxy floor yourself with a little bit of guidance and patience. In this article, we will provide you with a detailed step-by-step guide on how to achieve a beautiful 3D epoxy floor, along with some frequently asked questions that will help you overcome any challenges you may encounter along the way.
1. Preparing the Surface:
Before diving into the world of 3D epoxy flooring, it is crucial to ensure that your surface is properly prepared. Start by thoroughly cleaning the area where you plan to apply the epoxy. Remove any dirt, dust, or grease using a mild detergent and water. If there are any cracks or imperfections in the surface, make sure to repair them before proceeding further.
2. Applying the Primer:
Once your surface is clean and dry, it’s time to apply a primer coat. The primer serves as a bonding agent between the existing surface and the epoxy layer. Use a roller or brush to evenly spread the primer onto the floor. Make sure to cover every inch of the surface, paying extra attention to corners and edges. Allow the primer to dry completely before moving on to the next step.
FAQ: How long does the primer take to dry?
The drying time for primers may vary depending on factors such as temperature and humidity levels. On average, it takes around 4-8 hours for a primer coat to dry completely. However, it is recommended to refer to the manufacturer’s instructions for specific drying times.
3. Creating the Base Layer:
The base layer is the foundation of your 3D epoxy floor and sets the stage for the stunning designs to come. Start by mixing the epoxy resin and hardener according to the manufacturer’s instructions. Once mixed, pour the mixture onto the floor and spread it evenly using a roller or squeegee. Work in small sections to ensure that the base layer is applied smoothly and evenly.
FAQ: How much epoxy do I need for the base layer?
The amount of epoxy needed for the base layer depends on the size of the area you are covering. As a general rule of thumb, calculate the square footage of your space and refer to the product’s coverage specifications provided by the manufacturer. This will give you an estimate of how much epoxy you need to mix.
4. Adding Depth and Dimension:
Now comes the exciting part – adding depth and dimension to your 3D epoxy floor. To achieve this, you will need a clear epoxy resin, pigments, and metallic powders. Begin by mixing a small amount of clear epoxy resin with the desired pigment color. Once mixed, pour it onto the base layer and spread it using a brush or roller.
To create stunning effects such as waves or swirls, sprinkle metallic powders onto the wet epoxy and use a brush or roller to manipulate them into desired patterns. Take your time during this step as it requires careful attention to detail.
FAQ: Can I use different pigments and metallic powders together?
Absolutely! Mixing different pigments and metallic powders can result in unique and eye-catching designs. Experiment with different combinations to Create your desired look. Just make sure to mix them thoroughly before adding them to the epoxy resin.
5. Sealing and Protecting the Surface:
Once you are satisfied with the design of your 3D epoxy floor, it’s time to seal and protect it. Apply a clear topcoat over the entire surface using a roller or brush. This topcoat will provide durability and resistance to scratches, stains, and UV damage. Allow the topcoat to dry completely according to the manufacturer’s instructions.
FAQ: How long does the topcoat take to dry?
Similar to the primer, drying time for the topcoat may vary depending on various factors. On average, it takes around 24-48 hours for the topcoat to dry completely. It is important to avoid walking on or placing heavy objects on the floor during this time to prevent any damage.
6. Enjoy Your 3D Epoxy Floor:
Once the topcoat is dry, your 3D epoxy floor is ready for use! Take some time to admire your beautiful creation and enjoy the unique visual effects it brings to your space. Remember to maintain and clean your floor regularly using mild detergents and avoid using abrasive cleaning tools that can scratch or damage the surface.
FAQ: Can I apply a protective wax over the topcoat?
Yes, you can apply a protective wax over the topcoat to further enhance its shine and protection. Make sure to choose a wax specifically designed for epoxy floors and follow the manufacturer’s instructions for application.
By following these steps and taking proper care of your 3D epoxy floor, you can enjoy its beauty and durability for many years to come. Happy epoxy flooring!