If your basement enables moisture into the area, it will likely ruin any floor your choose. What'll you wish to make use of this specific room of the home of yours for. Leaks that occur once a heavy rain, for example, suggest that there is something wrong with the waterproofing. Many basement flooring ideas take into consideration the many forms of materials to be put into use for installation.
Images about Leveling A Concrete Basement Floor
Typically concrete floors are able to emit moisture over time which may negatively affect the adhesives utilized in floor installation. It is additionally more flexible, which makes polyurea flooring more cozy underfoot, easing pressure on feet, knees, and backs. The answers are going to help you in deciding the perfect flooring content recommended for you basement type. To start with, determine what sort of basement flooring suits your needs.
Qu0026A of the Week: “Whatu0027s the Best Way to Level An Old, Wonky
With the best floor, your basement might be the 1st space in your house you think of rather than one of the last. Upgrading this ugly concrete not merely makes the room more inviting for you and the family of yours, it could also boost the resale value of the house of yours significantly. Although some floors are actually appropriate for underneath grade installation, others aren't.
Self-Leveling Concrete Can Save Both Time and Money – Concrete Decor

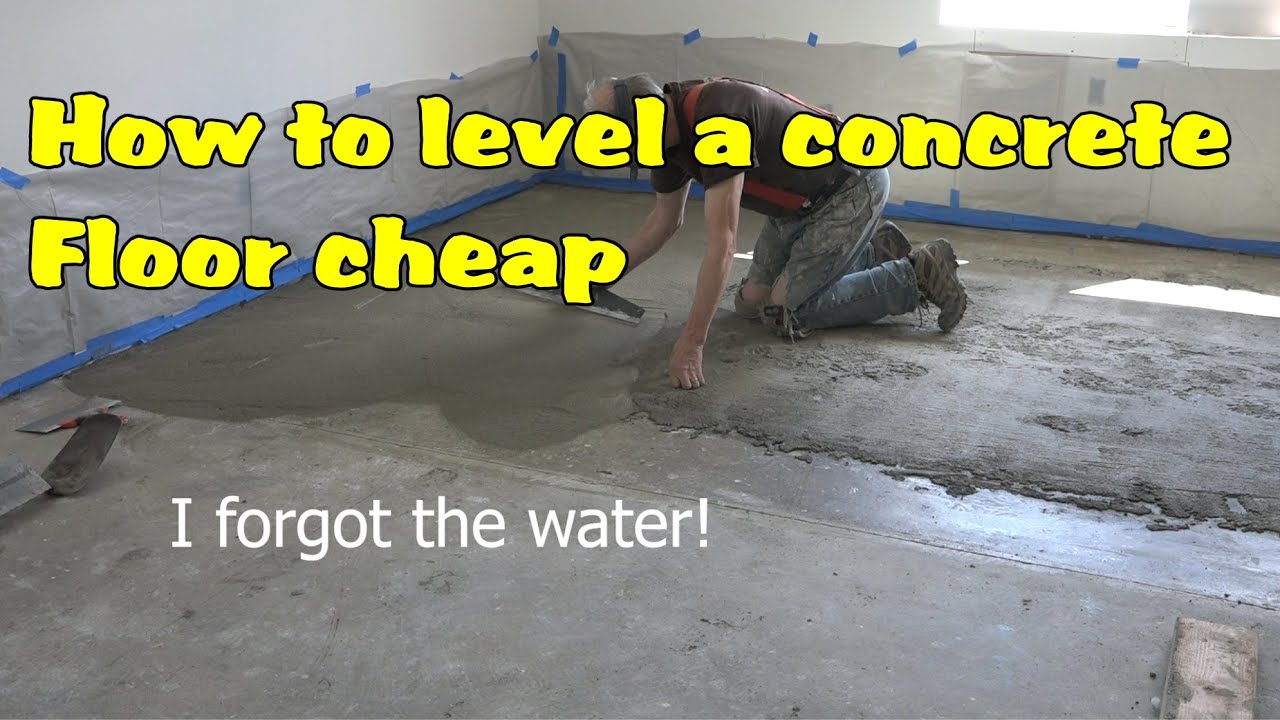
How to level a concrete floor cheap
Self Level a Painted Concrete Basement Floor – A little DIY

Leveling Basement Floor for New Tiles.
Self-Leveling Concrete: Preparing for Installation [Tips]
How to Level Basement Floor (with Pictures) – wikiHow

How to Level a Sloped, Uneven Concrete Floor
Adding Self-Leveling Concrete to a Basement Floor! Daniel Kanter
Fast Cement-Based Floor leveling in Tulsa, OK Residential
![]()
How to Level a Concrete Floor (Homeowneru0027s Guide) – Bob Vila

How to Self Level Concrete Floors Like Pros – Self Leveler
How to Patch and Level a Concrete Subfloor Concrete floors diy

Related Posts:
- Leveling A Concrete Basement Floor
- How To Snake A Basement Floor Drain
- Basement Flooring Products
- Cheap Tile For Basement Floor
- Mike Holmes Basement Flooring Options
- Is Vinyl Plank Flooring Good For Basements
- Paint Your Basement Floor
- How To Install Shower Drain In Basement Floor
- Basement Concrete Floor Paint Ideas
- White Powder On Basement Floor
Leveling A Concrete Basement Floor
A basement is a valuable space in any home, providing additional living or storage areas. However, many basements suffer from uneven or sloping concrete floors, which can be problematic for various reasons. Uneven floors not only make it challenging to install flooring materials such as tiles or carpeting but can also lead to structural issues and safety concerns. To ensure a level and stable surface, leveling a concrete basement floor is necessary. In this article, we will explore the process of leveling a concrete basement floor, including the tools and materials needed, step-by-step instructions, frequently asked questions, and tips for achieving professional results.
I. Understanding the Importance of Leveling a Concrete Basement Floor
– The problems caused by an uneven concrete basement floor
– The benefits of having a level basement floor
Having a level concrete basement floor is crucial for several reasons. First and foremost, an uneven floor can cause various flooring materials to crack or become damaged over time. This not only leads to costly repairs but also compromises the overall aesthetic appeal of the space. Additionally, an unleveled basement floor can result in water pooling in certain areas, leading to potential moisture issues and mold growth.
Moreover, an uneven basement floor can affect the structural integrity of the entire building. It puts additional stress on the foundation walls and can lead to cracks or even collapse if left unaddressed. Lastly, a level basement floor ensures safety for residents and reduces the risk of tripping and falling.
II. Tools and Materials Needed for Leveling a Concrete Basement Floor
– List of essential tools required for the project
– Recommended materials for achieving optimal results
Before starting the leveling process, gather the necessary tools and materials to ensure a smooth workflow. The following are some essential tools you will need:
1. Concrete grinder or shot blaster: Used to remove any high spots or debris on the existing floor surface.
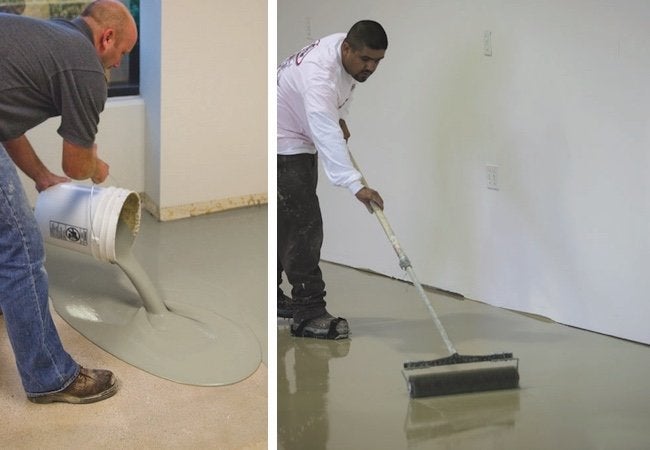
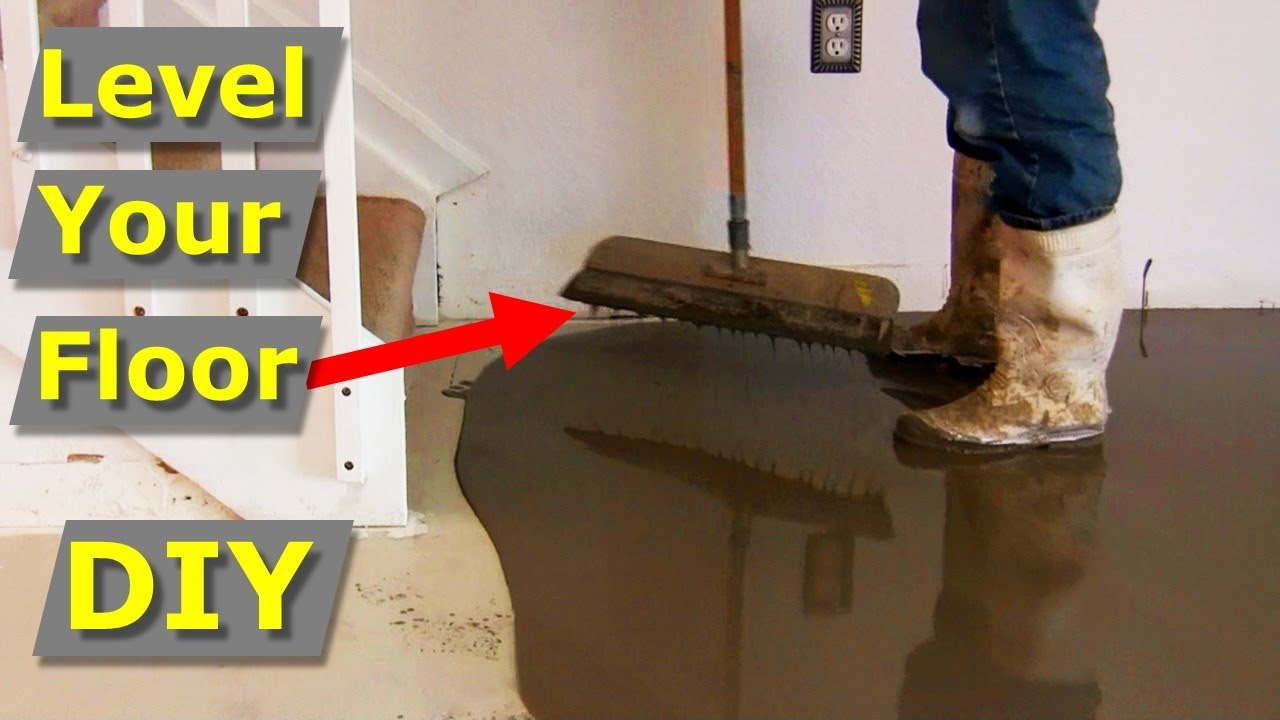
2. Concrete mix or self-leveling compound: Depending on the severity of the unevenness, you can choose either a regular concrete mix or a self-leveling compound to achieve a level surface.
3. Trowel or squeegee: Essential for spreading and smoothing the concrete mix or self-leveling compound.
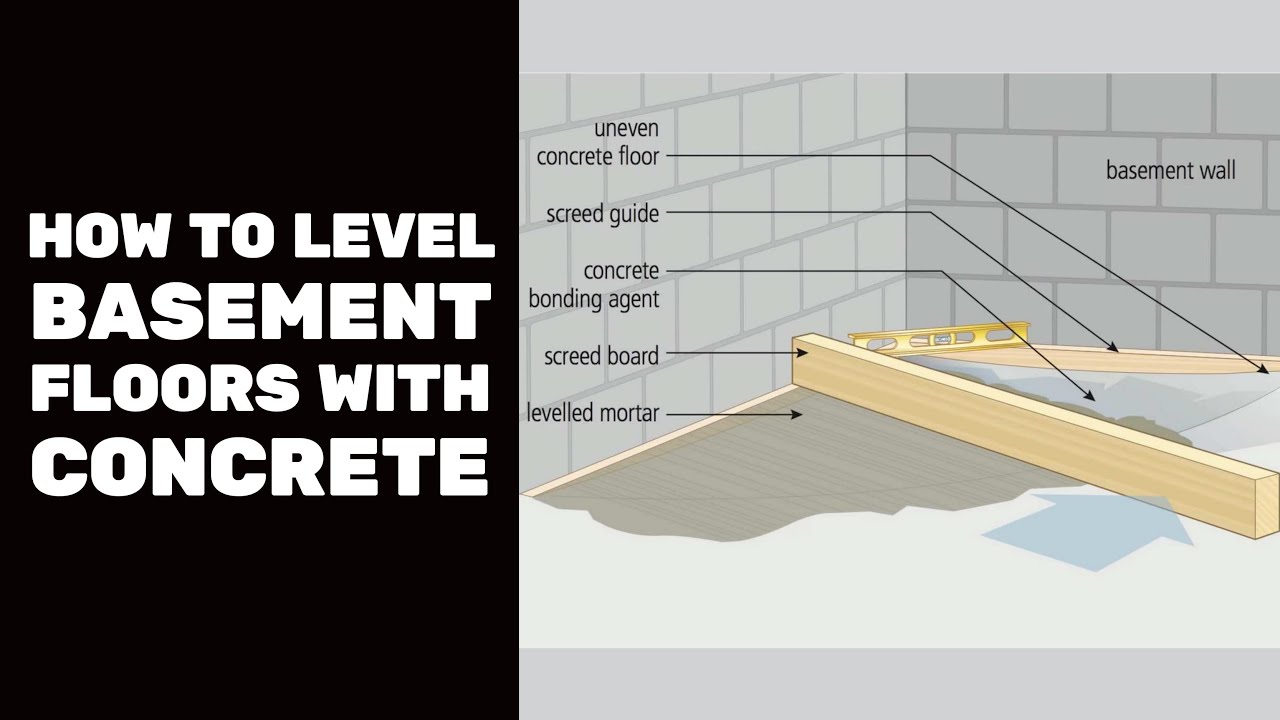
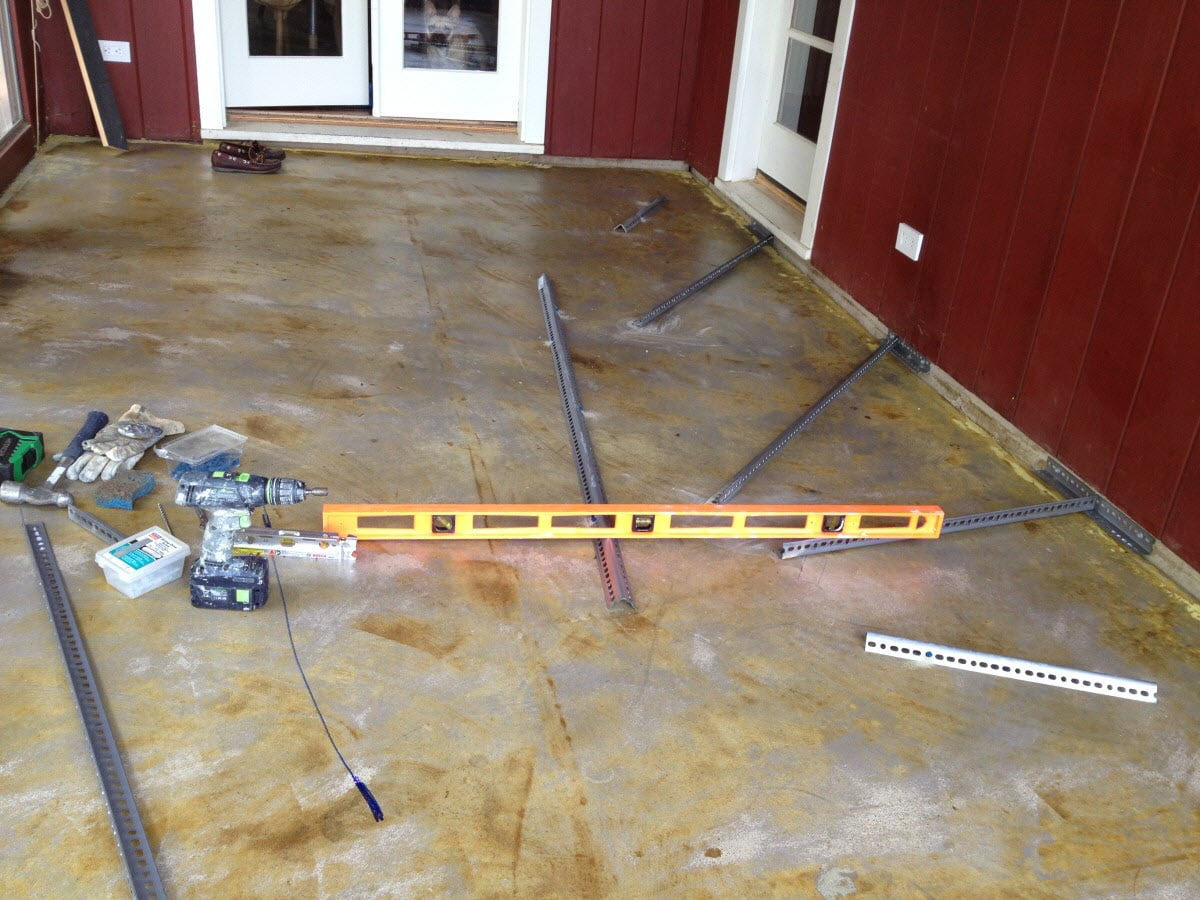
4. Leveling tools: A long straightedge, such as a level or laser level, is crucial for accurately measuring the floor’s evenness during and after the leveling process.
5. Safety equipment: Don’t forget to wear safety goggles, gloves, and a dust mask to protect yourself from potential hazards.
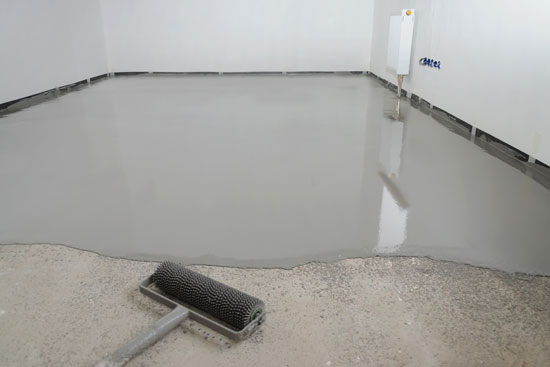
For optimal results, consider using a self-leveling compound instead of traditional concrete mix. Self-leveling compounds are specifically designed to create a flat surface by automatically spreading and filling in low areas. They are also easier to work with and provide a smoother finish.
III. Step-by-Step Guide for Leveling a Concrete Basement Floor
– Detailed instructions for each step of the leveling process
– Tips for achieving professional results
1. Prepare the basement floor:
Before starting the leveling process, it is essential to thoroughly clean the basement floor. Remove any loose debris, dirt, or old adhesive residue using a broom and vacuum cleaner. This step ensures better adhesion between the existing floor and leveling material.
2. Identify high and low spots:
Using a long straightedge or laser level, identify any high spots (areas that need grinding) and low spots (areas that need additional fill). Mark these areas with chalk or tape for easy reference during the leveling process. 3. Remove high spots:
If there are any high spots on the basement floor, use a concrete grinder or shot blaster to remove them. Follow the manufacturer’s instructions for operating the equipment and wear appropriate safety gear. Grind down the high spots until they are level with the surrounding floor surface.
4. Fill low spots:
For low spots on the basement floor, mix and apply the self-leveling compound according to the manufacturer’s instructions. Use a trowel or squeegee to spread the compound evenly over the low areas, ensuring that it fills all the depressions. Work quickly, as self-leveling compounds dry fast.
5. Smooth and level the surface:
After filling in the low spots, use a trowel or squeegee to smooth and level the entire basement floor surface. Work in small sections at a time, starting from one end and moving towards the other. Pay attention to any ridges or unevenness and correct them as you go.
6. Check for evenness:
Once you have finished spreading and leveling the self-leveling compound, use a long straightedge or laser level to check for evenness. Place it across different areas of the floor and look for any gaps or deviations from a flat surface. Make adjustments as necessary to achieve a level basement floor.
7. Allow drying and curing time:
Follow the manufacturer’s instructions for drying and curing times of the self-leveling compound. Typically, it takes several hours for it to dry completely and up to 24 hours for it to cure fully. Avoid walking on the freshly leveled floor until it is fully cured.
8. Inspect and make final adjustments:
After the self-leveling compound has dried and cured, inspect the basement floor for any remaining imperfections. If you notice any areas that are still uneven or require additional filling, repeat the leveling process as needed. Take your time to achieve a smooth and level surface.
9. Clean up and finish:
Once the basement floor is leveled to your satisfaction, clean up any tools, materials, or debris from the area. Dispose of any waste properly and ensure that the basement is ready for use. Consider applying a sealant or finishing coat to protect the leveled floor and enhance its durability.
Tips for achieving professional results:
– Follow all safety precautions when using tools and materials.
– Read and understand the manufacturer’s instructions for each product used.
– Work in small sections to ensure proper spreading and leveling of the self-leveling compound.
– Take breaks as needed to avoid rushing the process and making mistakes.
– Double-check for evenness with a long straightedge or laser level before considering the job complete.
– Consider seeking professional help if you are unsure about any step of the leveling process or if you encounter significant structural issues with your basement floor.