While cheap and also ordinary vinyl are functional, costlier ones come with colors that are deep and prints and can be laid out inside patterns to provide your bathroom a cool and chic look. You often go barefoot inside the bathroom, for instance, hence the sense of its floor can be just as crucial as the way that it looks. In case you are looking for a bold look, go in for tiles with bright colors and bold prints and patterns.
Images about Design Your Own Bathroom Floor Plan

Hardwood provides a warm feeling and a good visual appeal, though it may be wiped out by moisture except if coated with water-resistant sealant. At the lower end of the price scale is actually linoleum, some tiles as well as woods. But, it deserves the fifth spot because stone bathroom floorings do not permit some moisture to come in and eliminate it much love reliable hardwood does.
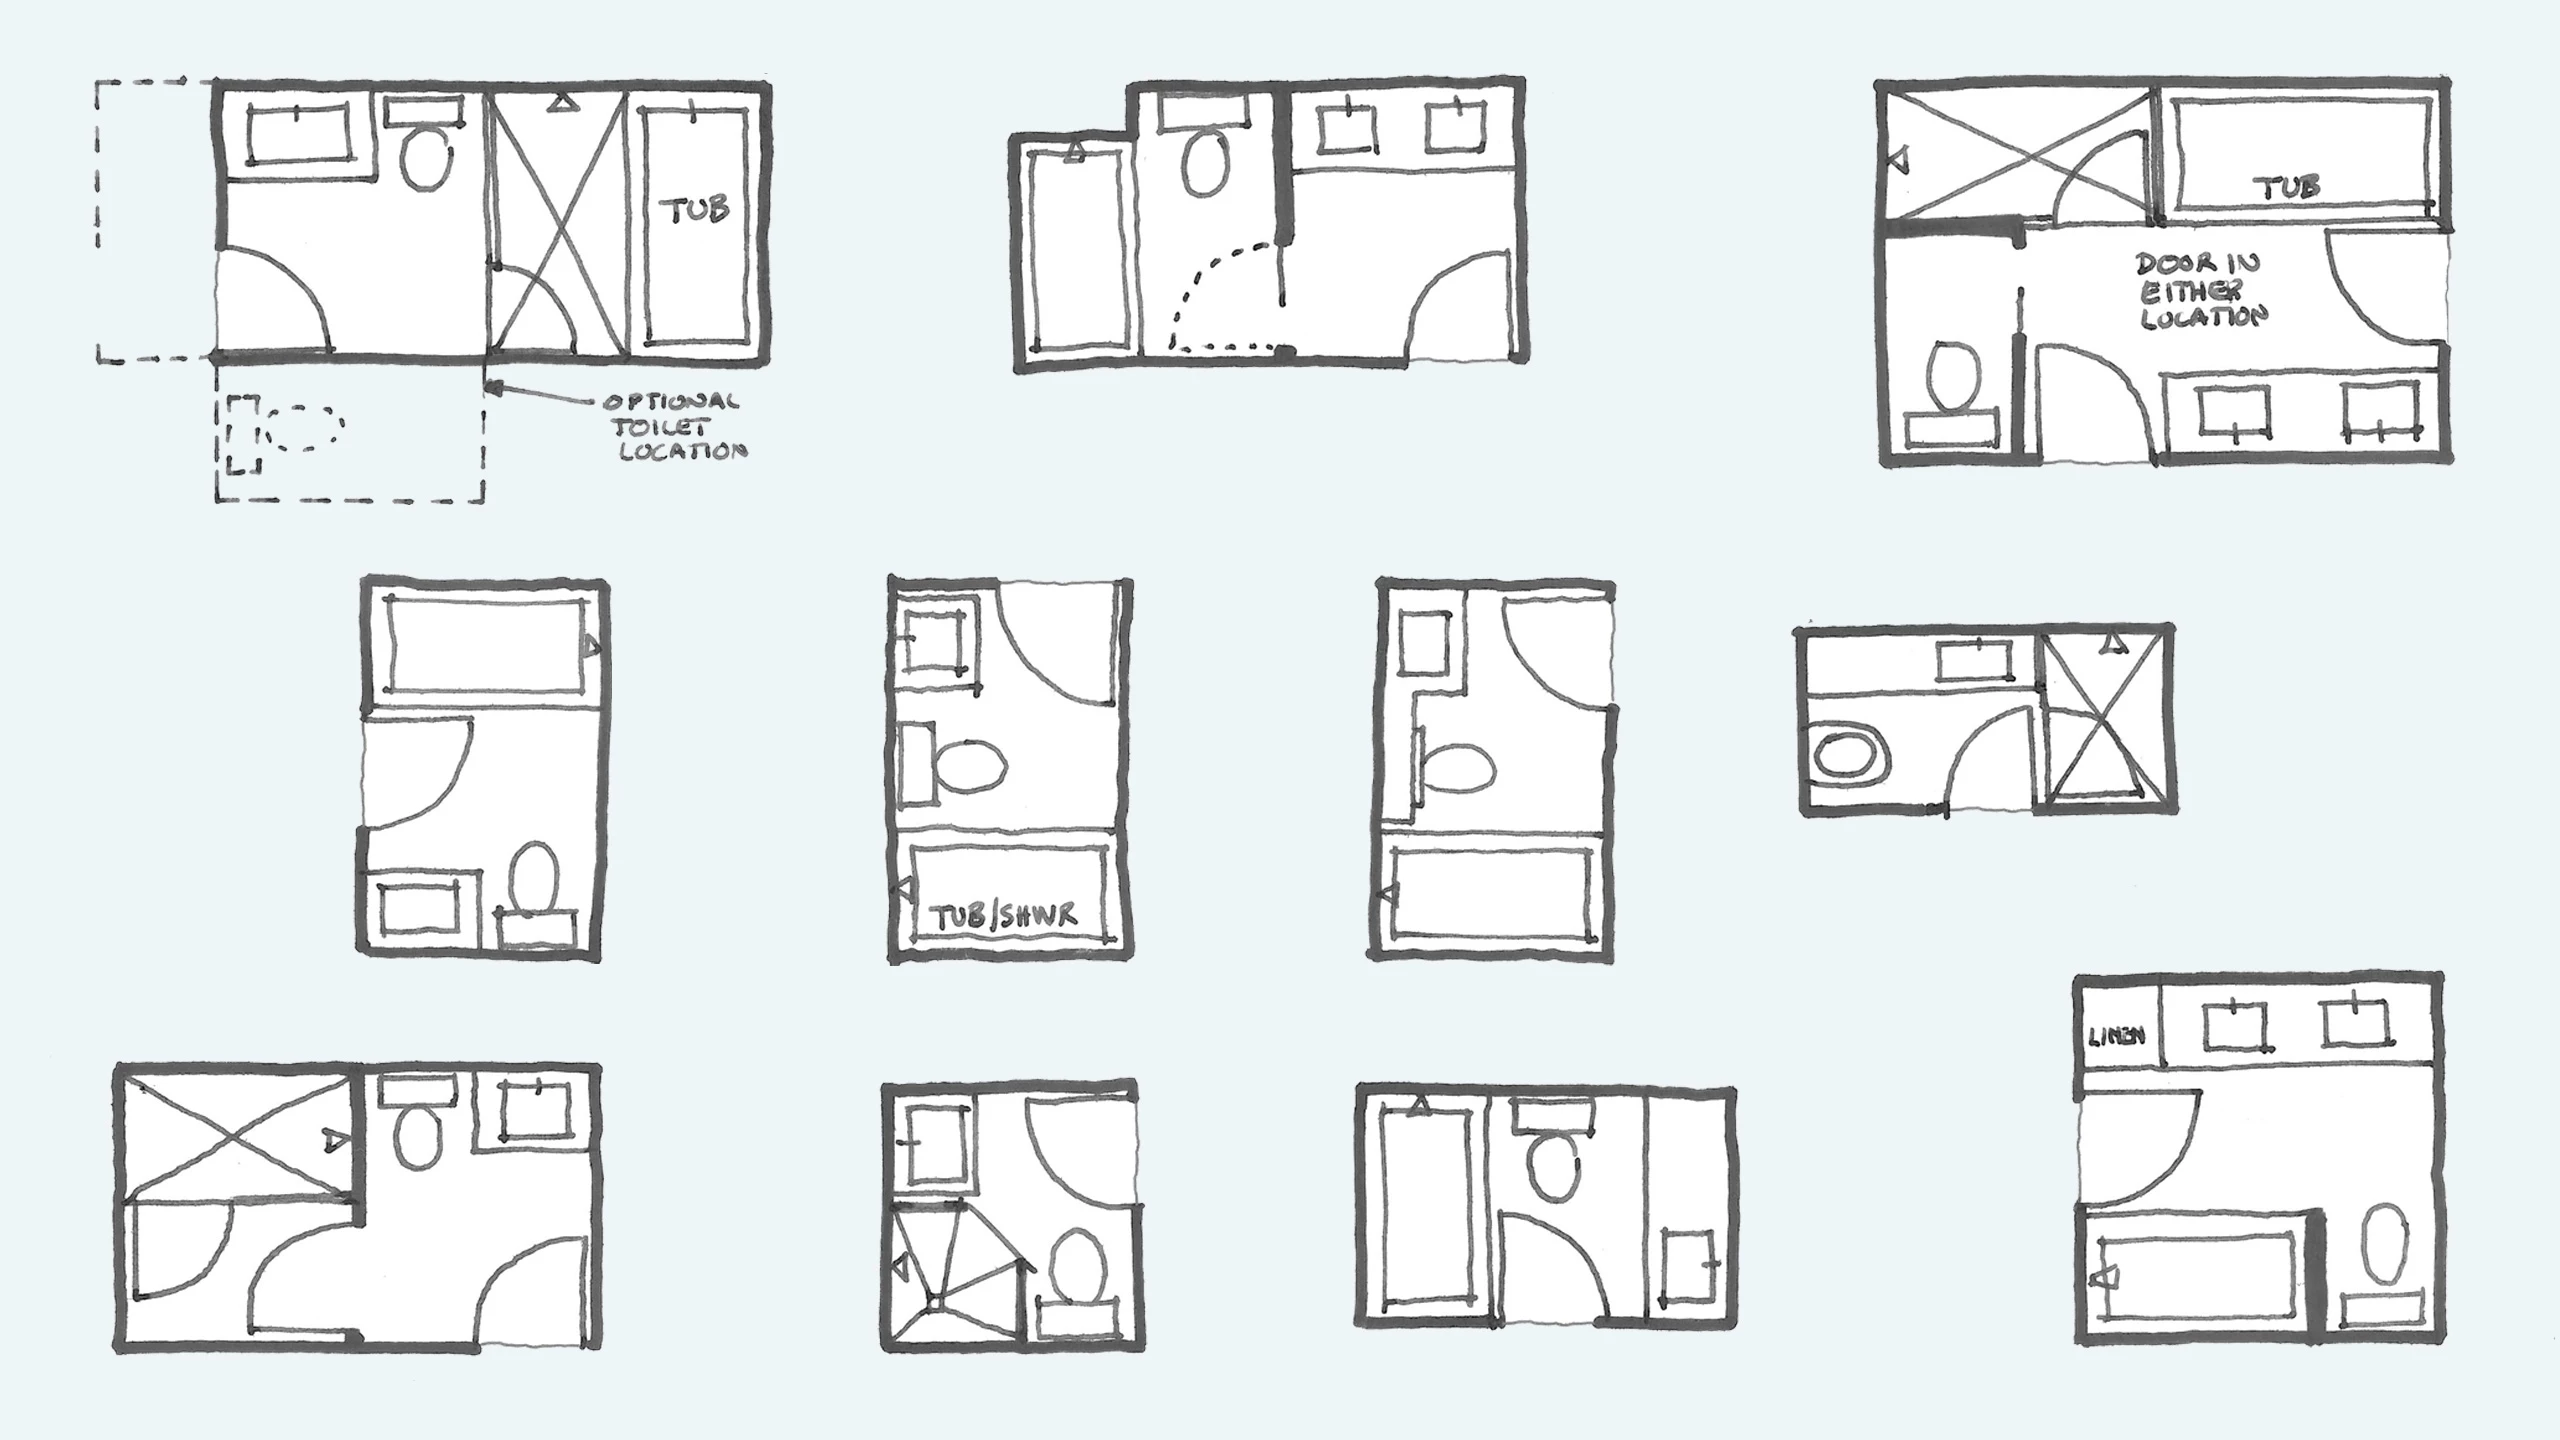
Common Bathroom Floor Plans: Rules of Thumb for Layout u2013 Board
Bathroom tiles are more hygienic than many other flooring types since they're so convenient to clean. As a question of point, vinyl last for a long time on end. Most importantly, don't compromise on the appearance that you would like. In case you would prefer the overall look of wood in a substance that can greatly stand up to the perils of this bathroom, laminate flooring could be for you.
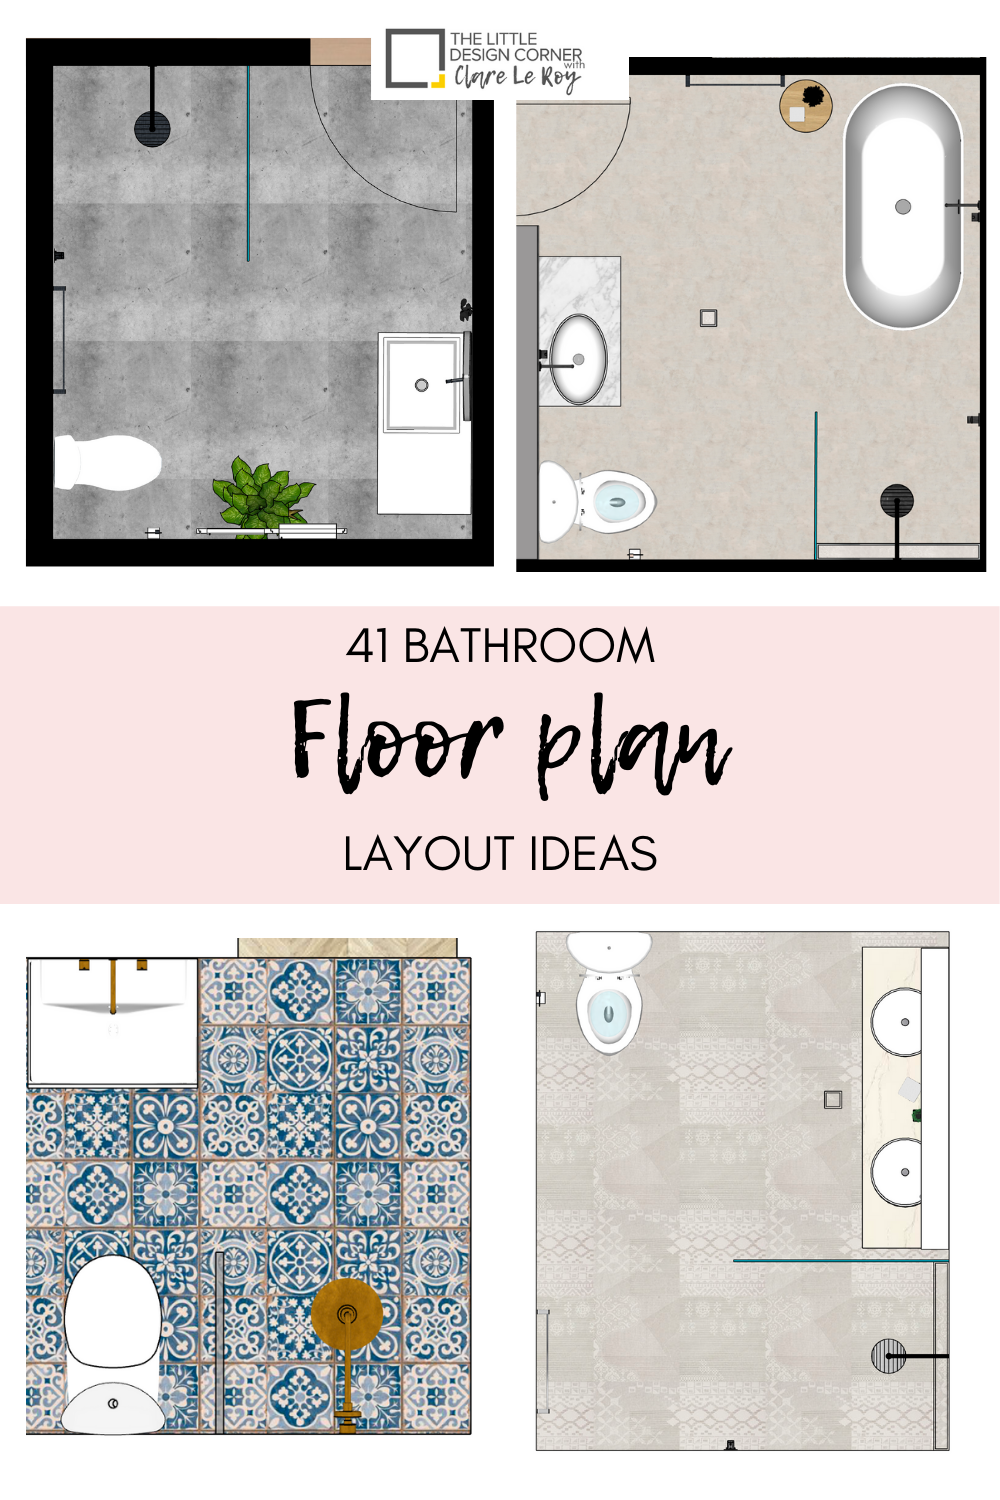
Bathroom layout ideas u2014 The Little Design Corner
Plan Your Bathroom Design Ideas With RoomSketcher – RoomSketcher

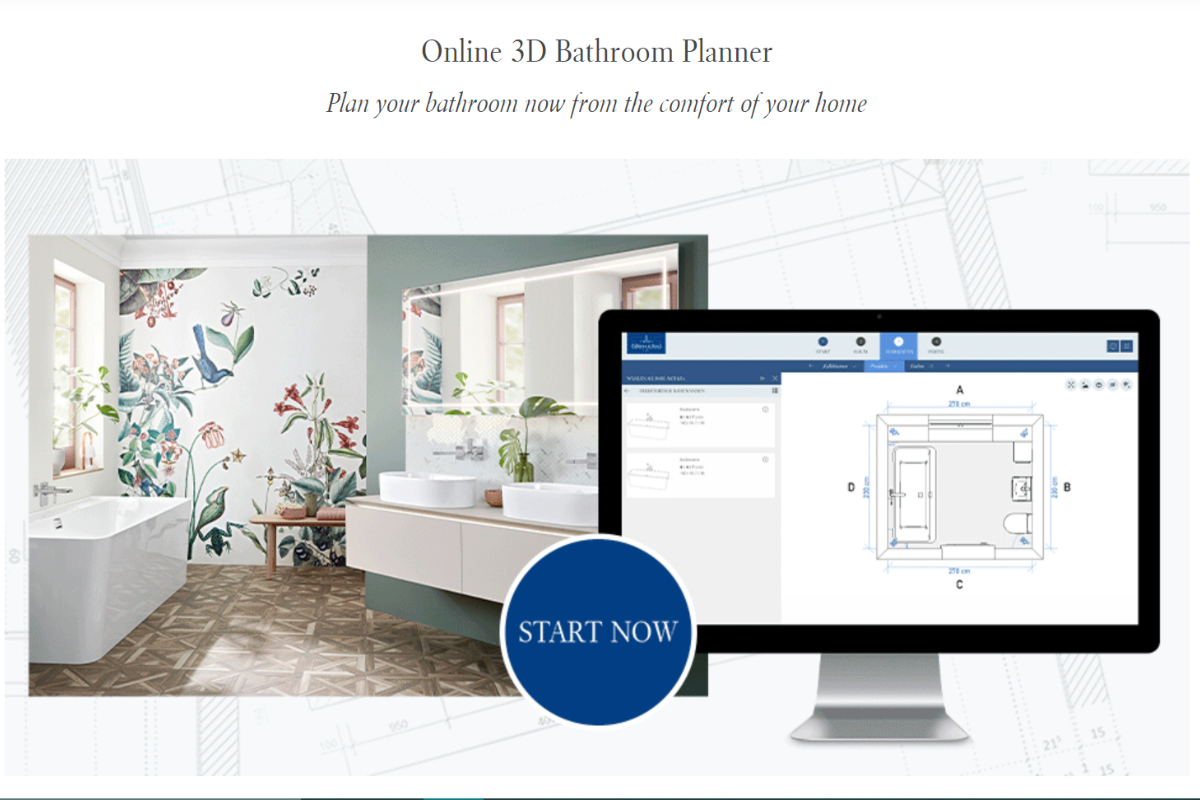
Bathroom Planner – Design Your Own Bathroom Online – RoomSketcher

Get the Ideal Bathroom Layout From These Floor Plans
:max_bytes(150000):strip_icc()/free-bathroom-floor-plans-1821397-07-Final-c7b4032576d14afc89a7fcd66235c0ae.png)
Get the Ideal Bathroom Layout From These Floor Plans
:max_bytes(150000):strip_icc()/free-bathroom-floor-plans-1821397-04-Final-91919b724bb842bfba1c2978b1c8c24b.png)
Bathroom Planner – Design Your Own Bathroom Online – RoomSketcher

3 Bathroom Layouts Designers Love – Bathroom Floor Plan Templates
Bathroom Planner – Create 3D Bathroom Layouts in Minutes – Cedreo

Bathroom Design Software Free Online Tool, Designer u0026 Planner
3D Bathroom Planner Online Free Bathroom Design Software

Try these virtual bathroom design tools and watch your space come
Bathroom Layout Planner HGTV
Related Posts:
- Bathroom Floor Tile Patterns Ideas
- Black And White Bathroom Floor Designs
- Bathroom Epoxy Floor Coating
- Bathroom Floor Covering Options
- His And Hers Bathroom Floor Plans
- Dark Wood Tile Floor Bathroom
- Handicap Bathroom Floor Plans Commercial
- How To Clean Grout In Bathroom Floor
- Bathroom Flooring Wood Look
- Bathroom Floor Tile Layout 12×24
Designing your own bathroom floor plan can be an exciting and rewarding project. Whether you are remodeling an existing bathroom or starting from scratch, a well-thought-out floor plan is essential for creating a functional and aesthetically pleasing space. In this article, we will guide you through the process of designing your own bathroom floor plan, providing detailed information and answering frequently asked questions along the way.
1. Assessing Your Needs and Space:
Before diving into the design process, it is important to assess your needs and the available space in your bathroom. Consider how many people will be using the bathroom, their ages, and any specific requirements they may have. Additionally, take accurate measurements of the room, noting the location of doors, windows, plumbing fixtures, and electrical outlets.
FAQ: How can I determine if my bathroom is large enough for my desired layout?
Answer: To determine if your bathroom is large enough for your desired layout, measure the dimensions of each fixture and furniture item you want to include. Then, use graph paper or a digital floor planning tool to create a scale drawing of your bathroom. Arrange the items within this drawing to see if they fit comfortably without making the space feel cramped.
2. Deciding on a Layout:
Once you have assessed your needs and space, it’s time to decide on a layout that best suits your requirements. There are several common bathroom layouts to consider:
a) Single-Wall Layout:
This layout is ideal for small bathrooms or powder rooms with limited space. It features all fixtures placed along a single wall.
b) Galley Layout:
Similar to a kitchen galley layout, this design places fixtures along two parallel walls with a walkway in between.
c) L-Shaped Layout:
Perfect for larger bathrooms, this layout utilizes two adjacent walls to create an L-shape. It offers ample space for multiple fixtures and provides some separation between different areas of the bathroom.
d) U-Shaped Layout:
This layout surrounds you with fixtures on three walls, creating a sense of enclosure and maximizing storage space.
e) Two-Wall Layout:
Ideal for long, narrow spaces, this layout places fixtures along two opposite walls, leaving an open area in the center.
FAQ: What is the most efficient layout for a small bathroom?
Answer: For a small bathroom, the single-wall layout or galley layout are often the most efficient. These layouts utilize limited space by placing fixtures along a single wall or two parallel walls, allowing for easy movement and maximizing floor area.
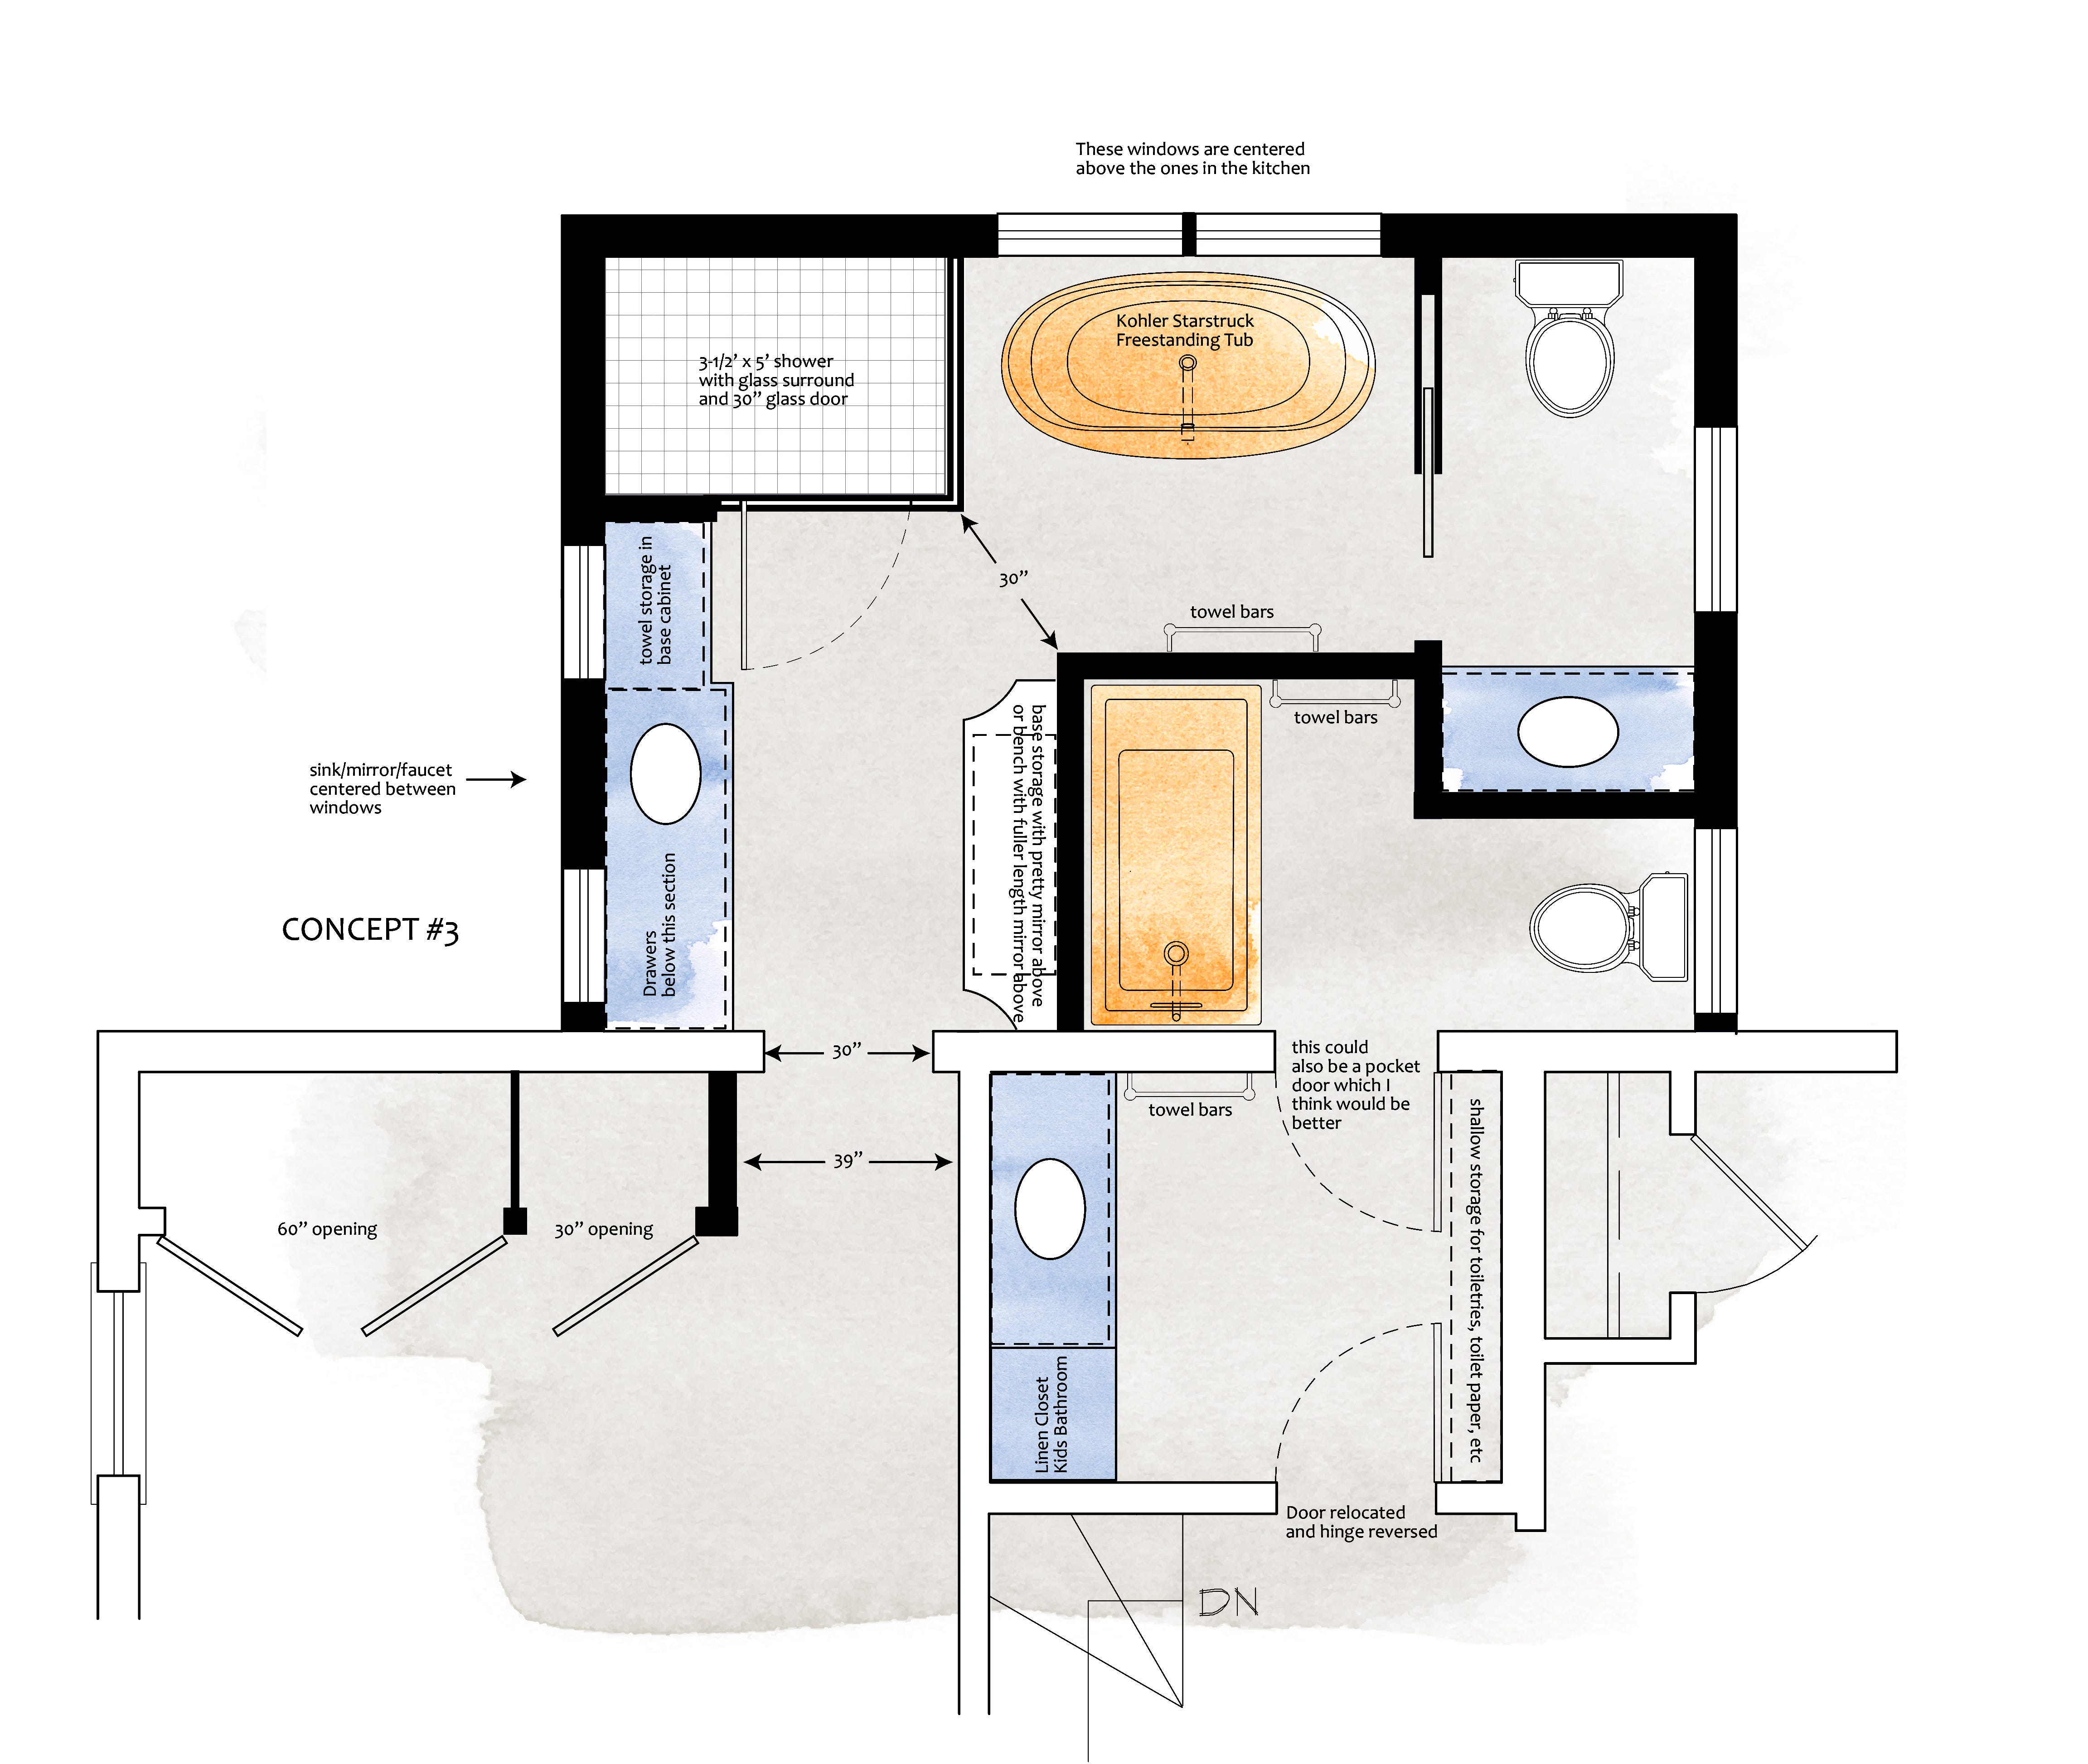
3. Zoning Your Bathroom:
After deciding on a layout, it’s time to zone your bathroom. Zoning involves dividing your bathroom into different areas based on their functions. The three main zones in a bathroom are:
a) Wet Zone:
The wet zone includes the shower or bathtub area. It should be well-sealed to prevent water from splashing onto other areas of the bathroom.
b) Dry Zone:
The dry zone encompasses the sink and vanity area. This is where you can get ready in the morning or evening and store your toiletries.
c) Storage Zone:
The storage zone is dedicated to storing towels, linens, cleaning supplies, and other bathroom essentials. It can include built-in cabinets, shelves, or freestanding furniture.
FAQ: How can I separate the wet and dry zones in my bathroom?
Answer: To separate the wet and dry zones in your bathroom, consider using glass panels or partitions to enclose the shower or bathtub area. This will prevent Water from splashing onto the sink and vanity area. Additionally, make sure to install proper waterproofing measures, such as a shower pan or waterproof membrane, to prevent water leakage. When zoning your bathroom, it’s important to consider the flow and functionality of each zone. For example, you may want to place the wet zone near the entrance for easy access, while the dry zone and storage zone can be located farther away. Additionally, think about the placement of fixtures within each zone to ensure convenience and efficiency.
4. Choosing Fixtures and Materials:
Once you have determined your layout and zones, it’s time to choose the fixtures and materials for your bathroom. Consider the following factors when making your selections:
a) Size: Choose fixtures that are proportionate to the size of your bathroom. Oversized fixtures can overwhelm a small space, while undersized fixtures may not provide enough functionality in a larger bathroom.
b) Style: Select fixtures that match your desired aesthetic. Whether you prefer a modern, minimalist look or a traditional, elegant design, there are plenty of options available to suit your taste.
c) Functionality: Think about how you will use each fixture and choose ones that meet your needs. For example, if you have limited mobility, consider installing a walk-in shower or grab bars for added safety.
d) Durability: Invest in high-quality materials that can withstand moisture and daily use. Choose tiles, countertops, and fixtures that are easy to clean and maintain.
e) Energy Efficiency: Opt for energy-efficient fixtures and appliances to reduce water and energy consumption. Look for products with WaterSense labels or ENERGY STAR certification.
FAQ: What are some popular materials for bathroom fixtures?
Answer: Popular materials for bathroom fixtures include porcelain, ceramic, stone (such as marble or granite), stainless steel, and acrylic. Each material has its own advantages in terms of durability, aesthetics, and maintenance requirements. Consider your budget and personal preferences when choosing the right material for your fixtures.
5. Lighting and Ventilation:
Proper lighting and ventilation are essential in a bathroom to create a functional and comfortable space. Consider the following tips when planning your bathroom’s lighting and ventilation:
a) Natural Light: If possible, incorporate natural light into your bathroom design. This can be done through the addition of windows, skylights, or light tubes. Natural light not only enhances the overall ambiance but also helps to reduce humidity and prevent mold growth.
b) Task Lighting: Install task lighting around the vanity area to provide ample illumination for daily grooming tasks. Consider placing lights on either side of the mirror to minimize shadows on your face.
c) Ambient Lighting: Use ambient lighting to create a warm and inviting atmosphere in your bathroom. This can be achieved through the use of recessed ceiling lights, wall sconces, or pendant lights.
d) Ventilation: Install a ventilation fan or window to remove excess moisture from the bathroom. Proper ventilation helps to prevent mold and mildew growth and improves air quality.
e) Dimmers: Install dimmer switches for your bathroom lights to control the amount of light based on your needs. Dimmers allow you to create a relaxing ambiance for a bath or a brighter setting for everyday tasks.
FAQ: How do I choose the right size fan for my bathroom?
Answer: The size of the fan you need depends on the square footage of your bathroom. As a general rule, you should aim for one cubic foot per minute (CFM) of ventilation per square foot of bathroom space. For example, if your bathroom is 100 square feet, you would need a fan with at least 100 CFM. However, if you have high ceilings or a particularly humid environment, you may need a more powerful fan.
In conclusion, designing a functional and aesthetically pleasing bathroom requires careful planning and consideration of various factors such as layout, zoning, fixtures, materials, lighting, and ventilation. By taking these steps into account and making informed decisions, you can create a bathroom that meets your needs and reflects your personal style.