This's a wonderful option which has been utilized since time immemorial by homeowners across the world. Bathroom vinyl tiles are available in different shades & textures. You are able to also try things out with colored grout. These tiles can be arranged to create patterns and themes. You are able to find prints of well-liked paintings or maybe scenarist or plain geometric patterns.
Images about DIY Epoxy Bathroom Floor

You don't need to promote yourself short with regards to selecting a floor for the bathroom of yours. If you're in question about the flooring type you would like for the bath room of yours, take a minute to glance with the present fashion. To have an attractive and clean bathroom is vitally important in any house.
DIY Designer Epoxy Resin Floor : 7 Steps (with Pictures

They come in shapes that are several, sizes as well as styles. Safety also is another aspect to check out. Yet another kind of vinyl come with felt backing. Tiles in single strong colors impose some limitations on creativity. Vinyl flooring is not the primary option for a bathroom simply as they're considered unfashionable.
DIY Epoxy Stone Flooring » Everlast® Editorial

3 DIY Bathroom Remodel Projects You Can Complete In A Weekend

Epoxy Flooring Bathroom Bathroom flooring, Epoxy floor, Marble

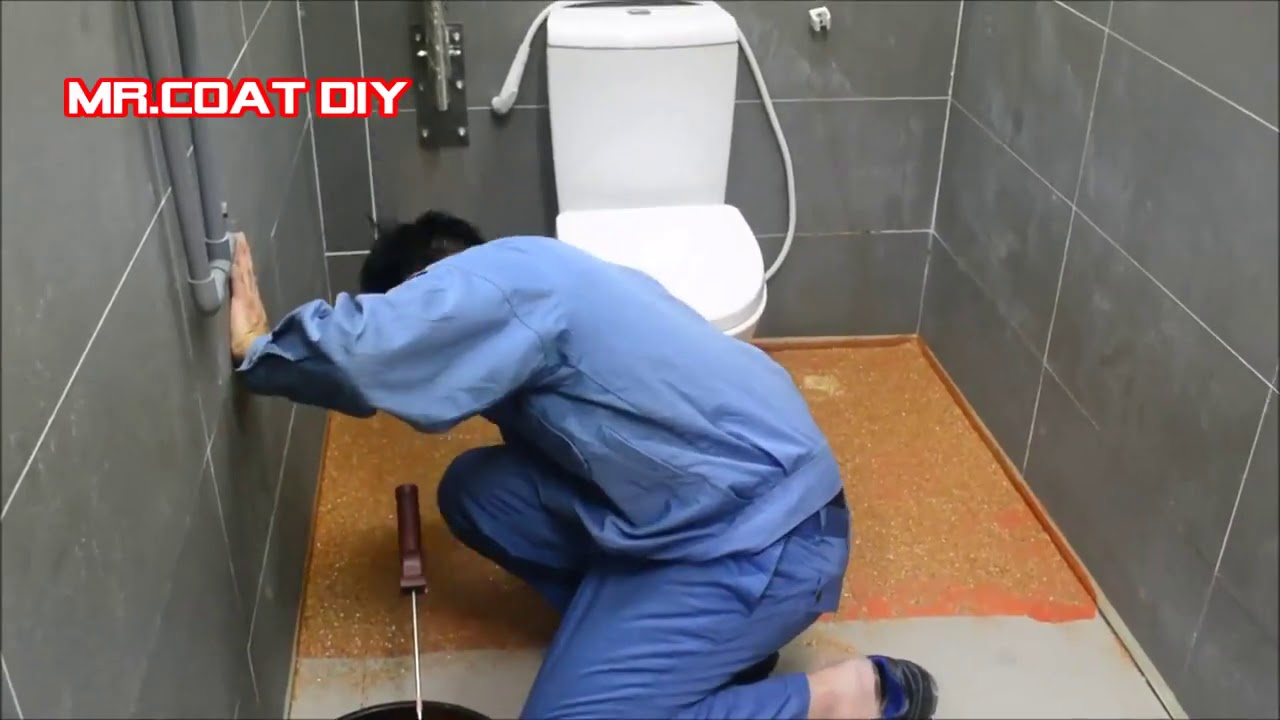
Waterproof No Leak DIY Toilet Floor Coating
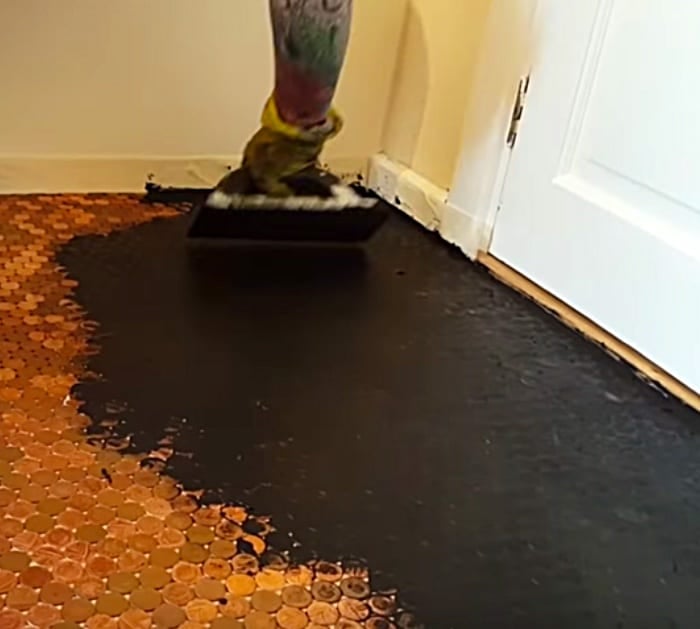
DIY Epoxy Penny Floor
Metallics and epoxy concrete floors Concrete stained floors

Diy Epoxy Floor Metallic Epoxy Bathroom Floor Metallic Coau2026 Flickr

DIY Designer Epoxy Resin Floor : 7 Steps (with Pictures

Low-Maintenance Flooring Ideas Low-Cost Flooring HouseLogic
Epoxy Paint for Tile u2013 Guide for coating Epoxy over Tile
DIY Designer Epoxy Resin Floor : 7 Steps (with Pictures

BEACH THEMED BATHROOM FLOOR COATING – YouTube
Related Posts:
- Bathroom Floor Tile Patterns Ideas
- Black And White Bathroom Floor Designs
- Bathroom Epoxy Floor Coating
- Bathroom Floor Covering Options
- His And Hers Bathroom Floor Plans
- Dark Wood Tile Floor Bathroom
- Handicap Bathroom Floor Plans Commercial
- How To Clean Grout In Bathroom Floor
- Bathroom Flooring Wood Look
- Bathroom Floor Tile Layout 12×24
DIY Epoxy Bathroom Floor: Transform Your Space with a Stunning and Durable Finish
Introduction:
When it comes to renovating your bathroom, one of the most important aspects to consider is the flooring. Not only does it need to be visually appealing, but it also needs to withstand the daily wear and tear that comes with this high-traffic area. If you’re looking for a cost-effective and long-lasting solution, a DIY epoxy bathroom floor might be just what you need. This versatile material provides a seamless and durable finish that can completely transform the look and feel of your space. In this article, we will guide you through the process of installing an epoxy floor in your bathroom, providing you with all the necessary information to ensure a successful project.
I. Understanding Epoxy Flooring:
Epoxy flooring is a type of resinous coating that is made up of two main components – epoxy resin and a hardener. When these two components are mixed together, they undergo a chemical reaction that creates a strong, durable, and moisture-resistant material. Epoxy floors are commonly used in commercial settings due to their ability to withstand heavy foot traffic, impacts, and spills. However, they have gained popularity in residential applications as well, particularly in bathrooms where moisture resistance is crucial.
II. Advantages of Epoxy Bathroom Floors:
1. Durability: One of the primary advantages of using epoxy for your bathroom floor is its exceptional durability. Unlike traditional tile or vinyl flooring, which can crack or peel over time, epoxy forms a seamless and resilient surface that can endure years of use without showing signs of wear.
2. Moisture Resistance: Bathrooms are notorious for their high humidity levels, making them prone to mold growth and water damage. Epoxy flooring provides an impermeable barrier against moisture, preventing any seepage into the underlying layers.
3. Easy Maintenance: Cleaning becomes a breeze with an epoxy bathroom floor. Its smooth and non-porous surface makes it resistant to stains, allowing you to simply wipe away spills and dirt with ease. Additionally, its seamless finish eliminates the need for grout lines, which are known to accumulate dirt and grime over time.
4. Versatility: Epoxy floors offer a wide range of design possibilities, allowing you to customize your bathroom according to your personal style. From solid colors to intricate patterns, you can achieve virtually any look you desire by incorporating different pigments, flakes, or metallic additives.
III. Preparing Your Bathroom for Epoxy Installation:
Before diving into the installation process, it is crucial to properly prepare your bathroom to ensure a successful application and long-lasting results. Follow these steps:
1. Clear the Space: Remove all furniture, fixtures, and accessories from the bathroom. This will provide you with a clean canvas to work on and prevent any potential damage or interference during the installation process.
2. Clean Thoroughly: Ensure that your bathroom floor is squeaky clean before applying epoxy. Remove any dirt, dust, or grease by sweeping or vacuuming the surface. Follow up with a mop using a mild detergent to eliminate any remaining residue.
3. Repair Damaged Areas: Inspect your floor for any cracks or chips. Fill these imperfections with an epoxy-based patching compound and allow it to dry completely before proceeding.
4. Etch the Surface: To enhance adhesion between the epoxy coating and the existing floor, it is recommended to etch the surface using an acid solution or Mechanical abrasion. This process helps remove any existing coatings, oils, or contaminants that may hinder the bonding of the epoxy.
5. Prime the Floor: Applying a primer is essential to promote adhesion and improve the longevity of the epoxy coating. Choose a primer specifically designed for use with epoxy floors and follow the manufacturer’s instructions for application.
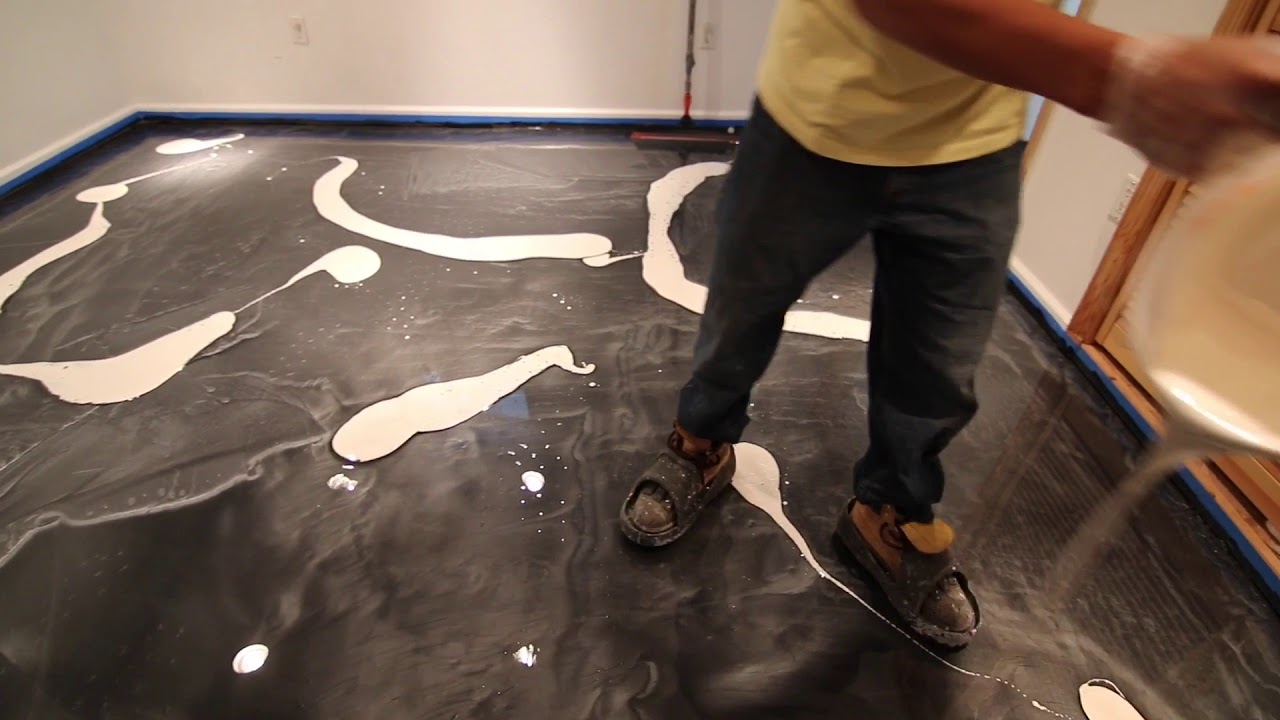
6. Mix and Apply the Epoxy: Follow the instructions provided by the epoxy manufacturer to properly mix the components. Use a roller or brush to apply the epoxy evenly onto the prepared floor surface. Work in small sections to ensure thorough coverage.
7. Allow for Proper Curing: After applying the epoxy, allow it to cure according to the manufacturer’s recommended time frame. This typically involves keeping foot traffic and moisture exposure to a minimum during the curing process.
8. Apply a Topcoat (Optional): For added protection and aesthetic appeal, you may choose to apply a clear topcoat over the cured epoxy floor. This will provide an extra layer of durability and enhance its resistance to stains and chemicals.
IV. Maintenance Tips for Epoxy Bathroom Floors:
To keep your epoxy bathroom floor looking its best and prolong its lifespan, follow these maintenance tips:
1. Regular Cleaning: Sweep or vacuum your floor regularly to remove any dirt or debris that could scratch or wear down the epoxy surface. Use a mild detergent and water solution to mop up spills or stains.
2. Avoid Harsh Chemicals: While epoxy floors are resistant to chemicals, it is best to avoid using harsh cleaning agents or solvents that could potentially damage or discolor the surface. Stick to mild cleaners approved for use on epoxy floors.
3. Use Protective Mats: Place mats near sinks, showers, and entryways to catch any excess moisture or dirt before it reaches the epoxy floor. This will help prevent any potential damage or staining.
4. Prevent Scratches: Place felt pads under furniture legs to prevent scratches or dents on the epoxy surface. Avoid dragging heavy objects across the floor to minimize the risk of damage.
5. Regular Maintenance Inspections: Periodically inspect your epoxy floor for any signs of wear, chips, or cracks. Address these issues promptly by applying touch-ups or contacting a professional for repairs.
By following these guidelines, you can enjoy the benefits of a beautiful and long-lasting epoxy bathroom floor for years to come.