It has been implemented for a long time on manufacturing floors because of its toughness, durability, and resistance to engine oil, grease, and many other chemicals that ruin frequent paint. Epoxy can be used to level out trouble areas and make certain and even area. You are able to put up epoxy flooring of places such as a finished basement, the garage of yours or maybe the outdoor deck of yours.
Images about Dy Mark 8l Epoxy Clear Garage Floor Coating Kit

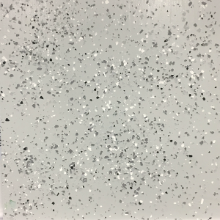
One disadvantage to utilizing an epoxy floor coating is that it is able to produce a yellowish hue during the curing process. It can additionally be modified to conform to the climate in the area of yours. Even though such flooring is frequently present in industries as well as public buildings it is starting to be more popular in residential houses.
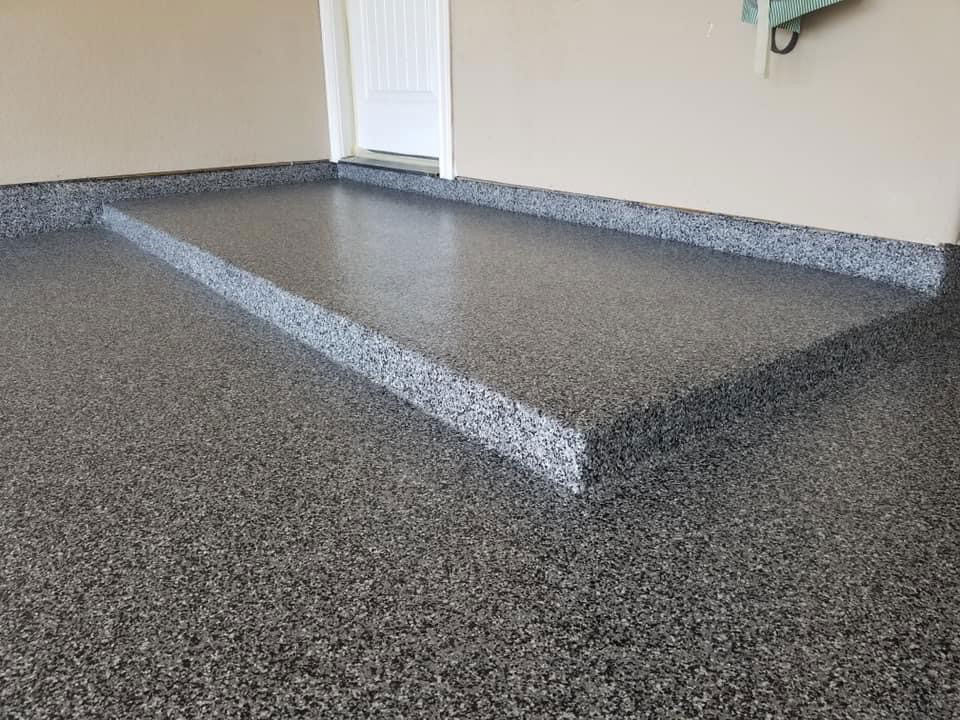
Garage Floor Coating Epoxy-Coat Clear 8L.

Epoxy flooring is additionally really painless to clean since there's nothing for pollutants to hang onto. These could be granted the preferred styles after blending several color agent to them. And in addition the epoxy flooring paint is really easy to use and maintain. It's not so costly and often will outlast other floor coatings. In fact, it is smarter than most other options.
Dy-Mark 8L Slate Epoxy Coat Garage Floor Kit – Bunnings Australia

Aside from the longevity of epoxy flooring, it is able to withstand damage which is brought on by various chemic solutions. No matter whether you want the garage of yours to look more inviting or perhaps the studio of yours to look more inviting, you are likely to find the color you want to make some floor stand out or even delicately combination in with the majority of the decor.
Dy-Mark 8L Slate Epoxy Coat Garage Floor Kit – Bunnings Australia

Dy-Mark How: Epoxy Coat Installation – YouTube

Bye Bye Bunnings “epoxy”! – Creative Concrete Coatings Facebook

DIY Dy-Mark Garage Floor Epoxy Coat – Step By Step How To

Dy-Mark Epoxy Coat Instructions for cleaning, etching and mixing the 2 parts for painting garage

Dy-Mark 4L Water-Based Charcoal Epoxy Coat Garage Floor Kit eBay

Made in China Chips Flakes Pigment Epoxy Floor Coating Epoxy Resin
![]()
Dy-Marku0027s Epoxy Coat floor coating kits transform garage floors
10 Reasons to Add a Clear Top Coat to an Epoxy Garage Floor All
![]()
Dymark – Epoxy-Coat Carrara Grey 8L
Home – 33 DreamCrete
Related Posts:
- Epoxy Garage Floor Crack Filler
- Gray Epoxy Floor
- Behr Epoxy Floor Paint
- High Build Epoxy Floor Coating
- Cost To Have Someone Epoxy Garage Floor
- Epoxy Shield Floor Paint
- Rustoleum Epoxy Basement Floor Paint
- What Is Epoxy Flooring Systems
- Austin Epoxy Floors
- Alternative To Epoxy Flooring
Dy Mark 8L Epoxy Clear Garage Floor Coating Kit: A Comprehensive Review
Introduction:
A garage floor is subjected to heavy usage on a daily basis. It endures the weight of vehicles, foot traffic, and various spills and stains. To protect and enhance the durability of your garage floor, investing in a high-quality floor coating is essential. One such product that stands out in the market is the Dy Mark 8L Epoxy Clear Garage Floor Coating Kit. In this comprehensive review, we will delve into the features, benefits, and frequently asked questions about this product.
Sub-heading 1: Superior Protection for Your Garage Floor
The Dy Mark 8L Epoxy Clear Garage Floor Coating Kit offers superior protection for your garage floor. Its epoxy formula creates a strong and durable barrier that resists wear and tear from heavy vehicle traffic. This coating acts as a shield against oil, grease, chemicals, and other common garage spills, ensuring that your floor remains stain-free and easy to clean.
FAQ 1: How long does it take for the epoxy coating to dry?
Answer: The drying time for the Dy Mark 8L Epoxy Clear Garage Floor Coating Kit depends on various factors such as temperature and humidity. Generally, it takes around 24-48 hours for the coating to dry completely.
FAQ 2: Can I apply this coating on a previously painted garage floor?
Answer: Yes, you can apply the Dy Mark 8L Epoxy Clear Garage Floor Coating Kit on a previously painted garage floor. However, proper surface preparation is crucial for optimal adhesion. Thoroughly clean the surface and remove any loose or flaking paint before applying the epoxy coating.
Sub-heading 2: Easy Application Process
One of the standout features of the Dy Mark 8L Epoxy Clear Garage Floor Coating Kit is its user-friendly application process. The kit includes all the necessary components, including the epoxy coating, activator, and application tools. Simply follow the step-by-step instructions provided in the kit to achieve professional-looking results.
FAQ 3: Do I need any special equipment to apply this coating?
Answer: No, you do not require any special equipment to apply the Dy Mark 8L Epoxy Clear Garage Floor Coating Kit. The kit includes a roller and brush for easy application. However, it is recommended to wear protective gloves and goggles during the application process.
FAQ 4: Can I use this coating on other surfaces besides a garage floor?
Answer: While the Dy Mark 8L Epoxy Clear Garage Floor Coating Kit is specifically designed for garage floors, it can be used on other concrete surfaces as well. It provides excellent protection and enhances the appearance of basement floors, workshops, and even outdoor patios.
Sub-heading 3: Enhanced Aesthetics for Your Garage
In addition to its protective qualities, the Dy Mark 8L Epoxy Clear Garage Floor Coating Kit also offers enhanced aesthetics for your garage. The clear finish allows the natural color and texture of your concrete floor to shine through, giving it a polished and professional look. This coating also helps to reduce dusting from concrete and provides a glossy finish that enhances the overall beauty of your garage.
FAQ 5: Will the epoxy coating make my garage floor slippery?
Answer: The Dy Mark 8L Epoxy Clear Garage Floor Coating Kit does not make the floor excessively slippery. The coating provides a glossy finish, but it is not overly slippery. However, it is always recommended to use caution when walking on any coated surface, especially when wet.
What are the steps for applying Dy Mark 8L Epoxy Clear Garage Floor Coating Kit?
The steps for applying Dy Mark 8L Epoxy Clear Garage Floor Coating Kit are as follows:1. Preparation: Clean the garage floor thoroughly, removing any dirt, oil, grease, or other contaminants. Use a concrete cleaner and scrub brush to ensure a clean surface. Rinse the floor with water and allow it to dry completely before proceeding.
2. Etching: If your garage floor is smooth or sealed, you will need to etch it to create a rough surface for better adhesion of the epoxy coating. Mix the etching solution according to the manufacturer’s instructions and apply it to the floor using a mop or sprayer. Allow the solution to sit on the floor for the recommended time (usually around 10-15 minutes), then scrub the floor with a stiff bristle brush. Rinse thoroughly with water and allow it to dry completely.
3. Patching: Inspect the floor for any cracks or holes and repair them with an appropriate concrete patching compound. Follow the instructions provided by the manufacturer of the patching compound for best results. Allow the patched areas to dry completely before moving on.
4. Mixing: Prepare the epoxy clear coat by mixing Part A (resin) and Part B (hardener) according to the ratios specified in the instructions provided with the kit. Thoroughly mix the two components together using a drill with a mixing paddle attachment for several minutes until they are well combined.
5. Application: Pour a small amount of mixed epoxy onto the prepared garage floor and spread it evenly using a roller or squeegee applicator. Work in small sections at a time, ensuring that there are no puddles or uneven areas. Continue applying until the entire floor is coated.
6. Second coat (optional): After allowing sufficient drying time as indicated in the instructions (usually around 12-24 hours), you may choose to apply a second coat for added durability and a smoother finish. Repeat the application process, ensuring that the first coat is fully dry before applying the second coat.
7. Curing: Allow the epoxy clear coat to cure for the recommended time specified in the instructions (usually around 24-48 hours) before subjecting it to heavy use or placing any objects on the floor.
Note: It is crucial to carefully read and follow the instructions provided by Dy Mark for their specific product, as application methods and drying times may vary.