All you require is a soft brush as well as a cloth, and you can later wash the tiles with warm water. While frequently one of probably the smallest rooms of the home, a bathroom can still have tremendous visual influence. The most widespread kind of bath room flooring is ceramic tiles. Simply apply glue at the corners and stick it.
Images about Hot To Tile A Bathroom Floor

Nevertheless, vinyl can be worn in innovative ways to provide the bath room of yours great looks and style. Regardless of whether you are considering luxury bath room designs or a simpler one, you need to take note that the floors material is dependent on the level of water spillage which occurs, the timeframe you are able to devote for cleaning, along with the durability of the material.
How to Lay a Tile Floor HGTV

Using mosaic floor tiles or stone tiles is in addition one of the more revolutionary bathroom floor tiles ideas. In case you pick ceramic tiles for your bathroom, consider using a tile that features a slip resistant surface for bathroom safety, that is among the very best bathroom tile ideas. There are specific reasons for that element.
How To Tile a Bathroom Floor The Home Depot

How to Install Ceramic Tile Flooring in 9 Steps – This Old House
:no_upscale()/cdn.vox-cdn.com/uploads/chorus_asset/file/19496978/howto_tile_01.jpg)
How to Lay Tile: Install a Ceramic Tile Floor In the Bathroom (DIY)

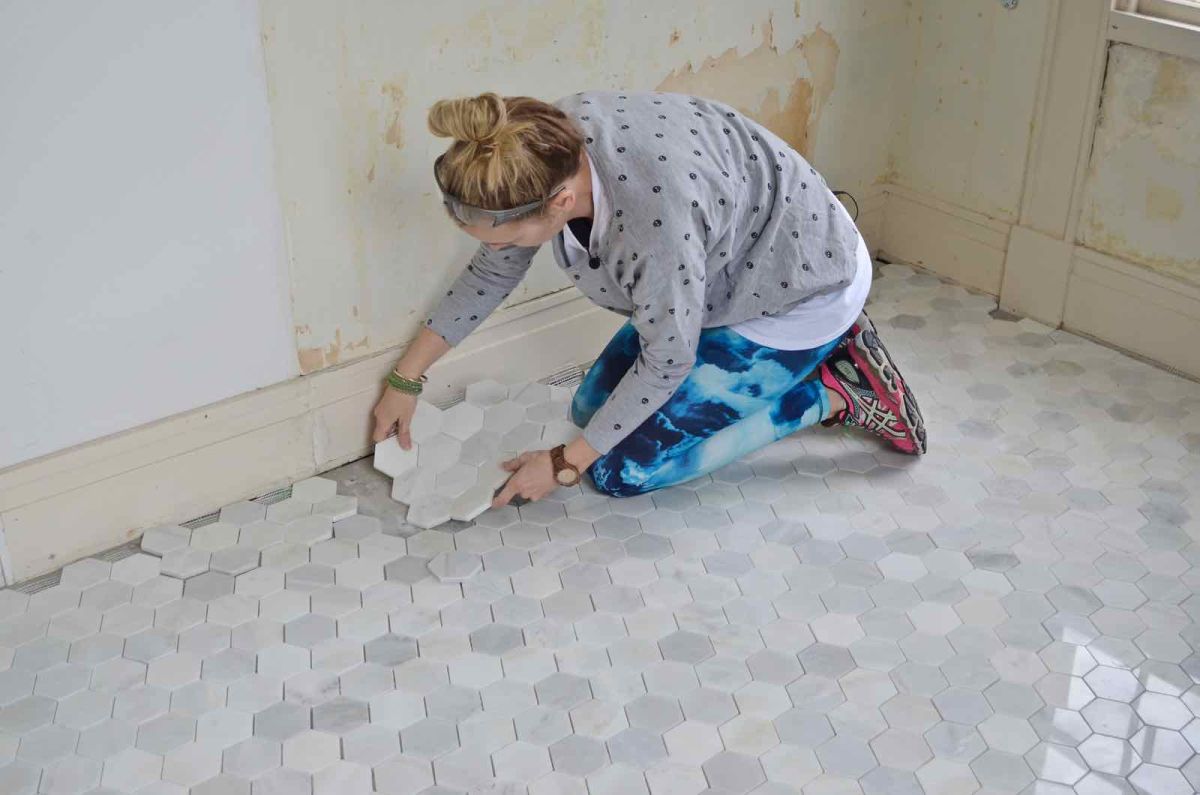
Laying Floor Tiles in a Small Bathroom – Houseful of Handmade
How To Update Your Bathroom Floor Tiles – 6 DIY ideas

How To Tile A Bathroom Floor – A Simple Guide With Useful Tips
How to Tile Floors u0026 Walls – Sincerely, Sara D. Home Decor u0026 DIY
How to Install Ceramic Tile Flooring in 9 Steps – This Old House
:no_upscale()/cdn.vox-cdn.com/uploads/chorus_asset/file/19496947/color_gutters_illo_web_1.jpg)
How To Tile A Bathroom Floor – A Simple Guide With Useful Tips
How to Lay a Tile Floor HGTV
How to Lay Tile: DIY Floor Tile Installation Loweu0027s

Why Bathroom Floors Need to Move
Related Posts:
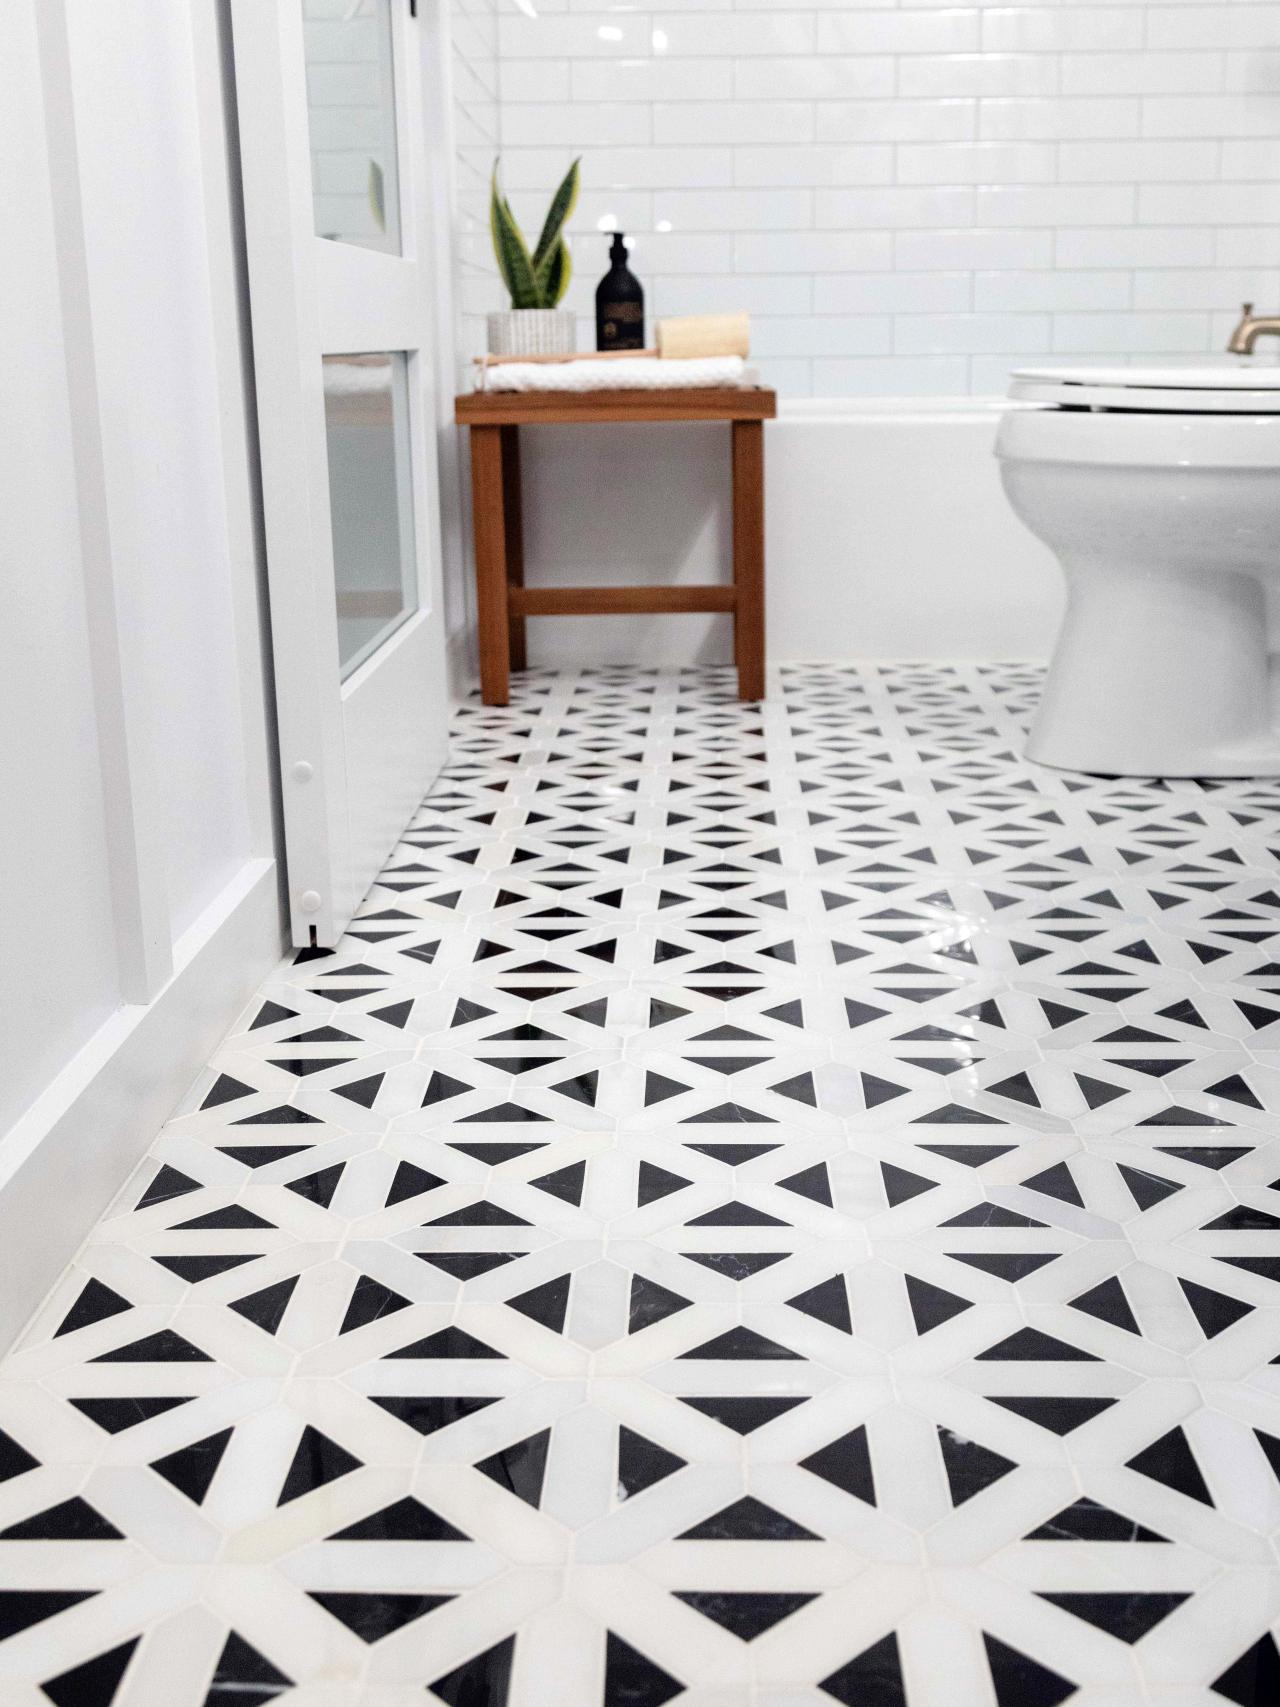
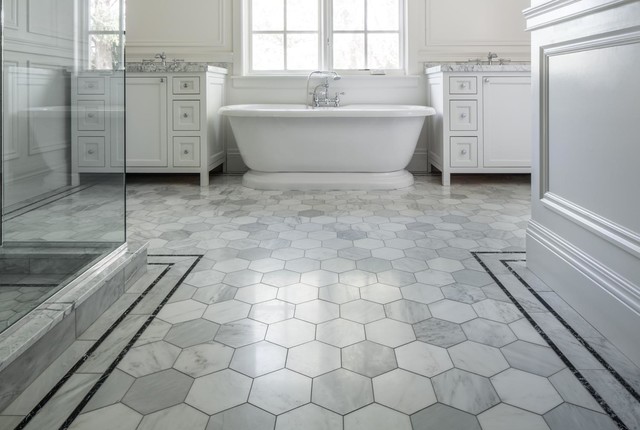
- Bathroom Floor Tile Patterns Ideas
- Black And White Bathroom Floor Designs
- Bathroom Epoxy Floor Coating
- Bathroom Floor Covering Options
- His And Hers Bathroom Floor Plans
- Dark Wood Tile Floor Bathroom
- Handicap Bathroom Floor Plans Commercial
- How To Clean Grout In Bathroom Floor
- Bathroom Flooring Wood Look
- Bathroom Floor Tile Layout 12×24
How to Tile a Bathroom Floor
Introduction:
Tiling a bathroom floor can be a daunting task for many homeowners, but with the right tools and techniques, it can be a rewarding DIY project. By following these step-by-step instructions, you can transform your bathroom into a beautiful and functional space. Whether you’re a beginner or have some experience in home improvement projects, this detailed guide will help you achieve professional-looking results.
Tools and Materials:
Before diving into the tiling process, it’s crucial to gather all the necessary tools and materials. Here’s a list of what you’ll need:
1. Tiles: Choose tiles that are suitable for bathroom floors, such as ceramic or porcelain. Consider factors like size, color, and pattern to ensure they complement your overall bathroom design.
2. Tile adhesive: Opt for a high-quality tile adhesive specifically designed for floor installations. It should provide strong bonding and flexibility to withstand moisture and temperature changes.
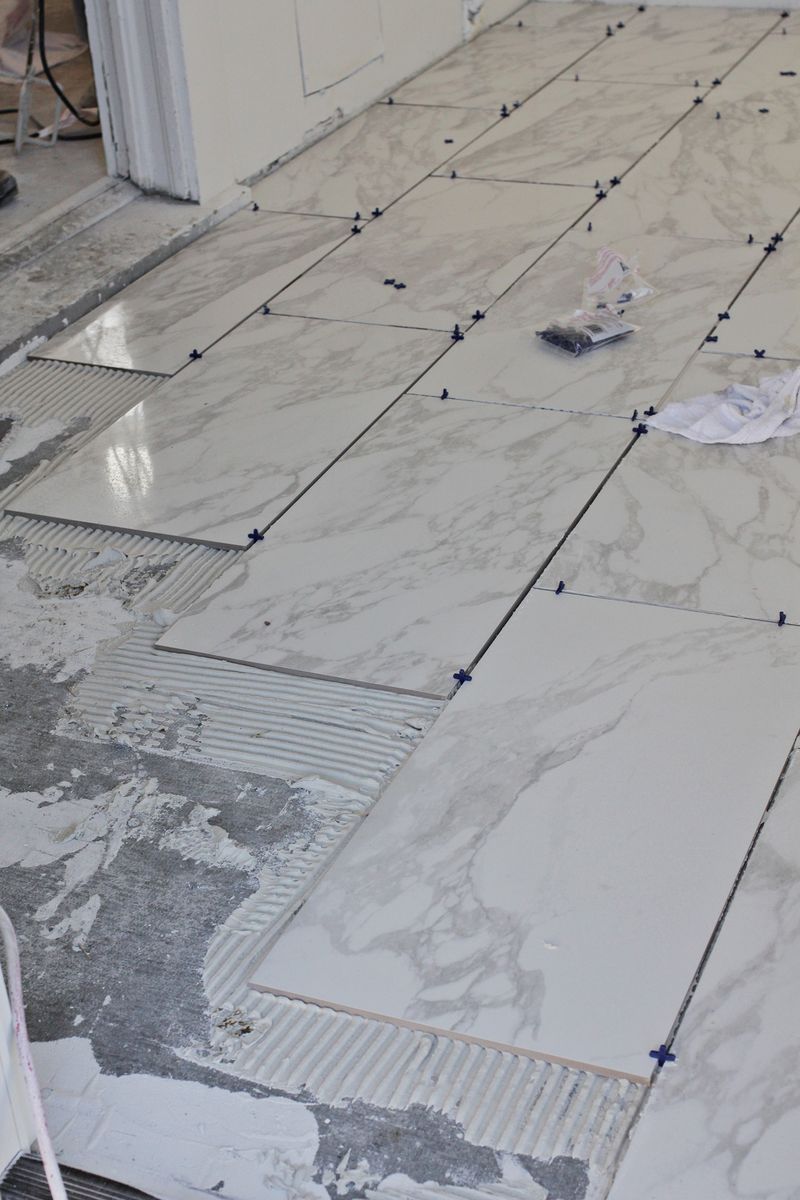
3. Trowel: A notched trowel is essential for spreading adhesive evenly on the floor. The size of the notches should correspond to the size of the tiles you’re using.
4. Tile spacers: These small plastic crosses help maintain consistent spacing between tiles, ensuring a professional finish.
5. Tile cutter: A manual tile cutter or wet saw will be needed to make precise cuts when fitting tiles around obstacles like pipes or corners.
6. Grout: Choose a grout color that complements your tiles and enhances their overall appearance. Additionally, select a grout sealer to protect against stains and moisture penetration.
7. Grout float: This tool is used to apply grout evenly between tiles and smooth the surface.
8. Sponge: A large sponge is necessary for wiping off excess grout from the tile surface during the installation process.
9. Level: To ensure your floor is perfectly flat and level, use both a long level and a smaller torpedo level.
10. Safety gear: Don’t forget to wear protective goggles, gloves, and a dust mask to safeguard yourself during the tiling process.
Preparation:
1. Remove existing flooring: Start by removing any existing flooring, including old tiles, vinyl, or carpet. Use a hammer and chisel to carefully pry them up, ensuring not to damage the subfloor.
2. Clean and level the subfloor: Thoroughly clean the subfloor to remove any dirt or debris that may affect the tile adhesion. Check for any uneven areas and use a leveling compound to fill in gaps or low spots. Allow it to dry completely before proceeding.
3. Measure and plan: Measure your bathroom floor accurately, taking into account any irregularities or obstacles. Use these measurements to plan your tile layout, ensuring you have enough tiles to cover the entire area.
4. Dry-fit tiles: Before applying adhesive, dry-fit some tiles on the floor to visualize how they will look and make any necessary adjustments. This step is especially important if you’re using patterned tiles or creating intricate designs.
Installation:
1. Begin at the center: Start tiling from the center of the room rather than near a wall. This ensures a symmetrical layout and minimizes small cut tiles along walls or corners.
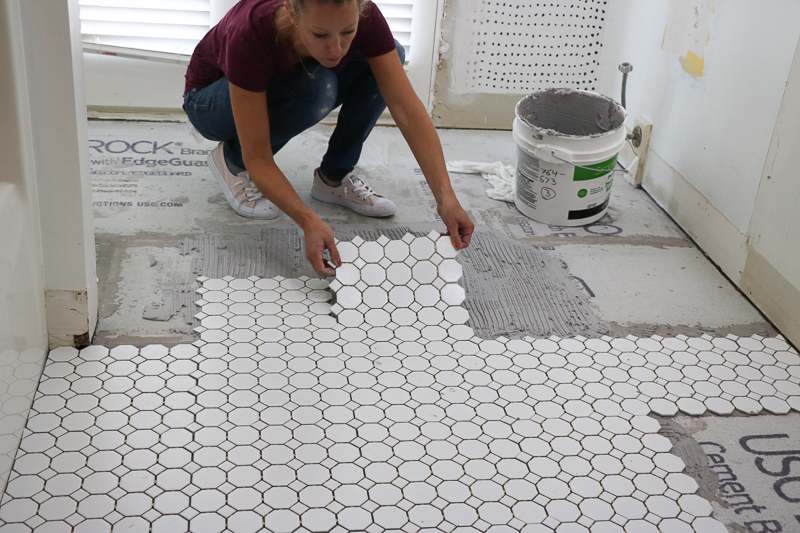
2. Apply adhesive: Using a notched trowel, spread an even layer of tile adhesive over a small section of the floor. Hold the trowel at a 45-degree angle to create ridges in the adhesive for better grip.
3. Lay tiles : Place the first tile in the adhesive, pressing it firmly into place. Use tile spacers to maintain consistent spacing between tiles. Continue laying tiles in a straight line, working your way outwards from the center.
4. Cut tiles: When you reach obstacles like pipes or corners, use a tile cutter or wet saw to make precise cuts. Measure and mark the tile before cutting, ensuring an accurate fit.
5. Apply grout: Once all the tiles are laid and the adhesive has dried, remove the tile spacers. Mix the grout according to the manufacturer’s instructions and use a grout float to apply it to the gaps between tiles. Hold the float at a 45-degree angle and spread the grout diagonally across the tiles.
6. Clean excess grout: After applying the grout, wait for it to set slightly before cleaning off any excess. Dampen a sponge with water and gently wipe over the tiles at a 45-degree angle to remove excess grout without disturbing the newly laid tiles.
7. Seal grout: Once the grout has fully dried, apply a grout sealer to protect it from stains and moisture penetration. Follow the manufacturer’s instructions for application.
8. Allow drying time: Give the tiled floor ample time to dry before walking on it or applying any weight. Follow the manufacturer’s instructions for recommended drying time.
9. Finishing touches: Replace any baseboards or trim that were removed during the tiling process. Clean up any remaining debris or dust from the installation area.
By following these steps and using the necessary tools and materials, you can successfully install tiles on your bathroom floor and achieve a professional-looking result.