It's far more stylish than that of carpets and hardwood, too, since it can utilize oak, cherry, slate, marble, and so on, for the so called "wear layer" of this powder room floor. If you're searching for deeper colors and shiny textures, choose inlaid vinyl which have color granules embedded within them.
Images about How To Fix Bathroom Floor

Mosaic tiles add texture and color to the floor and stop slipping. Just before you'll head to your area home improvement center, know the choice of ours to decide on the right one for the home of yours and your lifestyle. When you are using bathroom vinyl, do not forget to experiment by mixing as well as matching. Among the most useful bath room floor tiles ideas entails using concrete tiles.
How to Remove a Bathroom Floor (Step-by-Step) – by Home Repair
These tiles are available in colors which are a variety of and are Green as well. Last but not least, if you're after quality as well as style for the luxury bath room designs of yours, stone flooring. Sky blue, cherry red, yellow or green grout provides color along with an element of enjoyable to the bathroom.
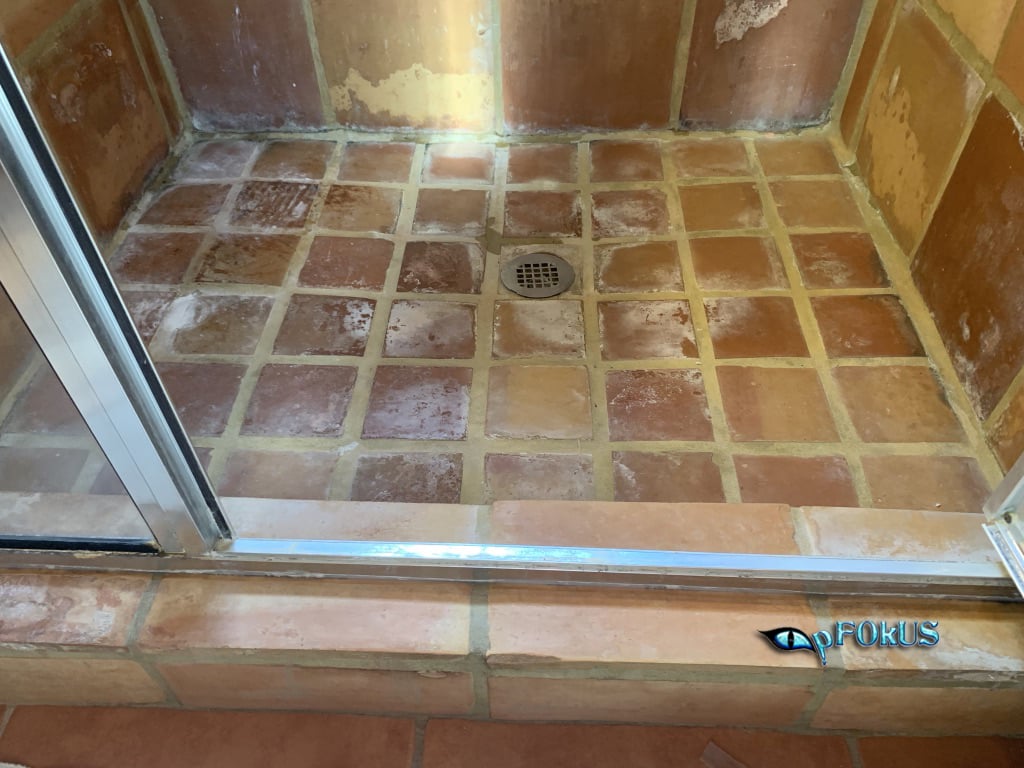
How to Fix A Water Damaged Bathroom Floor – pFOkUS
How to replace old bathroom floor tiles
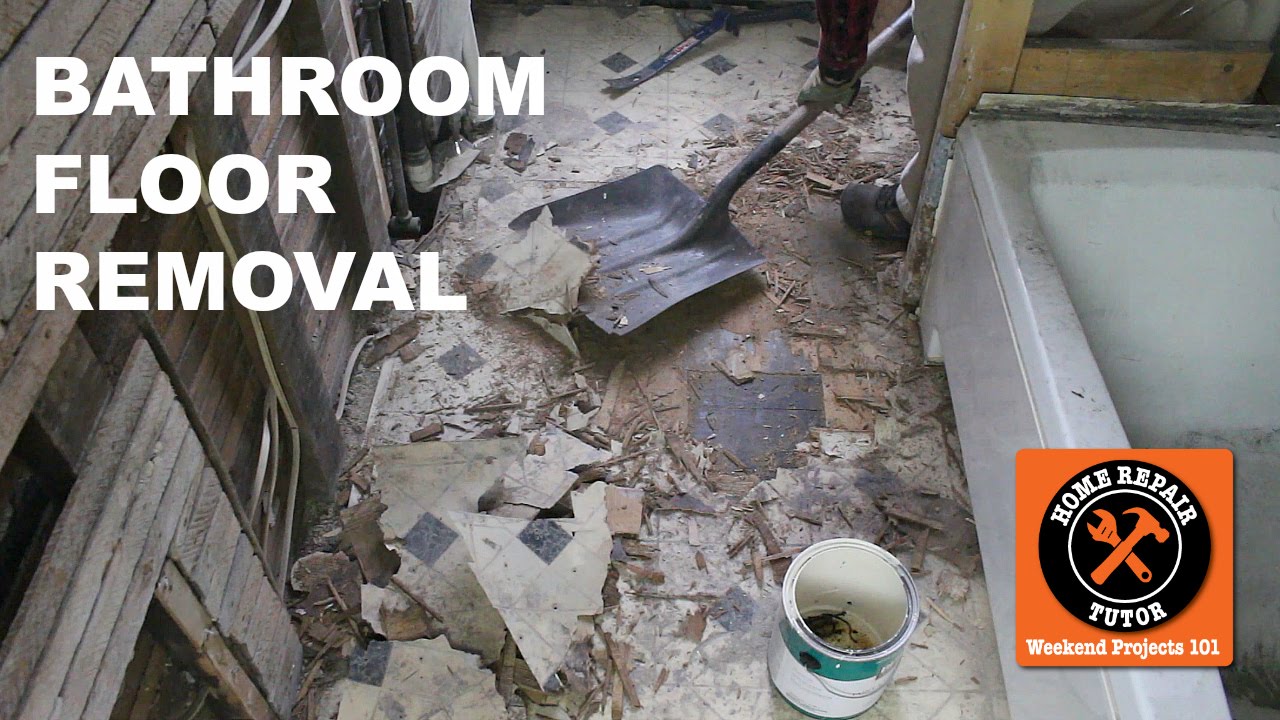
Fixing the bathroom floor
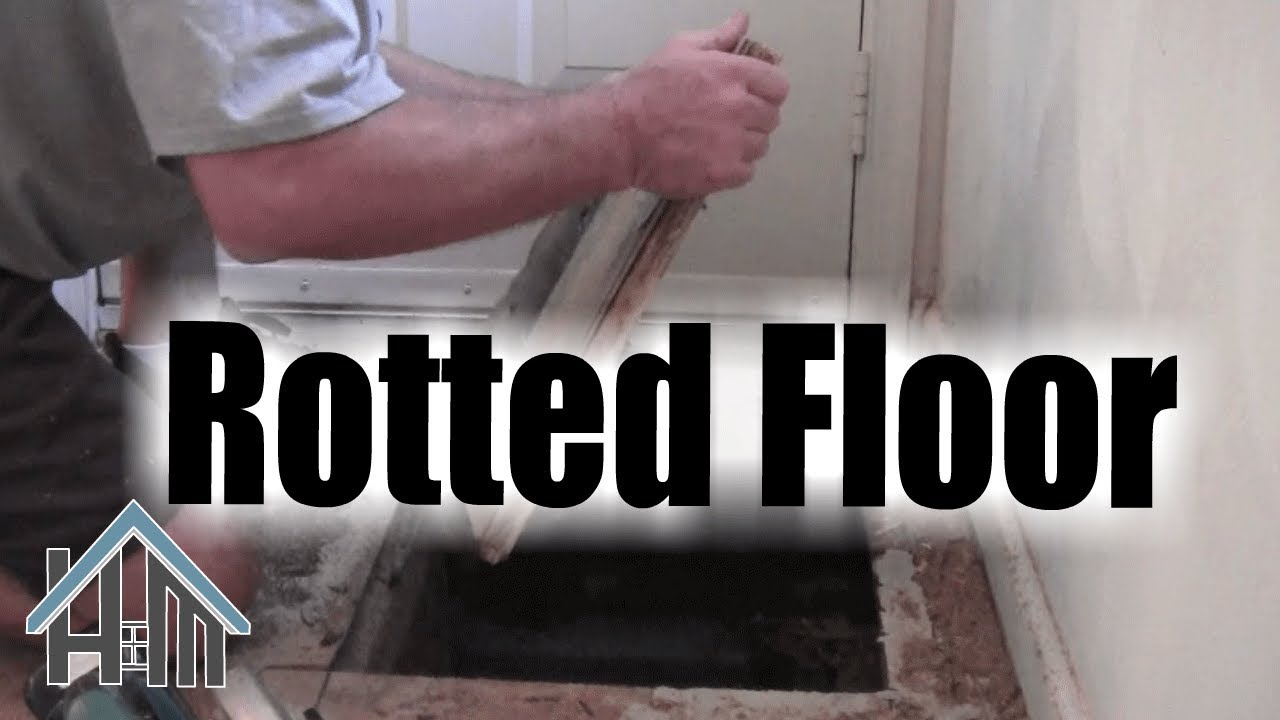
How to replace repair rotted sub floor, rotten floor. Easy! Home
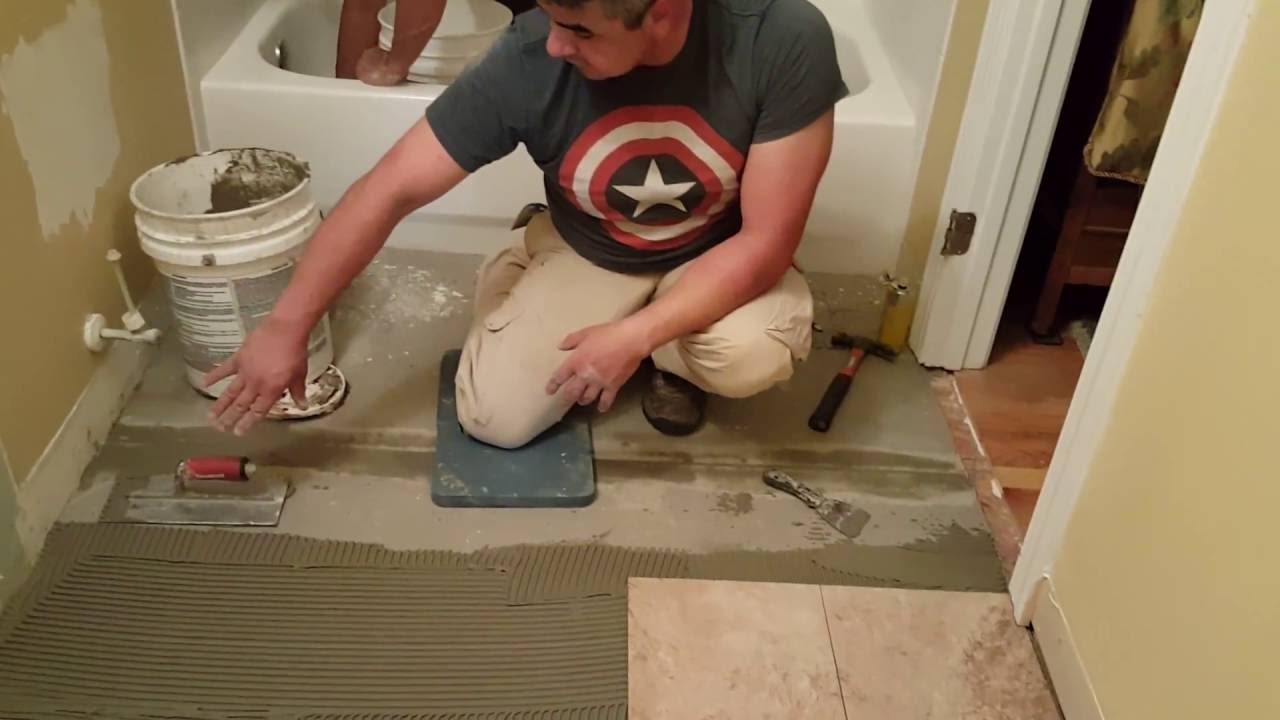
How to Tile a Small Bathroom Floor DIY Bath Remodel

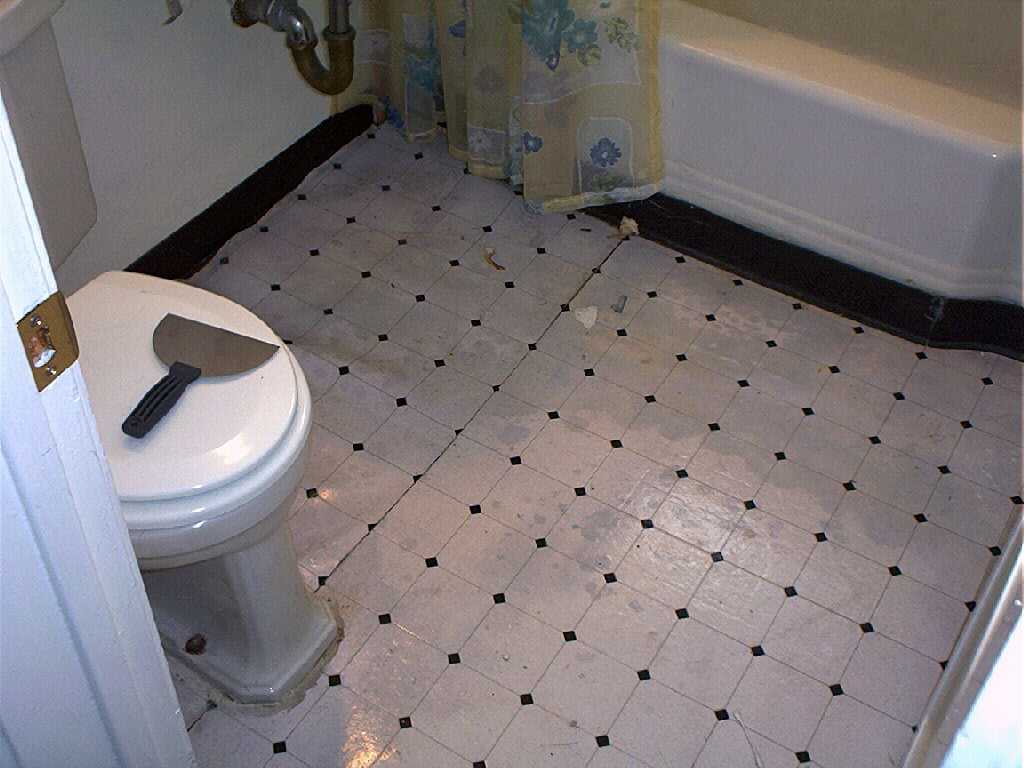
How to repair a rotted floor under the toilet

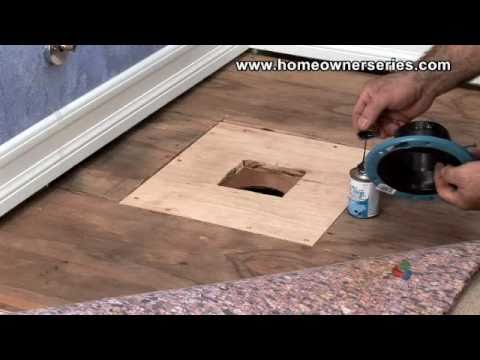
How to Fix a Toilet – Wooden Sub-Flooring Flange Repair – Part 3
How to Fix a Failing Bathroom Floor – Fine Homebuilding

The Best Flooring Options for Bathrooms – This Old House

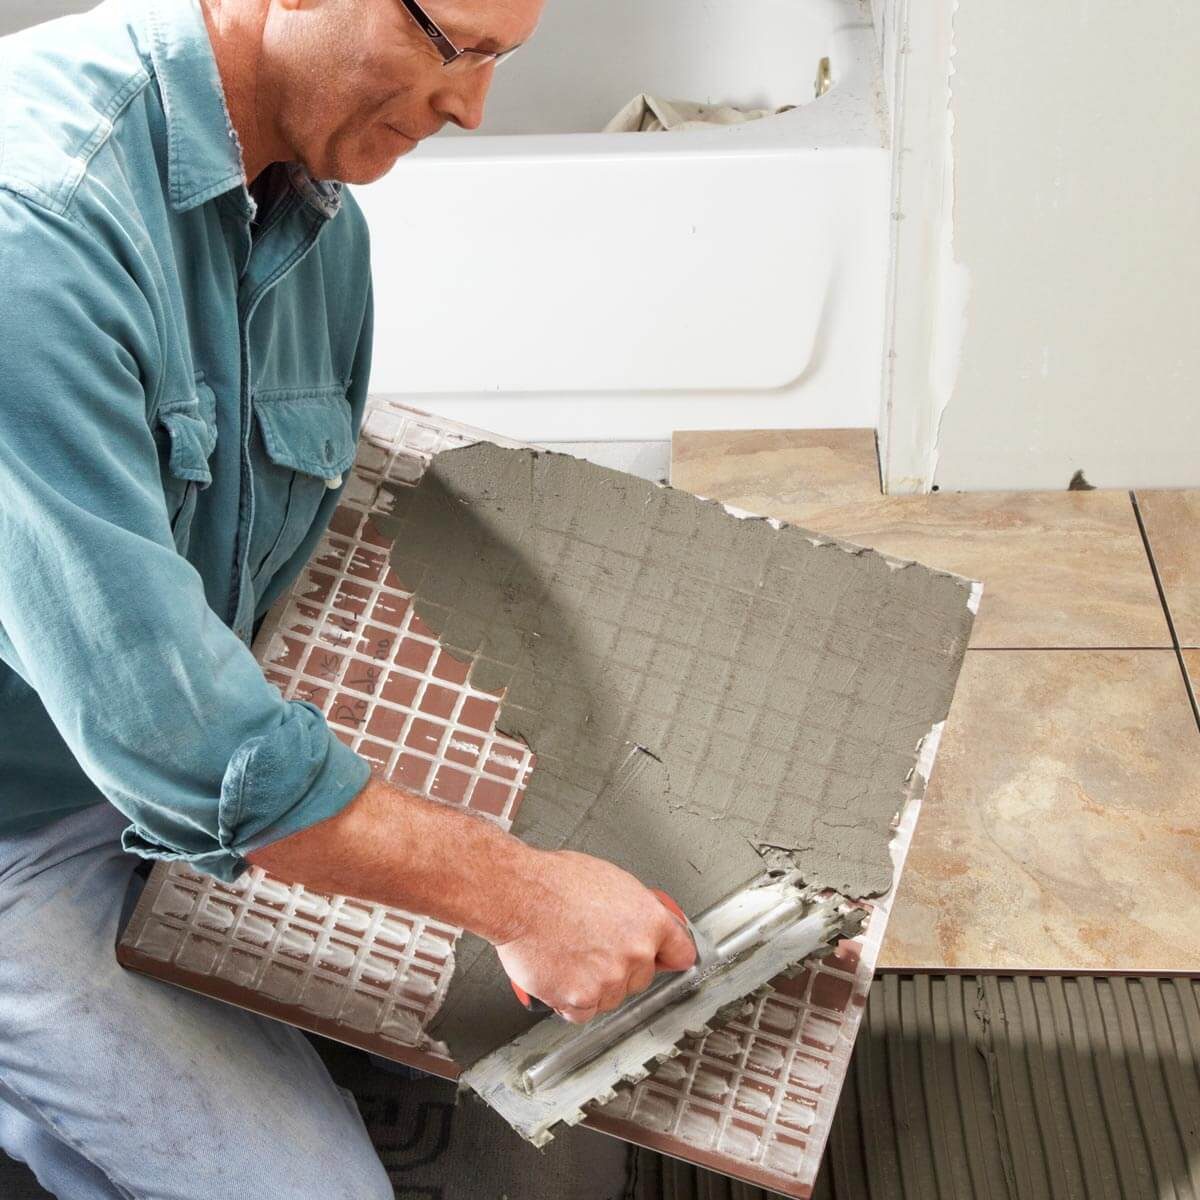
How to Lay Tile: Install a Ceramic Tile Floor In the Bathroom (DIY)
How to Replace a Rotting Bathroom Floor Hunker
7 Fast and Fabulous Fixes for Frightful Floors
:max_bytes(150000):strip_icc()/Fast-Fixes-for-Ugly-Floors-via-smallspaces.about.com-579bb3ff3df78c32766549d2.jpg)
Related Posts:
- Bathroom Floor Tile Patterns Ideas
- Black And White Bathroom Floor Designs
- Bathroom Epoxy Floor Coating
- Bathroom Floor Covering Options
- His And Hers Bathroom Floor Plans
- Dark Wood Tile Floor Bathroom
- Handicap Bathroom Floor Plans Commercial
- How To Clean Grout In Bathroom Floor
- Bathroom Flooring Wood Look
- Bathroom Floor Tile Layout 12×24
How to Fix Bathroom Floor: A Comprehensive Guide
Introduction:
The bathroom floor is an integral part of any bathroom, providing stability, durability, and aesthetic appeal. However, over time, it may start to show signs of wear and tear or develop issues such as cracks, water damage, or loose tiles. Fixing the bathroom floor requires careful planning, appropriate tools, and a step-by-step approach to ensure a successful renovation. In this article, we will provide you with a detailed guide on how to fix your bathroom floor effectively.
I. Assessing the Damage:
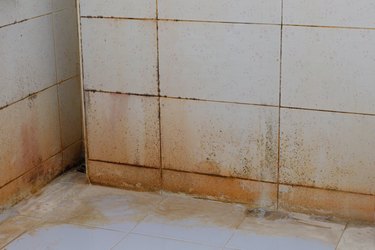
Before diving into the repair process, it is crucial to evaluate the extent of the damage in order to determine the best course of action. Start by inspecting the floor for any visible signs of cracks, water stains, or loose tiles. Pay attention to areas around fixtures such as the toilet and sink, as they are more prone to water damage. Additionally, check for any signs of mold or mildew growth as these can indicate underlying moisture problems.
FAQs:
1. How do I determine if my bathroom floor needs repair?
Look for visible cracks, water stains, loose tiles, or any signs of mold or mildew growth.
2. Can I fix a small crack myself?
Yes, small cracks can often be repaired using epoxy or caulk. However, larger cracks may require professional assistance.
II. Planning the Repair:
Once you have assessed the damage and identified the areas that need fixing, it is time to plan your repair project. This involves determining the materials needed, setting a budget, and establishing a timeline for completion.
1. Material Selection:
Choose flooring materials that are suitable for bathrooms and can withstand moisture and frequent use. Popular options include ceramic tiles, vinyl flooring, or waterproof laminate. Consider factors such as durability, ease of installation, and maintenance requirements when making your selection.
2. Budgeting:
Estimate the cost of materials and any professional assistance you may require. It is essential to allocate a realistic budget for the project to ensure its successful completion. Research prices online or visit local hardware stores to get an idea of the costs involved.
3. Timeline:
Depending on the extent of the damage and your availability, determine how long the repair project will take. Consider factors such as drying time for adhesives, grout, or other materials you may be using. It is advisable to allocate some extra time in case unexpected issues arise during the repair process.
FAQs:
1. What type of flooring material is best for bathrooms?
Ceramic tiles are a popular choice due to their durability and water-resistant properties. Vinyl flooring and waterproof laminate are also suitable options.
2. Can I install new flooring over the existing one?
In some cases, it is possible to install new flooring over the existing one. However, it is crucial to assess the condition of the current floor and consult with professionals to ensure proper installation.
III. Repairing Small Cracks and Chips:
If your bathroom floor has small cracks or chips, you can often fix them yourself using epoxy or caulk. These materials are readily available at hardware stores and can be applied easily with minimal tools.
1. Clean and Prepare the Cracked Area:
Start by thoroughly cleaning the cracked area with a mild detergent and warm water. Remove any loose debris or dirt that may hinder proper adhesion of the epoxy or caulk.
2. Apply Epoxy or Caulk:
Using a putty knife or a similar tool, carefully apply The epoxy or caulk to the cracked area. Make sure to fill the crack completely and smooth out any excess material. Follow the instructions provided with the product for best results.
3. Allow Time for Drying and Curing:
After applying the epoxy or caulk, allow sufficient time for drying and curing. This may vary depending on the specific product used, so refer to the instructions for recommended drying times. Avoid stepping on or putting heavy objects on the repaired area until it is fully cured.
4. Sand and Finish:
Once the repaired area is fully dry, use fine-grit sandpaper to gently sand down any rough edges or excess material. Wipe away any dust or debris, and apply a finishing product if desired to match the surrounding floor.
Note: It is important to remember that larger cracks or extensive damage may require professional assistance. If you are unsure about your ability to repair the floor yourself, it is always best to consult with a professional for proper assessment and guidance. 5. Seek Professional Assistance:
If you are unsure about your ability to repair the floor yourself or if the damage is extensive, it is best to seek professional assistance. They will have the expertise and experience to properly assess the damage and provide appropriate solutions. Contact a reputable flooring contractor or handyman to get a quote and discuss your options.
6. Consider Insurance Coverage:
If the damage to your bathroom floor is due to a covered event, such as a water leak or flood, you may be eligible for insurance coverage. Contact your insurance provider to inquire about the specific coverage and file a claim if necessary. Keep all documentation related to the damage and repairs for your records.
7. Prevent Future Damage:
To prevent future damage to your bathroom floor, take preventive measures such as using mats or rugs in high-traffic areas, cleaning up spills promptly, and ensuring proper ventilation in the bathroom. Regular maintenance and inspections can also help identify any potential issues before they become major problems.
Remember, repairing a bathroom floor can be a DIY project in some cases, but it is important to assess the extent of the damage and consult with professionals if needed. Take into consideration factors such as materials, costs, timeline, and insurance coverage before proceeding with any repairs.