The polished concrete is a fast printer getting a standard thing in numerous places around the planet and this is partly because a lot of individuals are actually appreciative of the beauty of its and also since many instances only are not able to stand having any other kind of floor. Sealed concrete has a really low environmental impact.
Images about How To Lay Concrete Floor Slab
Effectively sealed as well as maintained stained concrete lasts for ages and rarely requires replacement. Concrete flooring is exceptional flooring that's creating a long lasting impression on the quality of the life of yours by improving it holistically, no to point out the eco-friendly aspects. The shiny surface area is then sealed to keep the visual appeal and take the floor's longevity.
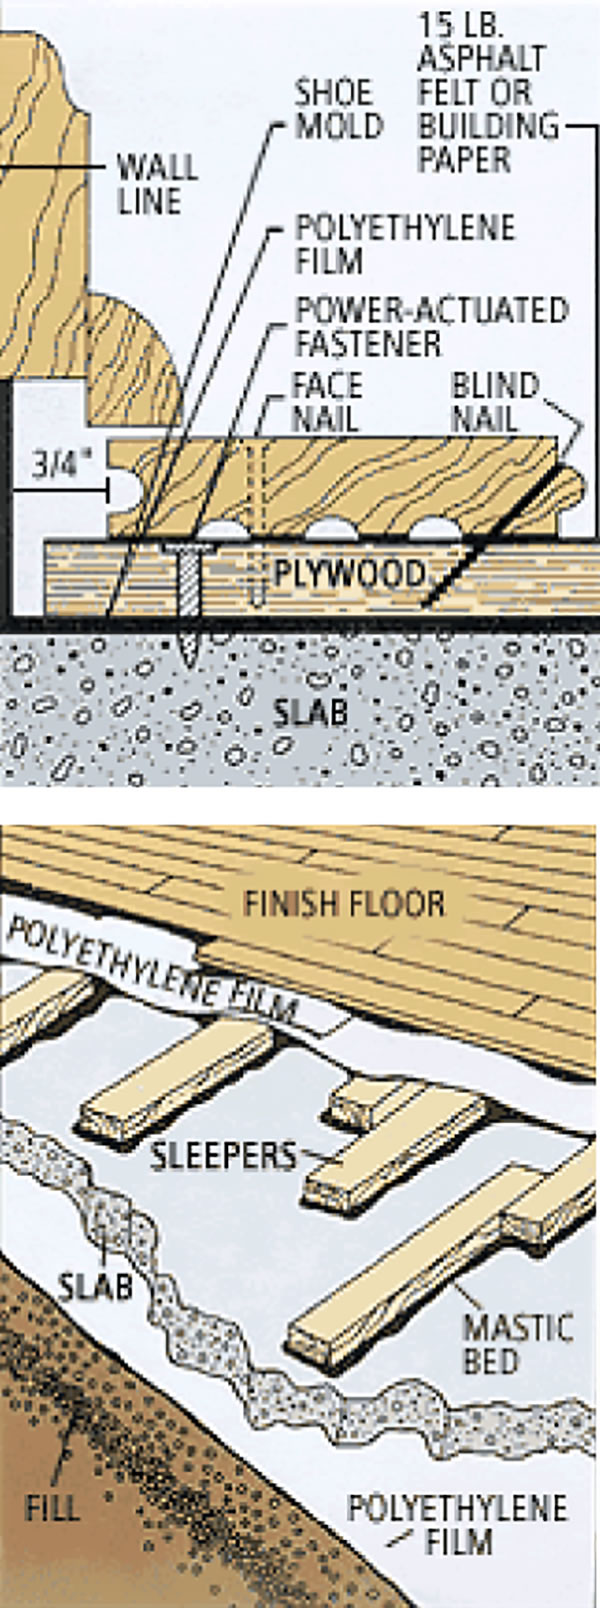
Installing a Hardwood Floor Over a Concrete Slab – American
Stained concrete floors are stained with colors to match up with any decoration. When several dust collects on the polished concrete floors, it is better to gently clean it all before it is able to gather to amounts that will require some scrubbing of sorts. As soon as the chemical reaction requires place, staining concrete floors deal with an irreversible connect with the concrete and will not peel away.
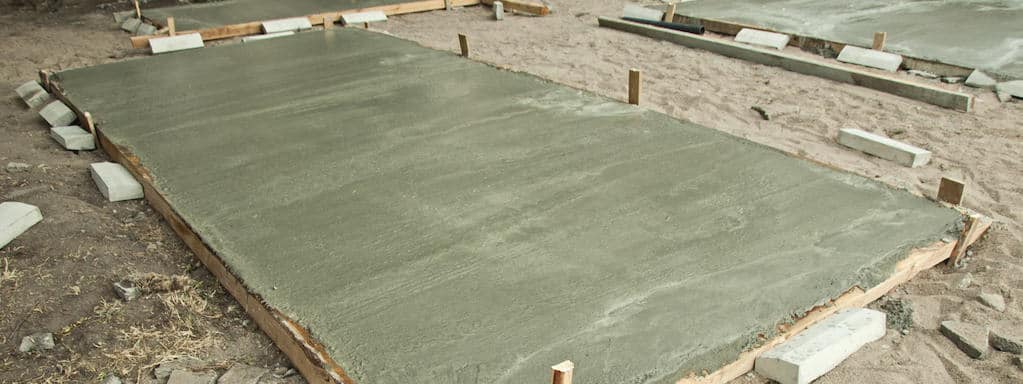
Concrete slab floor and how to make one by hand mixing the concrete
How to Pour Concrete Over-Existing Concrete Slab? – The Constructor

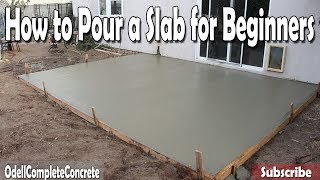
How to Pour a Concrete Slab
/PouringConcreteSlab-715d832fef224f53a859947db1914b16.jpg)
Concrete Floor Slab Construction Process – The Constructor

How to Pour Concrete: 12 Steps (with Pictures) – wikiHow

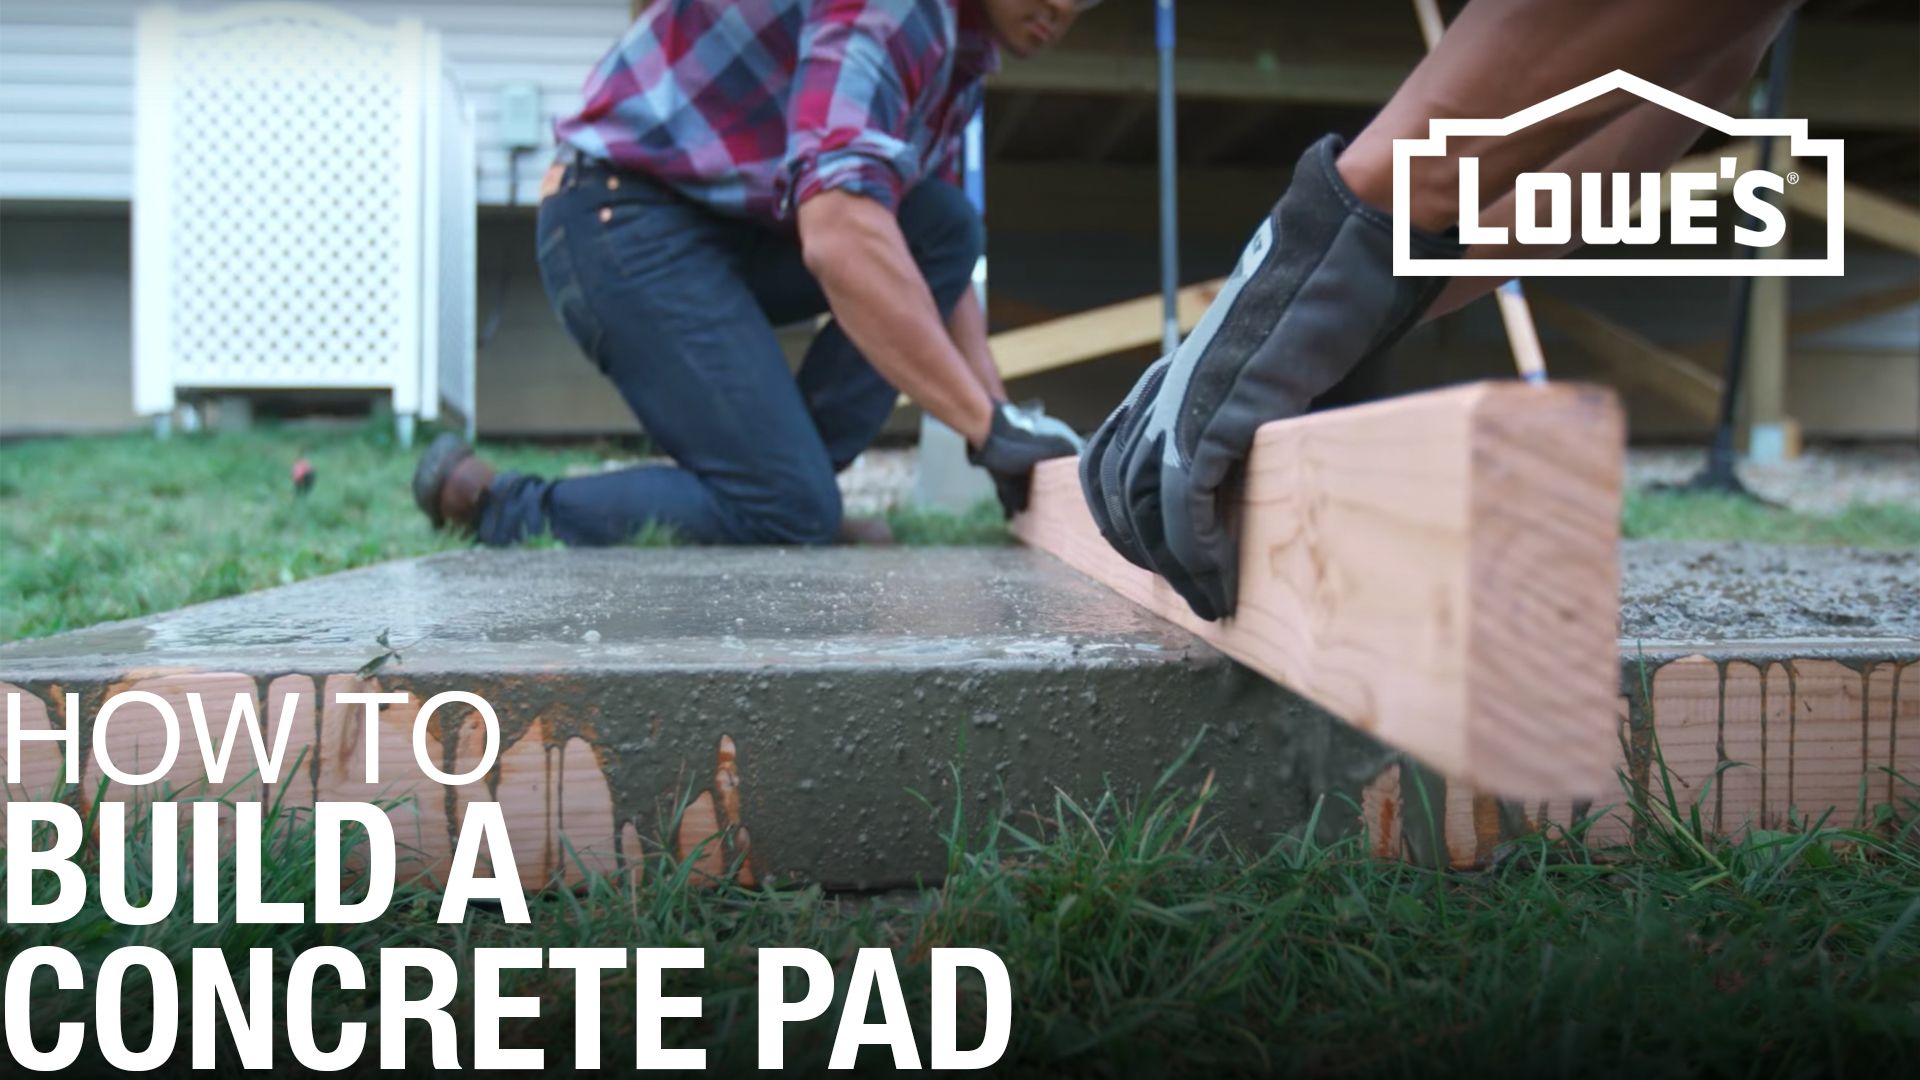
How to Build a Concrete Slab Loweu0027s
DIY Laying a Concrete Slab
Building Guidelines Concrete Floors, Slabs
Installing a Hardwood Floor Over a Concrete Slab – American
How Much Does a Concrete Slab Cost? A Budgeting Guide – Bob Vila

Pouring a Concrete Slab HomeTips
How to Pour a Concrete Slab (DIY) Family Handyman
Related Posts:
- Behr Epoxy Concrete Floor Paint
- Concrete Floor Preparation For Wood Flooring
- Epoxy Paint For Concrete Floors Colors
- Rent Concrete Floor Cleaner
- Heated Concrete Floor Tubing
- Concrete Floor Staining Process
- Concrete Floor Interior Design
- Concrete Floors In Your Home
- Cost Of Poured Concrete Floor
- Outdoor Polished Concrete Floors
How To Lay Concrete Floor Slab
Introduction:
A concrete floor slab is a durable and long-lasting solution for both residential and commercial spaces. Whether you are constructing a new building or renovating an existing one, laying a concrete floor slab can be a challenging but rewarding task. In this article, we will guide you through the step-by-step process of laying a concrete floor slab, from preparation to finishing touches. So let’s dive in and explore how to create a strong and beautiful concrete floor slab.
I. Planning and Preparation:
Before you begin the actual process of laying a concrete floor slab, proper planning and preparation are crucial. Here are the key steps involved:
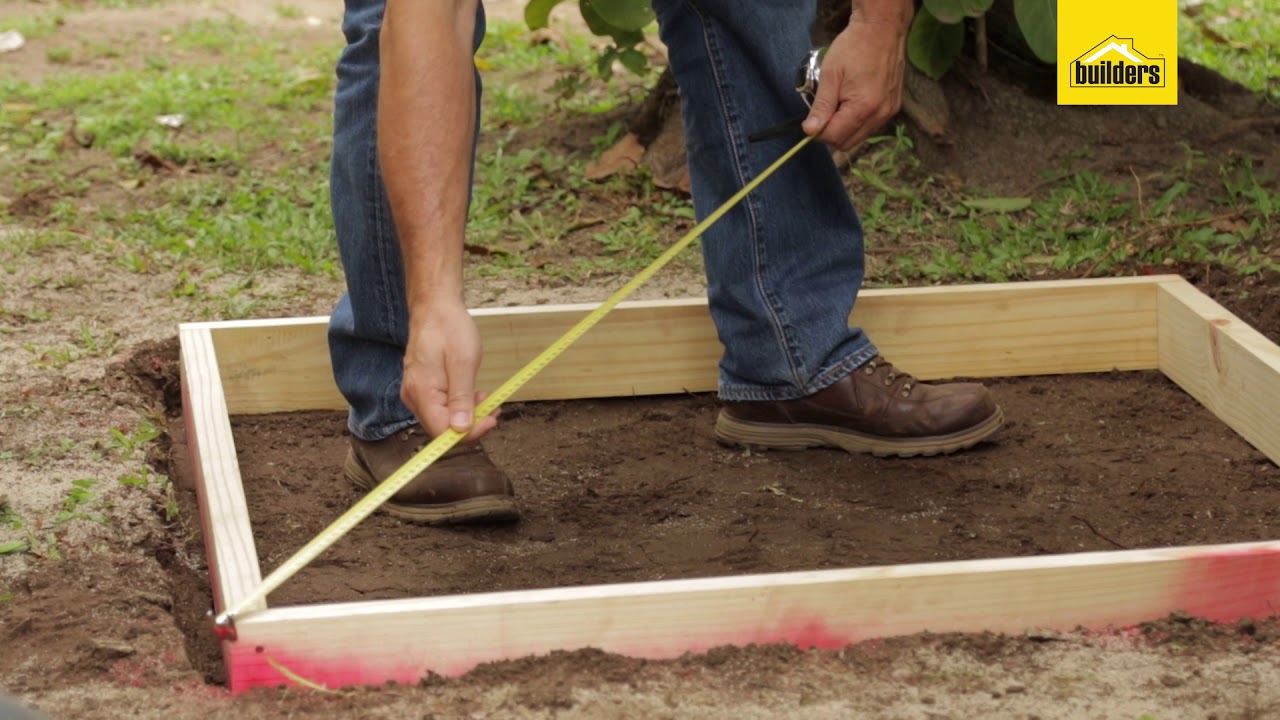
1. Measure and Mark the Area:
Start by measuring the area where you intend to lay the concrete floor slab. Use a measuring tape to determine the length and width accurately. Once measured, mark the boundaries using chalk or spray paint.
2. Clear the Area:
Remove any obstacles, debris, or vegetation from the marked area. It is essential to have a clean and level surface before pouring the concrete.
3. Excavation:
Dig out the top layer of soil to create space for your concrete slab. The depth of excavation depends on several factors, including the intended use of the floor slab and local building codes. Typically, a depth of 4-6 inches (10-15 cm) is sufficient for residential applications.
FAQs:
Q: Do I need to hire professional equipment for excavation?
A: It depends on the size of your project and your budget. For small-scale projects, manual tools like shovels and wheelbarrows can be sufficient. However, for larger areas or time-sensitive projects, using machinery like mini-excavators can save time and effort.
Q: How do I ensure that my excavation is level?
A: To ensure a level excavation, use a long spirit level or laser level across different points of the area. Make adjustments by adding or removing soil until you achieve a consistent level.
II. Building the Foundation:
A strong foundation is essential for a durable concrete floor slab. Here’s how you can build a solid base for your floor:
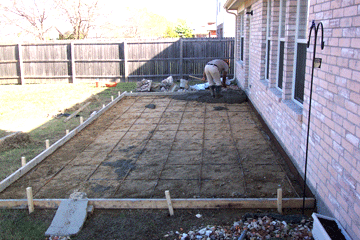
1. Install Formwork:
Formwork, also known as shuttering, is the temporary structure used to contain the concrete during pouring and curing. It provides shape and support to the slab until it gains sufficient strength. Install formwork around the perimeter of the excavated area, ensuring it is sturdy and well-aligned.
2. Compact the Soil:
Use a compactor or tamper to compact the soil within the excavated area. This helps to prevent any future settlement or shifting of the concrete slab.
3. Lay a Layer of Gravel:
Add a layer of gravel or crushed stone to the excavated area. This acts as a base material, providing drainage and stability to the concrete slab. Compact the gravel layer using a compactor or tamper.
FAQs:
Q: Can I use sand instead of gravel as a base material?
A: While sand can be used as an alternative, gravel is generally preferred due to its superior drainage properties and better load-bearing capacity.
Q: How thick should the layer of gravel be?
A: The thickness of the gravel layer will depend on factors such as soil conditions and local building codes. As a general guideline, aim for a thickness of 4-6 inches (10-15 cm) for optimal results.
III. Reinforcement and Pouring Concrete:
Reinforcing the concrete with Steel reinforcement bars or mesh is crucial to enhance its strength and durability. Here’s how you can reinforce and pour the concrete for your floor slab:
1. Add Reinforcement:
Place steel reinforcement bars or mesh within the formwork, ensuring proper spacing and coverage. This reinforcement helps to distribute the load and prevent cracking or shifting of the concrete slab.
2. Pouring Concrete:
Mix the concrete according to the manufacturer’s instructions, ensuring a proper water-to-cement ratio. Pour the concrete into the formwork, starting from one corner and working your way towards the opposite end. Use a shovel, rake, or trowel to evenly spread and level the concrete.
3. Consolidate the Concrete:
Use a vibrating poker or mechanical vibrator to consolidate the concrete and remove any air pockets or voids. This helps to ensure a dense and solid concrete slab.
FAQs:
Q: How long does it take for the concrete to cure?
A: The curing time can vary depending on factors such as temperature, humidity, and the type of concrete used. Generally, it takes around 7-14 days for concrete to reach its maximum strength.
Q: Can I add color or texture to my concrete?
A: Yes, you can add color pigments or create texture by using stamping tools or textured mats during the finishing process. This allows you to customize the appearance of your concrete floor.
IV. Finishing and Curing:
Proper finishing and curing techniques are essential to achieve a smooth, durable, and aesthetically pleasing concrete floor. Follow these steps to finish and cure your concrete slab:
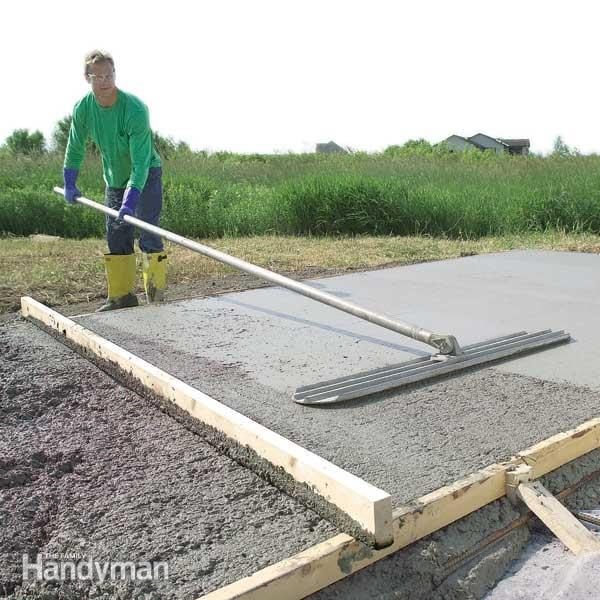
1. Edging and Floating:
Use an edging tool to create smooth, rounded edges along the perimeter of the slab. Then, use a bull float or darby to float the surface of the concrete, removing any imperfections or high spots.
2. Troweling:
Once the concrete has hardened slightly, use a steel trowel to further smooth and compact the surface. This helps to create a denser and more polished finish.
3. Curing:
Cover the concrete slab with a curing compound or plastic sheeting to retain moisture and prevent rapid drying. This allows the concrete to cure slowly and develop its full strength. Keep the slab moist for at least 7 days, spraying it with water or using wet burlap.
FAQs:
Q: Can I walk on the concrete immediately after pouring?
A: It is best to avoid walking on the concrete for at least 24-48 hours after pouring to prevent any damage or imprints. However, you can place temporary plywood boards or walkways if necessary.
Q: How long before I can use my concrete floor?
A: While you can start using the floor after about 7 days, it is recommended to wait for a full curing period of 28 days before subjecting it to heavy loads or any significant stress. This allows the concrete to reach its maximum strength and durability.