colors which are Warm as peach and grey colored are fun, they can make the bathroom feel cozier and they go best with a more country looking bath room decor. You will find a great deal of designs and styles to check out to the market. Ceramic tiles are maybe the most common sort of flooring option for the bathroom's floor design.
Images about How To Remove Tile Bathroom Floor
Mosaic bathroom floors tiles not just add style, elegance and class to the bathroom, they are in addition resilient as well as easy to keep. Thankfully, you will find alternatives which are a number of to select from, each with their very own pros positives and negatives.
How to remove tile – easy ceramic tile removal
Laminates are able to turn slippery when there is water and you need to have anti skid flooring for your bathrooms, that is a simple requirement. This gives your bathroom a dash of color. Tiles with lustrous finish offer a touch of elegance to the powder room whereas mosaic with matte finish gives the bathroom a spacious and warm feel. Stone flooring might be more costly but they keep going long.
How to Remove a Tile Floor HGTV

How to replace old bathroom floor tiles
How To Remove A Tile Floor and Underlayment
How to Remove Tile the Easy Way – Like a Pro PTR

How to Remove a Tile Floor HGTV
How to Remove Tile Flooring Yourself {with Tips and Tricks} All
How to Remove Ceramic Tile
How to remove bathroom tile and not make a big mess
How to remove floor tiles without breaking them – Ideas by Mr Right
How to remove ceramic tile
preparing for new tile floors – 06 remove bathroom tile
How to Remove a Tile Floor HGTV
Related Posts:
- Bathroom Floor Tile Patterns Ideas
- Black And White Bathroom Floor Designs
- Bathroom Epoxy Floor Coating
- Bathroom Floor Covering Options
- His And Hers Bathroom Floor Plans
- Dark Wood Tile Floor Bathroom
- Handicap Bathroom Floor Plans Commercial
- How To Clean Grout In Bathroom Floor
- Bathroom Flooring Wood Look
- Bathroom Floor Tile Layout 12×24
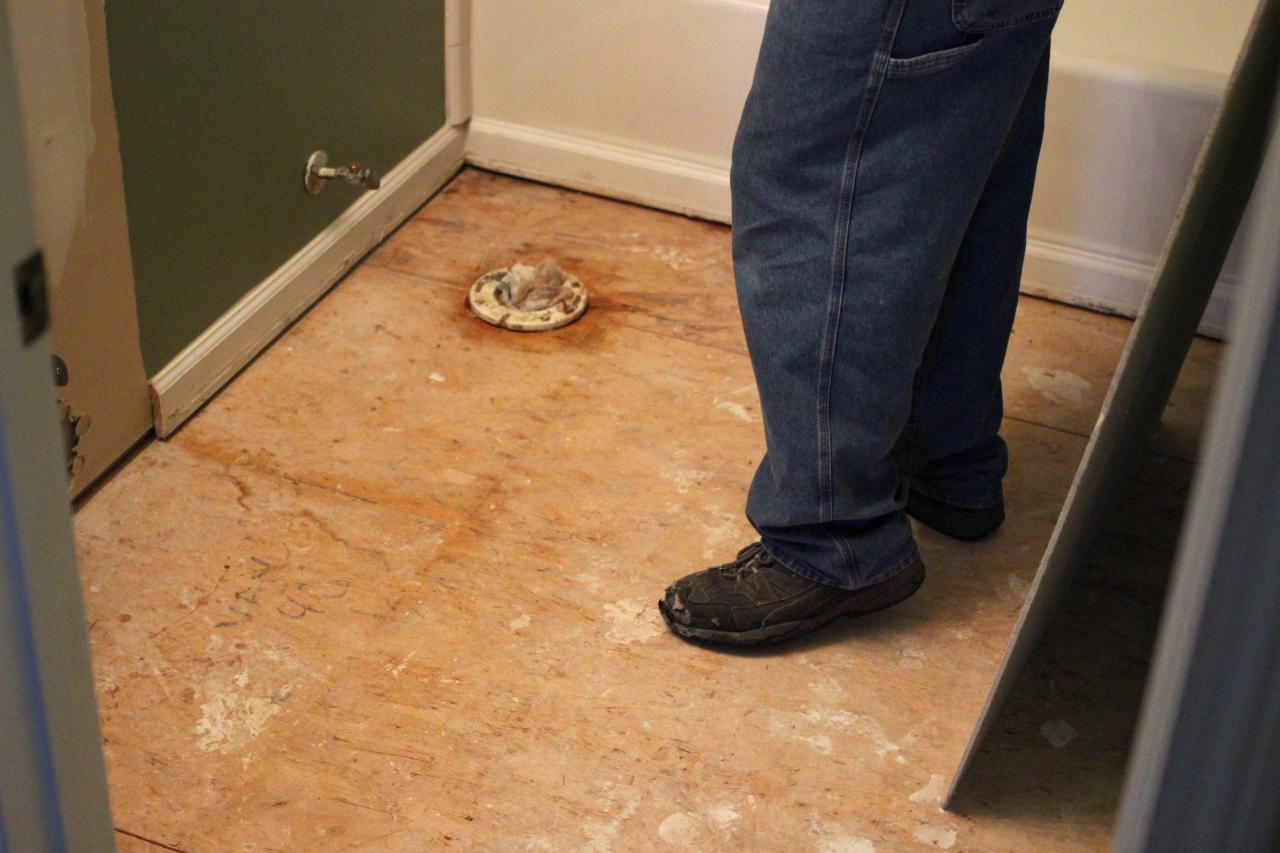
How to Remove Tile from a Bathroom Floor
Renovating a bathroom can be an exciting project, but one of the first steps is often removing the existing tile floor. Whether you want to replace the outdated tiles with a new, modern design or simply repair damaged tiles, removing them can be a daunting task. However, with the right tools and techniques, you can successfully remove tile from your bathroom floor without causing any damage. In this article, we will guide you through each step of the process, providing detailed instructions and helpful tips along the way.
1. Prepare for the Removal Process
Before you begin removing the tile from your bathroom floor, it’s important to prepare the area properly. Start by clearing out all furniture, rugs, and other items from the bathroom to create a clear workspace. Next, cover any nearby fixtures or cabinets with plastic sheets or drop cloths to protect them from debris and dust. Additionally, put on safety goggles and gloves to protect yourself during the removal process.
2. Gather the Necessary Tools
To effectively remove tile from your bathroom floor, you will need several tools that are specifically designed for this task. Some of these tools include:
– Safety goggles and gloves: As mentioned earlier, these are essential for protecting your eyes and hands while working.
– Pry bar or chisel: A pry bar or chisel will help in loosening and lifting tiles from the floor.
– Hammer: You will need a hammer to strike the pry bar or chisel gently for better leverage.
– Scraper: A scraper can be used to remove any remaining adhesive or grout after tile removal.
– Dust mask: Wearing a dust mask is recommended to prevent inhaling dust particles during the process.
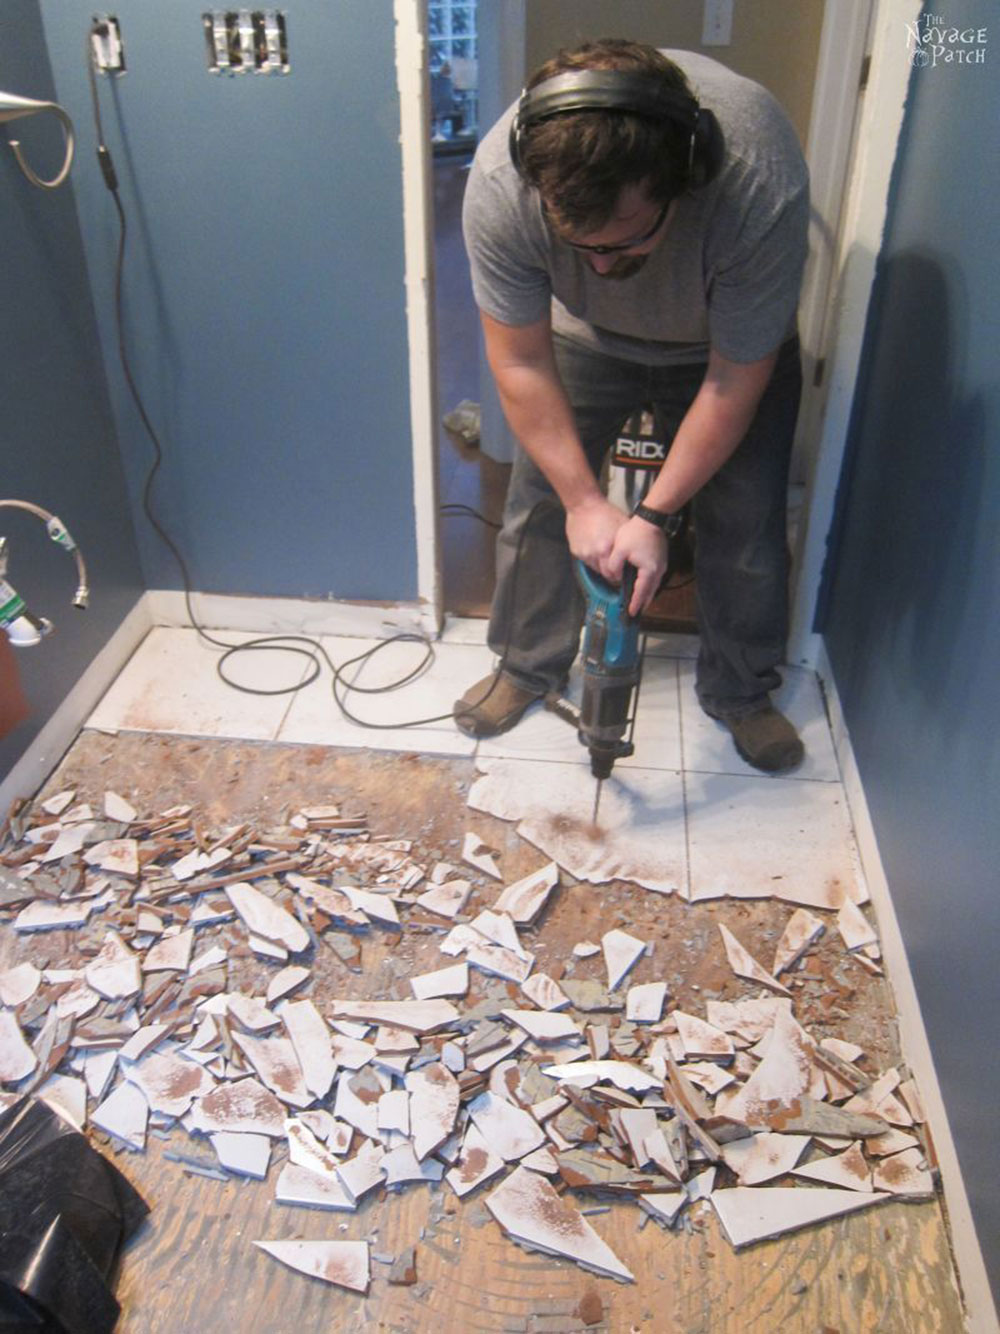
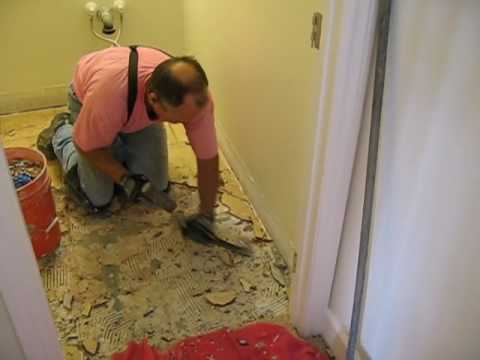
3. Begin Removing the Tiles
Once you have prepared the area and gathered all necessary tools, it’s time to start removing the tiles from your bathroom floor. Follow these steps:
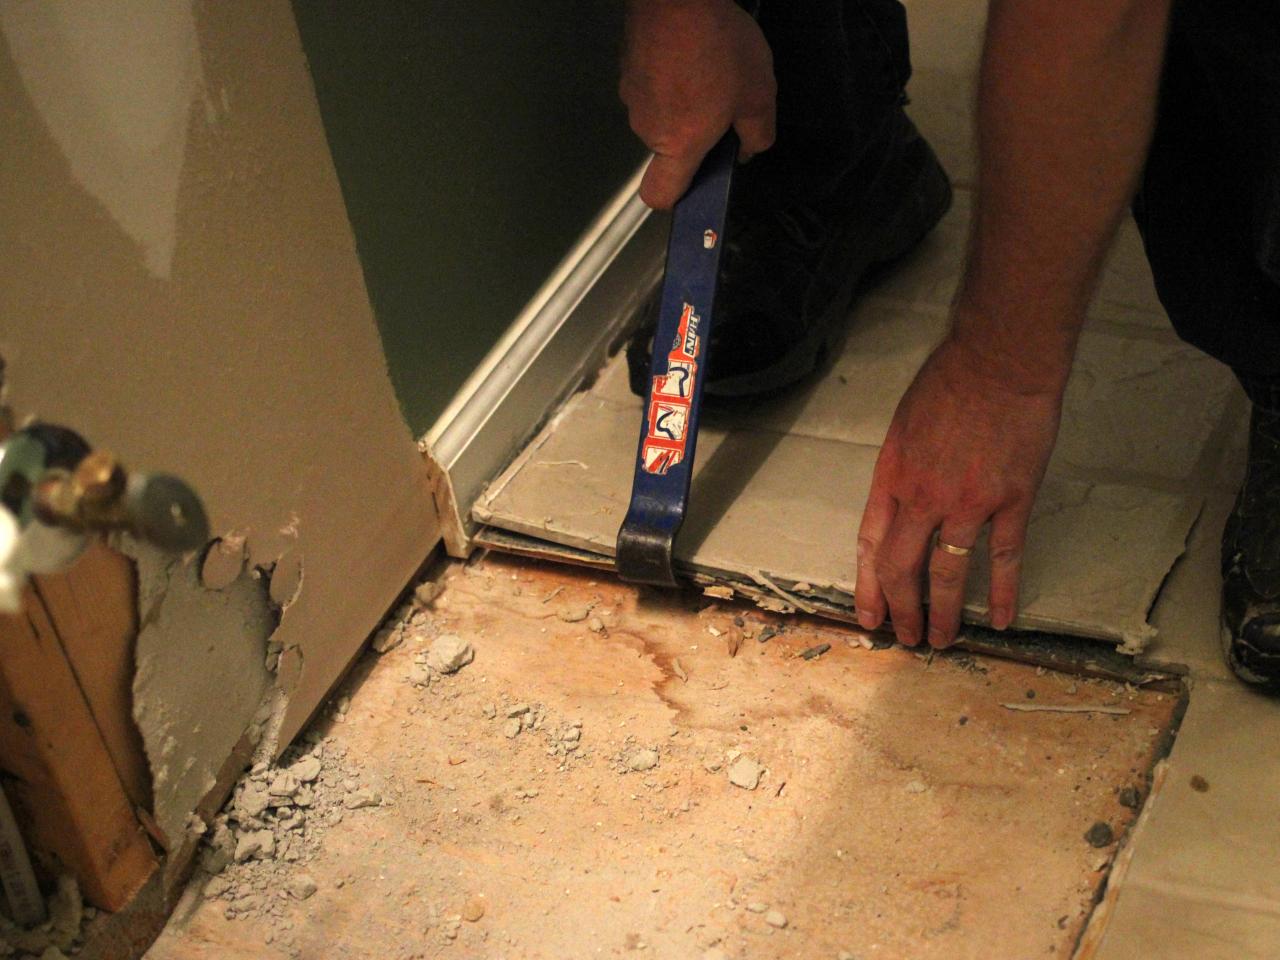
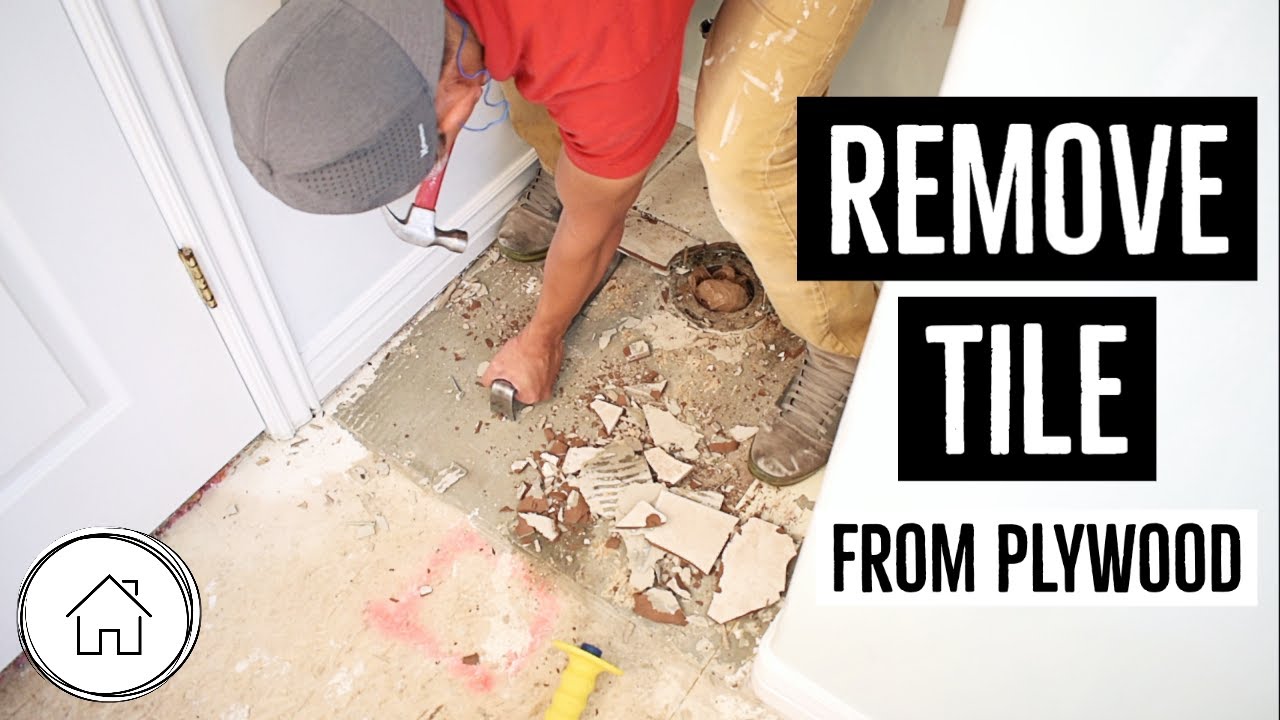
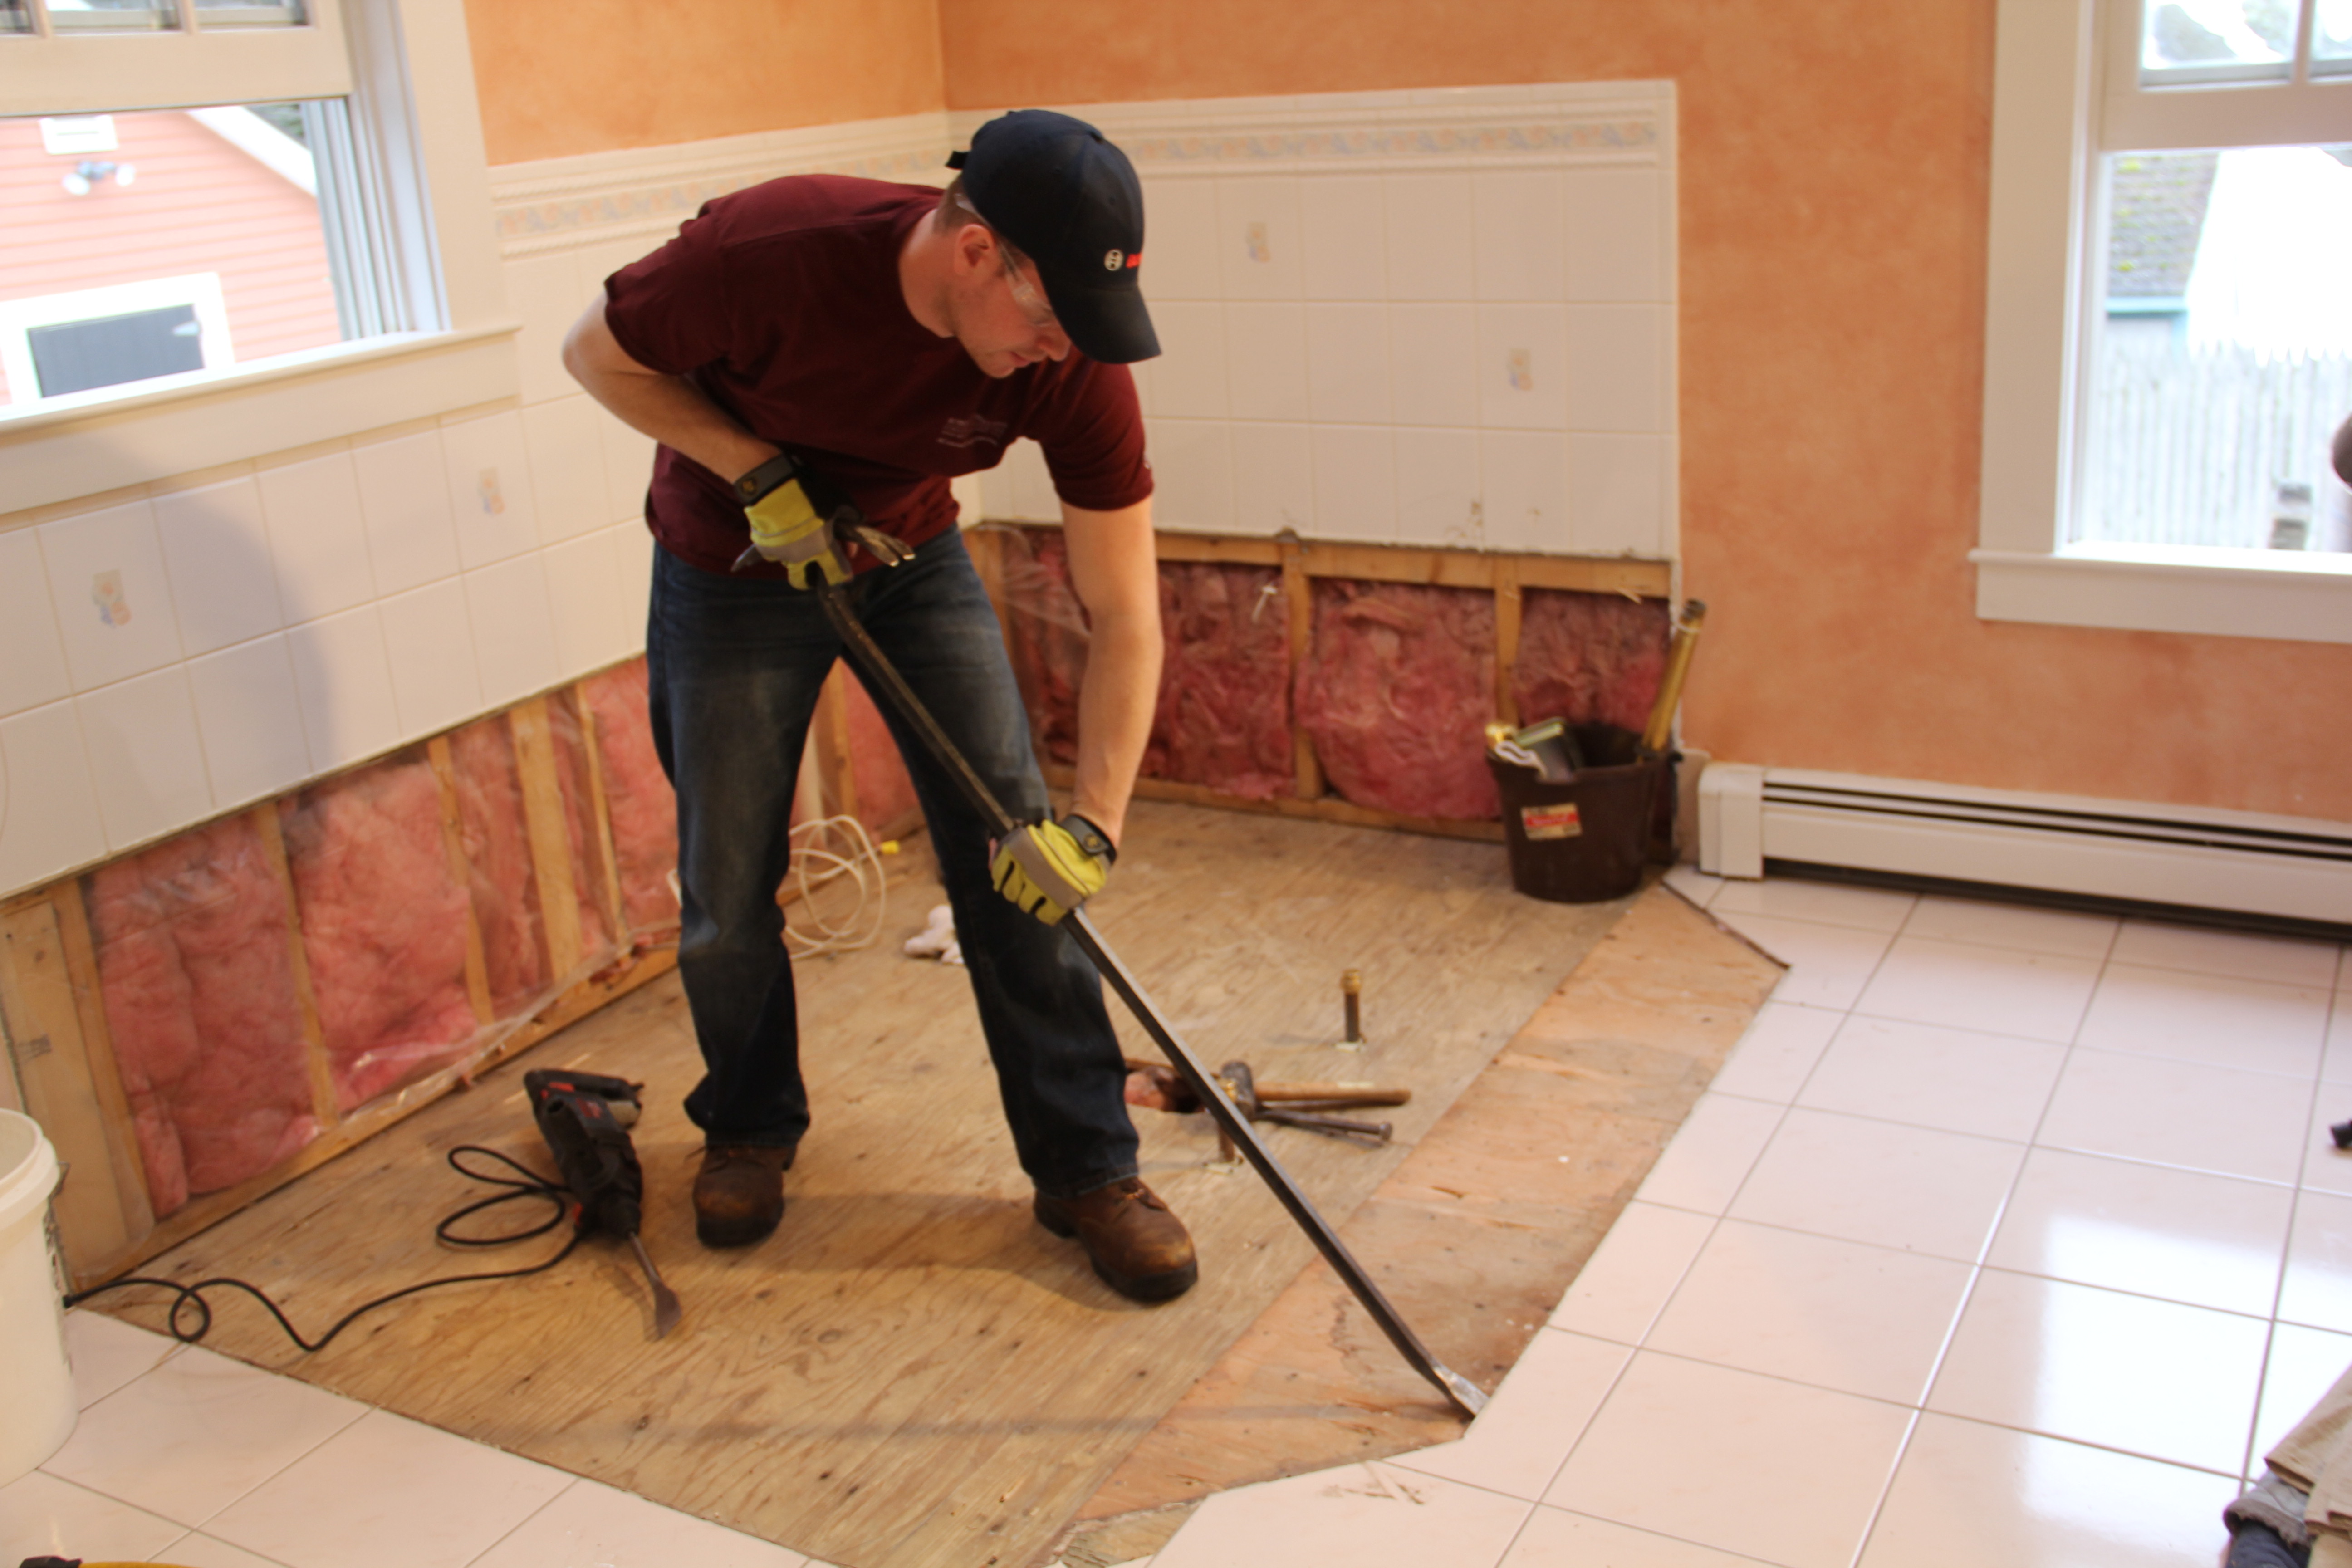
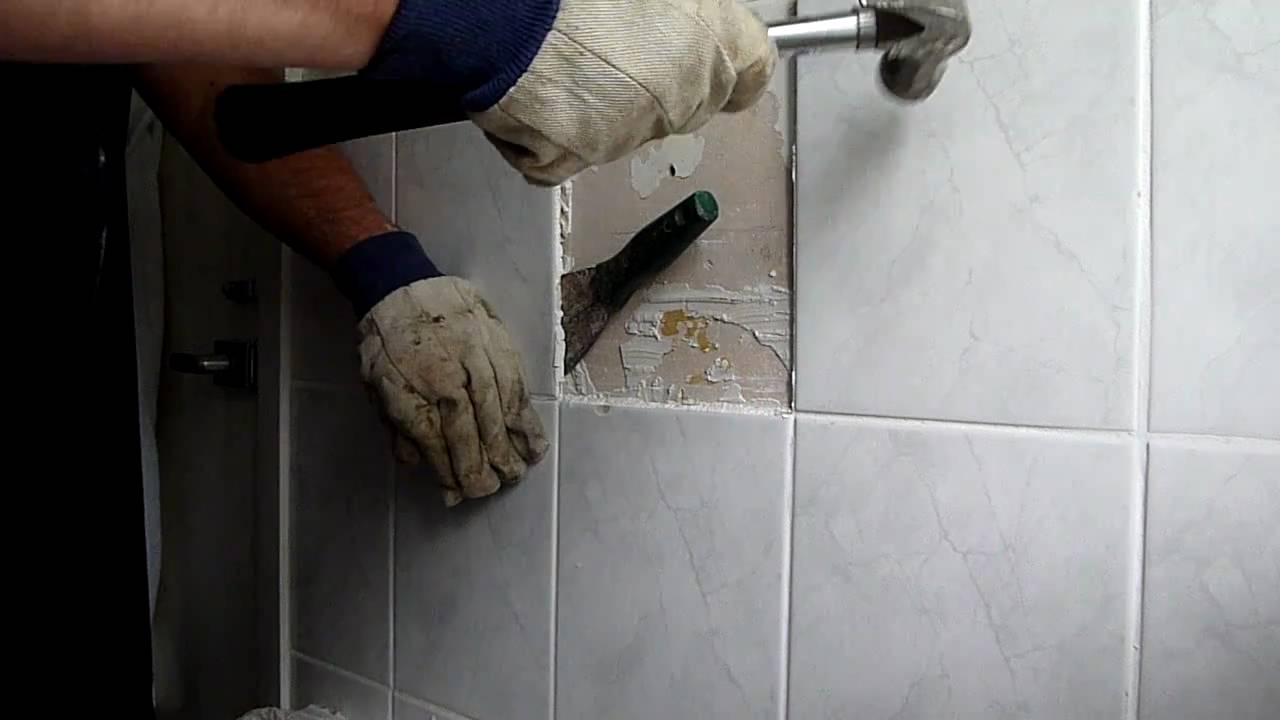
a) Start at an Edge: Begin by identifying an edge or corner where you can start the removal process. Using a pry bar or chisel, gently insert it between the tile and the floor at a slight angle. Apply pressure to lift the tile from the floor. If necessary, tap the pry bar or chisel with a hammer to loosen stubborn tiles.
b) Work in Sections: Rather than trying to remove all the tiles at once, it is recommended to work in sections. This will help you maintain control over the process and minimize the risk of damaging adjacent tiles or the subfloor. Once you have successfully removed a section of tiles, move on to the next one.
c) Remove Adhesive and Grout: After removing the tiles, you may find that there is still adhesive or grout remaining on the floor. To remove this residue, use a scraper or putty knife to carefully scrape it away. Take care not to damage the subfloor while doing so.
4. Addressing Common FAQs
Q: Can I reuse the removed tiles after removal?
A: In most cases, reused tiles will not be in good condition after removal. The adhesive used during installation often damages the back of the tile, making them unsuitable for reuse. It is recommended to purchase new tiles for your bathroom renovation.
Q: How do I remove stubborn grout?
A: Stubborn grout can be challenging to remove, especially if it has hardened over time. One effective method is using a grout saw or rotary tool with a grout removal attachment. These tools allow you to carefully Cut away the grout without damaging the tiles. Another option is to use a grout remover solution and a scrub brush to loosen and remove the grout. Make sure to follow the instructions on the grout remover product and take necessary safety precautions.
Q: How can I protect my subfloor during tile removal?
A: To protect your subfloor during tile removal, it is important to work carefully and avoid damaging it. Use a pry bar or chisel with caution to prevent gouging or scratching the subfloor. If necessary, you can place a piece of plywood or cardboard on top of the subfloor to provide an extra layer of protection while working.
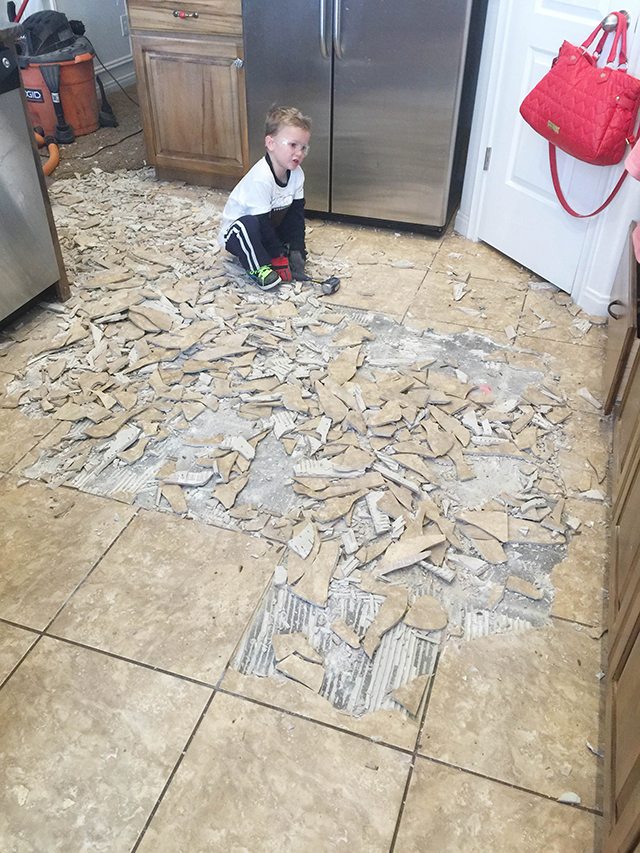
Q: What should I do with the debris after tile removal?
A: After removing the tiles, you will have a pile of debris including broken tiles, adhesive, and grout. It is best to dispose of this debris properly. You can check with your local waste management facility for guidelines on how to dispose of construction debris. Some areas may allow you to dispose of it in regular trash bins, while others may require special arrangements for disposal.
5. Clean Up and Prepare for Installation
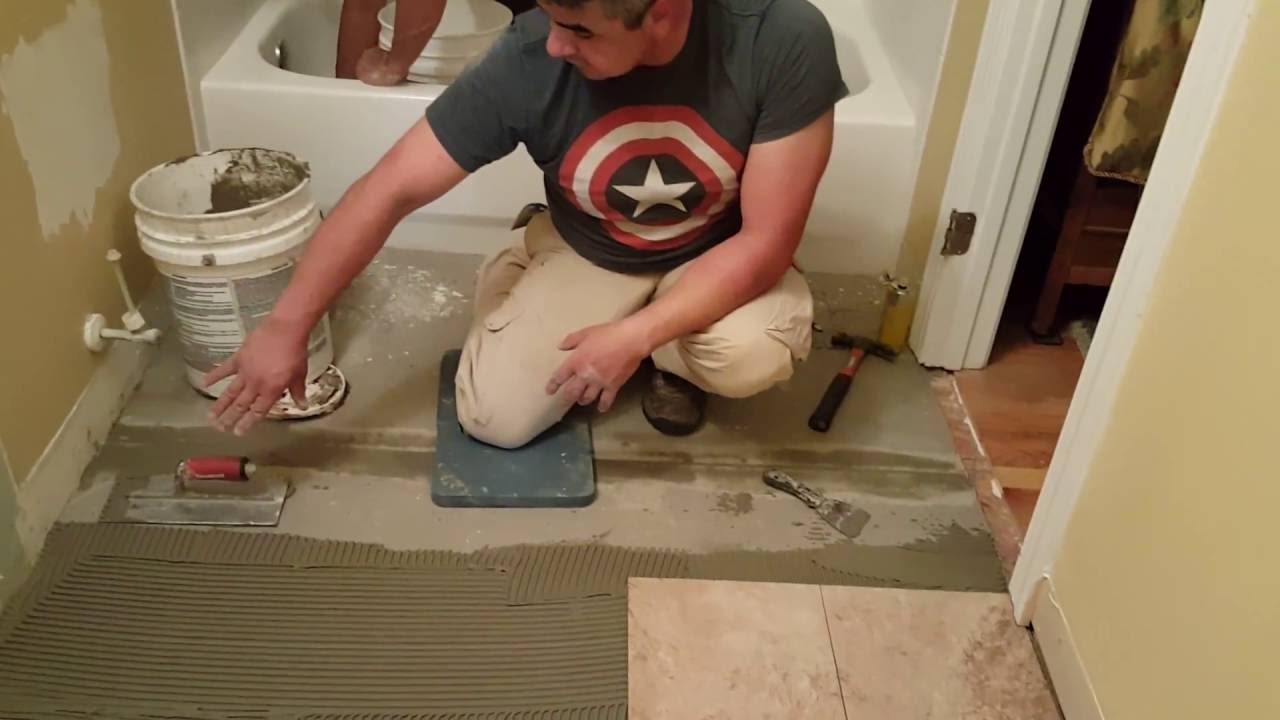
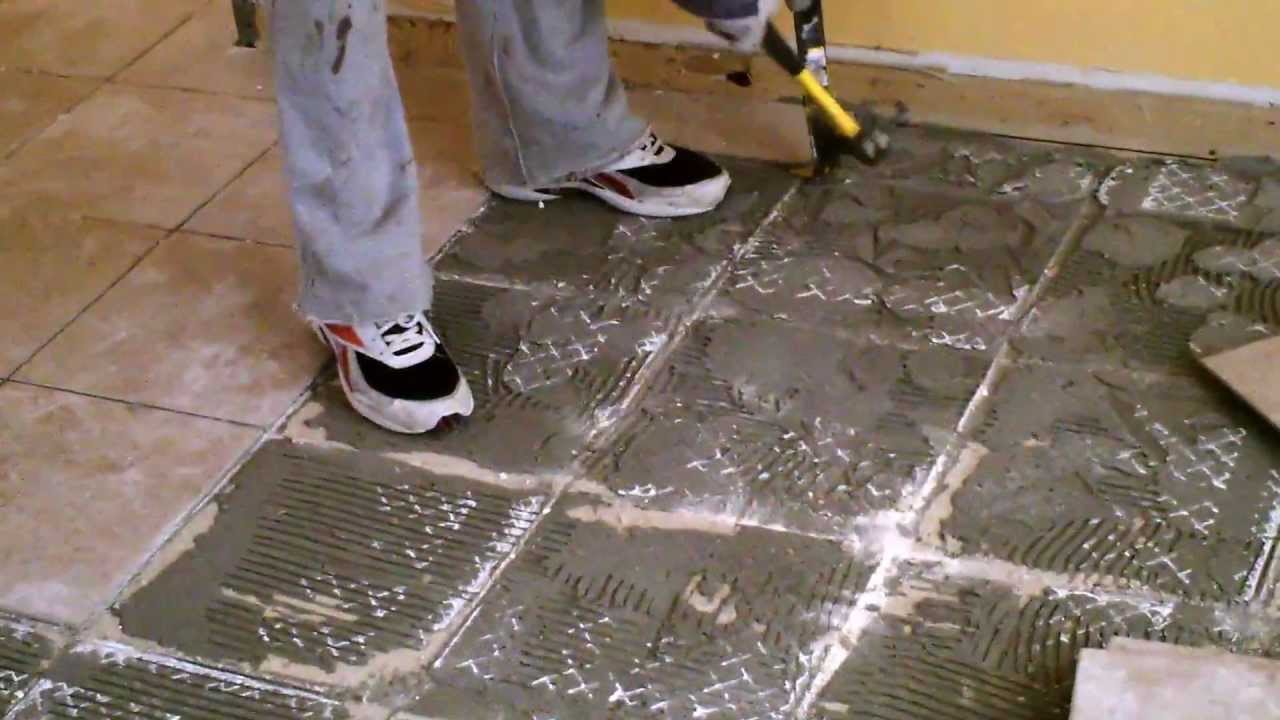
Once you have successfully removed all the tiles and cleaned up any remaining adhesive or grout, it’s time to prepare for installation. Make sure the subfloor is clean and free from any debris or residue. If necessary, repair any damage or unevenness on the subfloor before proceeding with tile installation. 6. Measure and Plan: Before installing the new tiles, measure the area to determine the amount of tiles needed. It is recommended to purchase extra tiles to account for any mistakes or future replacements. Plan out the layout of the tiles, taking into consideration any patterns or designs you want to create.
7. Apply Tile Adhesive: Once you have measured and planned, begin applying tile adhesive to the subfloor using a notched trowel. Spread the adhesive evenly, working in small sections at a time.
8. Install Tiles: Place the tiles onto the adhesive, pressing them firmly into place. Use tile spacers to ensure even spacing between each tile. Continue this process until all tiles are installed.
9. Allow Adhesive to Dry: Give the adhesive ample time to dry according to the manufacturer’s instructions before proceeding with grouting.
10. Grout the Tiles: Mix grout according to the manufacturer’s instructions and apply it between the tiles using a grout float or rubber grout trowel. Work in small sections, removing excess grout with a damp sponge as you go.
11. Clean and Seal: After grouting, clean off any remaining grout haze from the tiles using a clean sponge and water. Once the grout is fully dry, apply a sealer to protect the tiles and grout from stains and moisture.
12. Enjoy your newly tiled bathroom!