This means that you will have to find out how to install laminate flooring surrounding the cabinets. Hence, if there's something that you like, ask for a piece to be delivered to you so you are able to know whether it really is just what you are looking for. Maintaining the temperature to normal will surely avoid this issue. The best decision in installing laminate floors lower is using your entry way as a guide.
Images about Laminate Flooring Patterns Installation

The decor layer is imprinted with virtually any of an assortment of hardwood, stone or perhaps tile designs. Besides, you can enquire from neighbors who've in addition used laminate flooring to ensure you can get first hand info on how it may show up in the own home of yours. Ammonia is used to get rid of wax from floors, and also could actually have a similar impact on the majority of laminated floors' sealants.
11 Common Mistakes When Installing Laminate Floors

Laminate flooring is normally installed on a foam cushioning within a frame that you place into place around the exterior of the room before installation. A third option is a glue less laminate with a strategy that snaps the tongue and groove in concert, locking the floor straight into place. Hence, it is not surprising that it will look and feel just like real wood. Attach the move pieces in doorways as well as level changes.
How to Stagger Laminate Flooring Flooring-Experts.com

Random Staggeredjpg » How To Stagger Laminate Flooring Ztepelu

How To Install Laminate Over Hardwood: In 15 Easy Steps u2013 All
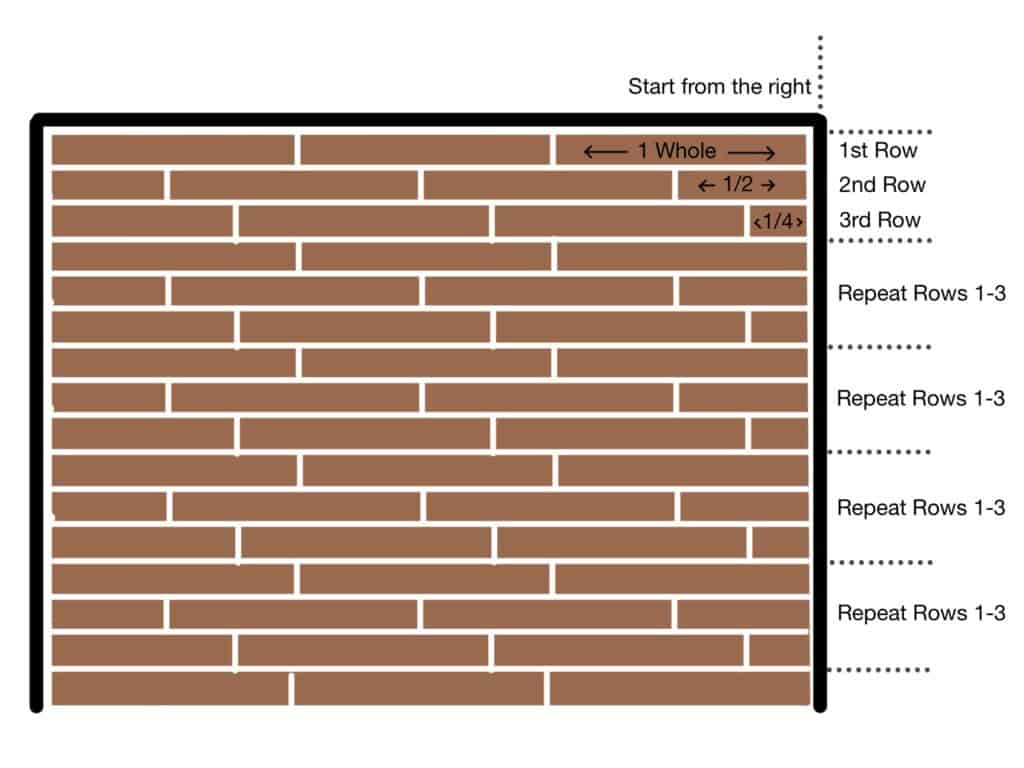
How to Stagger Laminate Flooring! – DIYist

Laminate Floor Installation Tips

How to Install Laminate Flooring
:max_bytes(150000):strip_icc()/how-to-lay-laminate-flooring-1822250-07-7fa831f76c8e420fb7f3a59fbebec516.jpg)
How To Make A Stagger Pattern For Laying Laminate Flooring (+
How to lay flooring part 3: laying locking laminate
How To Make A Stagger Pattern For Laying Laminate Flooring (+

How to Stagger Laminate Flooring [Case Study] – FloorTheory
How to Install Laminate Flooring
:max_bytes(150000):strip_icc()/how-to-lay-laminate-flooring-1822250-03-ebdb9a5b978646f4b55bd242d846fc6c.jpg)
Can Laminate Flooring Be Installed in a Herringbone Pattern

Related Posts:
- Direction Of Laminate Flooring In Bedroom
- Installing Laminate Flooring Trim Molding
- Traditional Living Laminate Flooring Reviews
- How To Nail Laminate Flooring
- Best Way To Clean Timber Laminate Flooring
- Laminate Flooring Up To Stairs
- Price To Install Laminate Flooring On Stairs
- Krono Aberdeen Oak Laminate Flooring
- How To Replace Laminate Flooring With Hardwood
- Red Gloss Laminate Flooring
Laminate Flooring Patterns Installation: A Comprehensive Guide
Introduction:
Laminate flooring has gained immense popularity in recent years due to its durability, affordability, and wide range of design options. One aspect that adds to its appeal is the ability to create various patterns during installation, allowing homeowners to personalize their spaces. In this comprehensive guide, we will explore different laminate flooring patterns and provide a step-by-step process for their installation.
I. Understanding Laminate Flooring Patterns:
Before delving into the installation process, it is crucial to familiarize yourself with different laminate flooring patterns. These patterns are created by arranging the laminate planks in specific ways, enhancing the visual appeal of your floor. Here are some popular patterns:
1. Straight Pattern:
The straight pattern is the simplest and most common choice for laminate flooring installation. It involves installing planks parallel to each other, creating a neat and linear look. This pattern works well in both small and large spaces, providing a timeless aesthetic.
FAQ:
Q: Can I install laminate flooring in any room?
A: Laminate flooring can be installed in almost any room except for areas with excessive moisture, such as bathrooms or laundry rooms.
2. Diagonal Pattern:
For those seeking a more visually stunning effect, the diagonal pattern offers an excellent choice. In this pattern, the planks are installed at a 45-degree angle to the walls, creating a dynamic and unique look. The diagonal pattern works particularly well in larger rooms as it can make them appear more spacious.
FAQ:
Q: Are there any specific tools required for diagonal pattern installation?
A: No special tools are needed for diagonal pattern installation. However, precise measuring and cutting of the planks are essential to achieve accurate angles.
3. Herringbone Pattern:
If you desire a classic and elegant look for your space, the herringbone pattern is an ideal choice. This pattern involves laying the planks at a 90-degree angle to each other, creating a distinctive V-shaped design. The herringbone pattern can add a touch of sophistication to any room, making it a popular choice for formal areas such as dining rooms or entryways.
FAQ:
Q: Can I install laminate flooring over existing vinyl or tile flooring?
A: Yes, laminate flooring can be installed over existing vinyl or tile flooring as long as the surface is flat, clean, and in good condition. It is essential to consult the manufacturer’s guidelines for specific instructions.
II. Preparing for Laminate Flooring Installation:
Once you have chosen the desired pattern for your laminate flooring, it is time to prepare for installation. Proper preparation ensures a smooth and successful installation process. Here are the necessary steps:
1. Acclimate the Laminate Flooring:
Before installation, it is crucial to acclimate the laminate flooring to the room’s temperature and humidity levels. This process allows the planks to adjust and prevents any potential warping or buckling after installation. Place the unopened boxes of laminate flooring in the room for at least 48 hours before installation.
2. Prepare the Subfloor:
The subfloor must be clean, dry, and level before installing laminate flooring. Remove any existing carpeting or debris from the floor and repair any uneven areas. If necessary, use a self-leveling compound to even out the subfloor.
3. Measure and Calculate:
Measure the dimensions of your room accurately to determine how many laminate planks you will need. It is advisable to purchase extra planks to account for any cutting mistakes Or future repairs. Use a calculator or consult with a professional to ensure accurate measurements and calculations.
4. Gather the Necessary Tools and Materials:
Before starting the installation process, gather all the tools and materials you will need. This may include laminate flooring planks, underlayment, adhesive, a tape measure, a pencil, a saw, a tapping block, spacers, and a rubber mallet. Having everything ready beforehand will streamline the installation process.
5. Install the Underlayment:
The underlayment is an essential component of laminate flooring installation as it provides cushioning, moisture resistance, and sound insulation. Roll out the underlayment over the entire subfloor and trim any excess material along the edges.
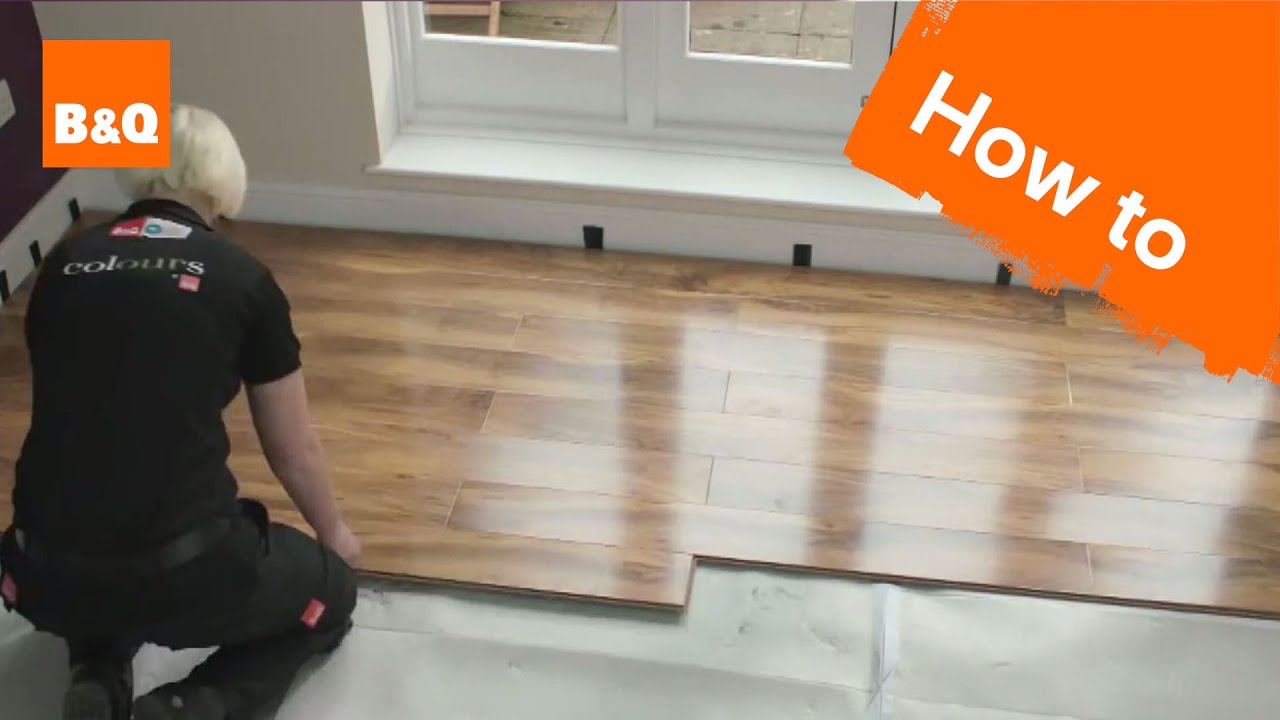
6. Begin Installing Laminate Flooring:
Start by laying the first row of laminate planks against the longest wall in the room. Place spacers between the planks and the wall to allow for expansion. Use a tapping block and rubber mallet to connect each plank tightly together. Continue installing subsequent rows, ensuring that each plank is securely locked in place.
7. Cut Planks as Needed:
During installation, you may need to cut planks to fit around corners or obstacles such as doorways or vents. Measure carefully and use a saw to make precise cuts. Remember to wear protective eyewear and follow all safety precautions while cutting.
8. Finish with Appropriate Trim:
Once the laminate flooring is installed, finish off the edges with appropriate trim pieces such as baseboards or quarter-round molding. These trim pieces not only provide a finished look but also help cover any gaps or expansion spaces along the walls.
III. Maintaining Laminate Flooring:
Proper maintenance is essential to keep your laminate flooring looking its best and prolong its lifespan. Here are some tips for maintaining laminate flooring:
1. Regular Cleaning:
Regularly sweep or vacuum the laminate flooring to remove any dirt or debris that can scratch the surface. Use a damp mop or cloth to clean up spills or stains promptly. Avoid using excessive water or harsh cleaning chemicals as they can damage the laminate.
2. Use Protective Pads:
Place felt or rubber pads on the bottom of furniture legs to prevent scratching or denting the laminate flooring when moving or rearranging furniture.
3. Avoid Excessive Moisture:
While laminate flooring is generally resistant to moisture, excessive exposure to water can cause damage. Wipe up any spills immediately and avoid wet mopping the floor.
4. Prevent Sun Damage:
Prolonged exposure to direct sunlight can cause fading or discoloration of laminate flooring. Use curtains, blinds, or UV-protective window film to minimize sun exposure.
5. Repair Damages Promptly:
If you notice any scratches, chips, or other damages on your laminate flooring, repair them promptly to prevent further deterioration. Consult with a professional for appropriate repair methods and materials.