The benefits having to deal with the wood floor of yours oiled is the fact that it is going to keep for longer and will additionally delay aging so you're free to keep the colour you initially purchased. Engineered wood flooring is made to be healthy, and solid wood floors could just not compete in this area. Another benefit would be that the factory finishes are generally much tougher than the polyurethane applied in the field.
Images about Old Wood Floor Repair

You might want to install solid wood flooring, though the budget of yours only provides engineered wood flooring that can keep going just provided that a solid wood species can. If you're truly concerned about sunlight's affect on the floors of yours, purchase a hardwood that's been colored by using a darker stain or perhaps buy a species like Northern Reddish Oak that is a less photosensitive species.
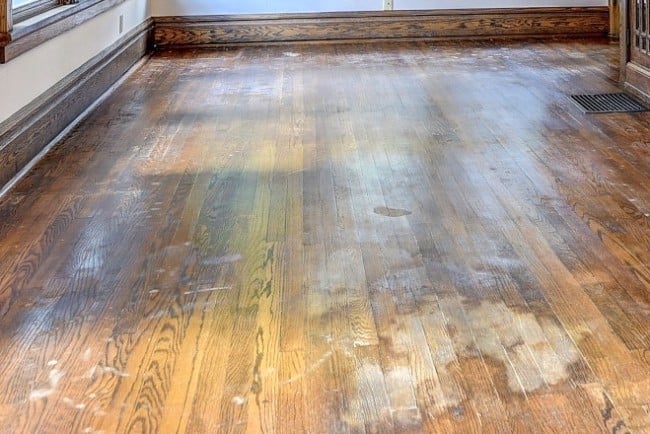
Hardwood Floor Restoration: After Years of Neglect

As a result of our accurate sanding throughout the lamination process for the engineered products and after, pieces are definitely more consistent in position, much more consistent in feel, fit collectively tighter, with no waste, gaps and cracks already loaded, and hardly any sanding needed after install until you should do a light display or even buff. You are able to still have that appealing hardwood warmth and appeal with an engineered floor.
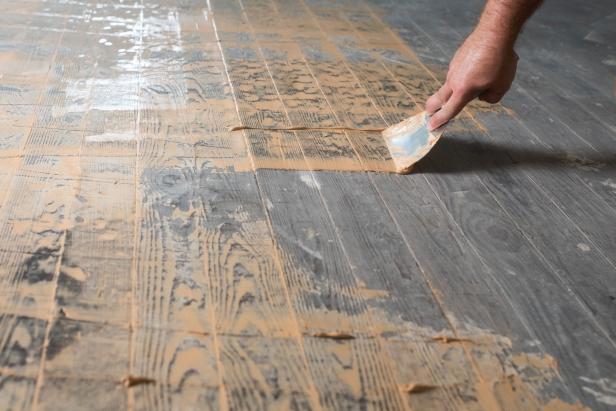
Repairing Your Old Wood Floors – E_M Custom Flooring

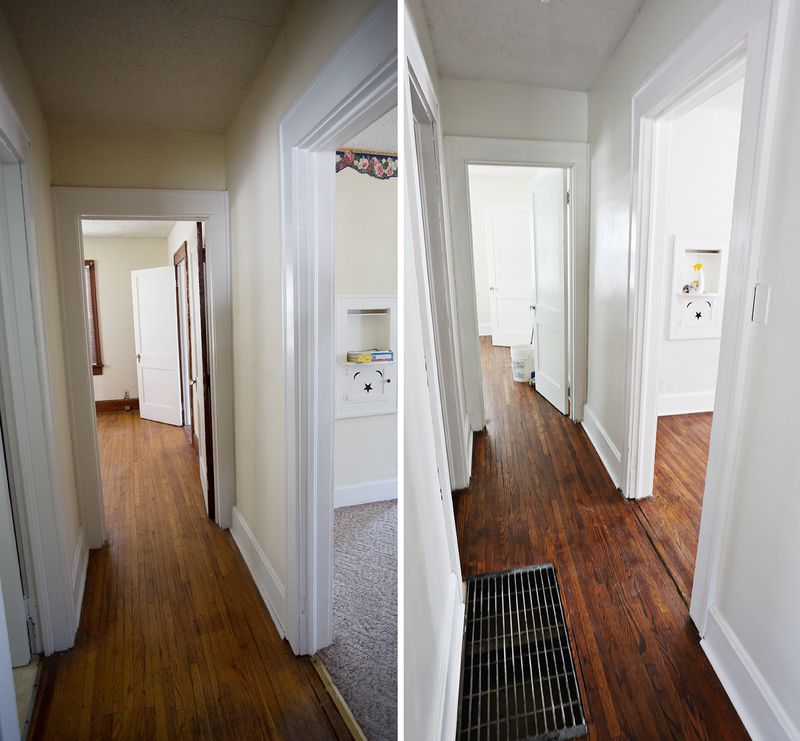
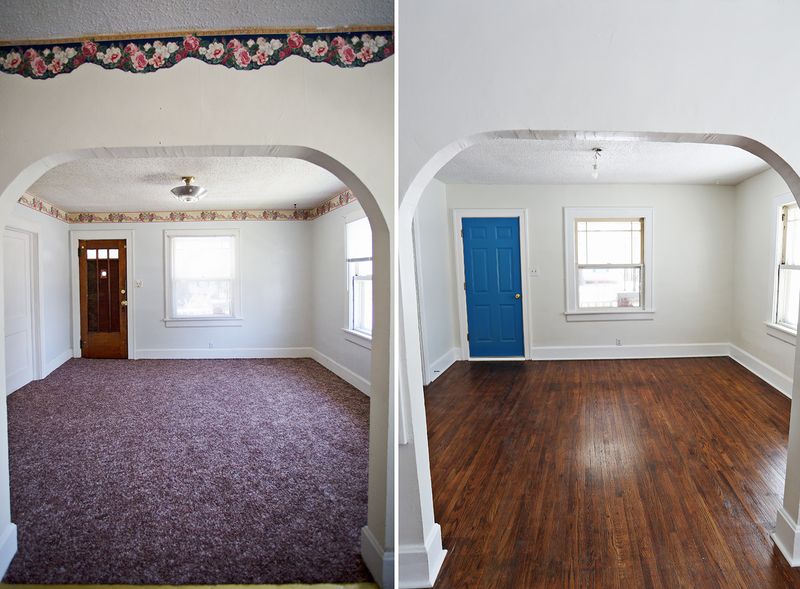
Refinishing Old Wood Floors – A Beautiful Mess
Hardwood Floor Restoration: After Years of Neglect

Refinishing Wood Floors 7 Easy Steps

How To Refinish Hardwood Floors – DIY Home Improvement HGTV
Hardwood Floor Restoration: After Years of Neglect

Refinishing Old Wood Floors – A Beautiful Mess
7 Things to Know Before You Refinish Hardwood Floors
/before-refinishing-old-hardwood-floors-4065469-hero-a4b6cc14f14e4b59a833515bd9d70f33.jpg)
Restoring the 100-year old flooring in the library – Part 1

Repairing 100 Year Old Wood Floors Duffy Floors

Hardwood floor refinishing in my vintage (100-year-old) home
Hardwood Floor Repair – This Old House
/cdn.vox-cdn.com/uploads/chorus_asset/file/19491004/wood_floors_x.jpg)
Related Posts:
- Canadian Maple Engineered Wood Flooring
- Bordeaux Pine Wood Flooring
- Reclaimed Wood Flooring Ideas
- White Wood Floor Bathroom
- Outdoor Wood Flooring Planks
- Wood Floor Sealing Options
- Bamboo Solid Wood Flooring Reviews
- Wood Floors White Baseboards
- Can You Use Engineered Wood Flooring In A Bathroom
- Wood Floor Out Of Pallets
Old Wood Floor Repair: Restoring Beauty and Durability to Your Floors
Introduction:
Wooden floors have a timeless charm and add warmth to any space. However, over time, they may start showing signs of wear and tear, leaving you with the need for repairs. Old wood floor repair is a process that can bring back the beauty and durability of your floors. In this article, we will guide you through the various aspects of repairing old wood floors, including common issues faced, step-by-step repair methods, and frequently asked questions.
I. Identifying Common Issues:
1. Scratches and Dents:
One of the most common issues with old wood floors is scratches and dents caused by heavy furniture, pet claws, or regular foot traffic. These imperfections not only detract from the floor’s appearance but also compromise its structural integrity.
FAQ 1: Can I repair minor scratches myself?
Answer: Yes, minor scratches can be repaired using touch-up kits or simple DIY methods. For instance, applying a mixture of olive oil and vinegar on the scratch can help minimize its visibility. However, for deeper scratches or extensive damage, it’s best to seek professional assistance.
2. Gaps and Squeaks:
As wood ages and contracts due to changes in humidity levels, gaps may develop between floorboards. These gaps not only mar the aesthetics but also allow drafts to seep in and create squeaking noises when walked upon.
FAQ 2: How can I fix gaps between floorboards?
Answer: Simple fixes include using wood putty or filler to fill small gaps. However, for larger gaps or multiple areas affected, it’s recommended to hire a professional who can assess the underlying cause and employ proper techniques such as lifting the boards and reattaching them securely.
3. Water Damage:
Water spills or leaks can cause significant damage to wooden floors over time. This may result in warping, discoloration, or even mold growth if left unattended.
FAQ 3: Can water-damaged wood floors be repaired?
Answer: Yes, water-damaged wood floors can often be repaired. The extent of the damage will determine the repair method. In minor cases, sanding and refinishing the affected area might suffice. However, for severe damage, it may be necessary to replace the damaged boards entirely.
II. Step-by-Step Repair Methods:
1. Preparing for Repair:
Before diving into the repair process, it’s crucial to prepare the area properly. This involves removing furniture and rugs from the floor, thoroughly cleaning the surface, and ensuring proper ventilation.
2. Assessing the Damage:
Carefully examine the floor to identify all issues that need to be addressed. Take note of scratches, gaps, squeaks, or any other visible damage. It’s essential to have a clear understanding of what needs to be fixed before proceeding further.
3. Sanding and Refinishing:
Sanding is an integral part of old wood floor repair as it helps remove surface imperfections and prepares the floor for refinishing. Using a drum sander or orbital sander, start with a coarse-grit sandpaper and gradually move to finer grits until achieving a smooth surface.
4. Filling Gaps and Cracks:
Once the floor has been sanded and cleaned, address gaps and cracks between floorboards using an appropriate filler or putty. Choose a product that matches your wood floor color for seamless blending.
5. Staining and Finishing:
If desired, The repaired areas can be stained to match the rest of the floor. Apply the stain evenly and allow it to dry completely. Once the stain has dried, apply a protective finish such as polyurethane or varnish to seal the wood and give it a polished look.
6. Professional Assistance:
If you are unsure about any step or if the damage is extensive, it’s best to seek professional assistance. They have the expertise and tools required to handle complex repairs and ensure a satisfactory outcome.
III. Preventive Measures:
1. Use Protective Mats and Rugs:
Place mats or rugs in high-traffic areas, near entrances, or under furniture to prevent scratches and minimize wear on the wood floor.
2. Maintain Proper Humidity Levels:
Wood floors are sensitive to changes in humidity levels. Use a humidifier in dry seasons and ensure proper ventilation in humid conditions to prevent gaps, warping, or cupping of the floorboards.
3. Clean Spills Immediately:
Wipe up any spills or leaks immediately to prevent water damage. Standing water can seep into the wood, causing irreversible damage over time.
4. Regular Cleaning and Maintenance:
Sweep or vacuum your wood floors regularly to remove dirt and debris that can scratch the surface. Use a damp mop with a mild cleaner specifically formulated for wood floors to keep them clean and well-maintained.
By following these repair methods and preventive measures, you can extend the lifespan of your wooden floors and keep them looking beautiful for years to come.