The glazed type can be bought in a variety of sorts which include gloss, matt, dull, and satin. Furthermore, one must have to spend information that is fantastic to sealing the surface with basic pH sealers after the set up. Even if you are ready to revive the appearance of your marble floor by using a restorer remedy, pH parameter should be given its due value.
Images about Polishing Marble Floors Yourself

In the event you really want your marble tiles to stick out, you might want to mix it using a countertop to match. Cultured marble is a little tougher as compared to natural marble. If perhaps you've the fundamental DIY skills, you may well discover that using the marble tiles isn't likely to be a whole lot more complex than laying the ceramic or travertine flooring. You can quickly find matching patterns to suit the home decor of yours.
10 mistakes to avoid when polishing your marble floor

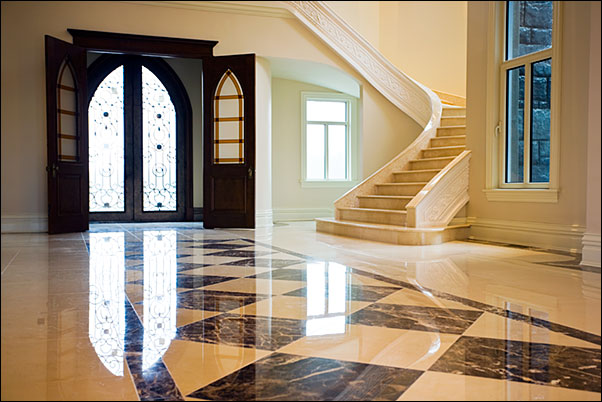
Marble floors are great to enjoy in the home of yours. Marble have hypoallergenic properties, it will not pick up pollen, other dirt or pet hair, and it is obviously reluctant to bacteria. This's particularly important if you are planning on using marble flooring in your kitchen where it can be subject to spills and a lot of foot prints. Without any them, the approach to cleaning marble will definitely be long and exhausting.
3 DIY Marble Floor Polishing That Will Kill Your Marbleu0027s Shine

3 Simple Ways to Polish a Marble Floor by Hand – wikiHow

Do It YourSelf Marble Restoration u0026 Polishing thanks to SuperShine
How to Polish Marble Floor? All you need to know! – Wipeout
Crash Course: How To Clean, Polish and Maintain Marble Floors
How to Polish Your Marble Flooring at Home – DIY Hacks Luce Blog
How to Polish Marble Floor? All you need to know! – Wipeout

How to Clean Marble Floors DIY Projects Craft Ideas u0026 How Tou0027s for
Crash Course: How To Clean, Polish and Maintain Marble Floors

Bring Your Floors Back to Life with Affordable Marble Restoration Designing Spaces
How Often Should You Polish Marble Floors?
Remedy Surface Care – Marble Floor u0026 Surface Polishing Experts
Related Posts:
- Cost Of Marble Flooring Per Square Foot In Kolkata
- Marble Floor Grinding Machine
- Hexagon Mosaic Marble Floor Tile
- Marble Floor With Wood Inlay
- Bathroom Marble Floor Cleaner
- How To Restore Marble Floor Shine
- What Do You Use To Clean Marble Floors
- Makrana Marble Flooring
- How To Refinish Marble Floors
- White Marble Flooring Designs Pictures
Polishing Marble Floors Yourself
Marble is a luxurious and elegant material that adds a touch of sophistication to any space. However, over time, marble floors can lose their shine and become dull due to wear and tear. Professional marble polishing services can be quite expensive, but the good news is that you can polish marble floors yourself with the right tools and techniques. In this article, we will guide you through the process of polishing marble floors step by step, providing you with all the information you need to achieve stunning results.
1. Gathering the Necessary Tools and Materials
Before diving into the process of polishing your marble floors, it’s essential to gather all the necessary tools and materials. Here are some items you’ll need:
– Soft-bristle broom or vacuum cleaner: Start by thoroughly cleaning your marble floors to remove any dust or debris.
– pH-neutral cleaner: Use a pH-neutral cleaner specifically designed for marble surfaces to clean any stains or spills.
– Microfiber mop or soft cloth: This will be used to apply the cleaning solution and wipe away excess moisture.
– Diamond-polishing pads: These pads are available in various grits and are specifically designed for polishing marble surfaces.
– Polishing machine or hand-held polisher: Depending on your preference and budget, you can choose between a machine or hand-held polisher.
– Water source: You’ll need access to water to wet the diamond-polishing pads during the polishing process.
– Marble sealer: Once the polishing is complete, applying a marble sealer will help protect your floors from future damage.
Frequently Asked Questions:
Q: Can I use any cleaner on my marble floors?
A: No, it’s crucial to use a pH-neutral cleaner specifically formulated for marble surfaces. Harsh chemicals or acidic cleaners can damage the marble.
Q: Do I need to purchase a specific type of mop or cloth?
A: Yes, it’s recommended to use a microfiber mop or a soft cloth to avoid scratching or damaging the marble surface.
2. Preparing the Marble Surface
Before you start the polishing process, it’s important to prepare the marble surface adequately. Follow these steps:
Step 1: Clear the area – Remove any furniture or objects from the area you will be working on. This will allow you to have a clear and unobstructed workspace.
Step 2: Clean the marble – Use a soft-bristle broom or vacuum cleaner to remove any loose dirt or debris from the floor. Then, using a pH-neutral cleaner, follow the manufacturer’s instructions to clean any stains or spills on the marble surface.
Step 3: Rinse and dry – After cleaning, rinse the marble surface thoroughly with clean water to remove any residue from the cleaning solution. Use a microfiber mop or soft cloth to wipe away excess moisture and ensure that the surface is completely dry before proceeding.
Frequently Asked Questions:
Q: Can I skip the cleaning step if my marble floors look relatively clean?
A: No, even if your marble floors appear clean, it’s essential to remove any dust or debris before polishing. This will ensure a smooth and even polishing process.
Q: How often should I clean my marble floors?
A: It’s recommended to clean your marble floors regularly using a pH-neutral cleaner. The frequency depends on foot traffic and usage but aim for at least once a week.
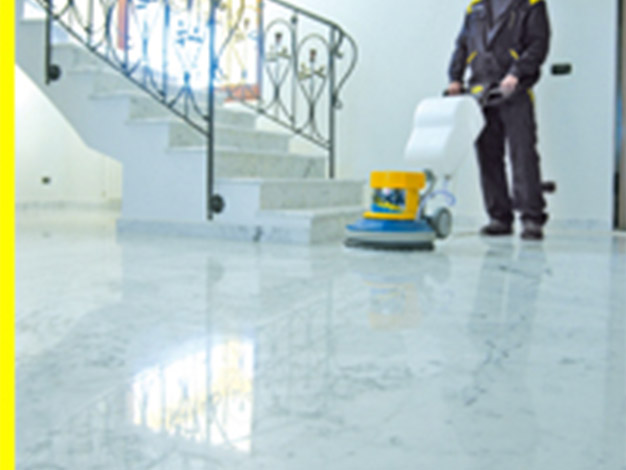
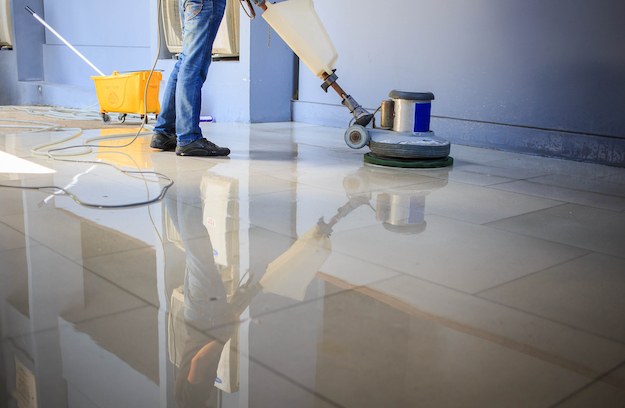
3. Polishing the Marble Floors
Now that your marble floors are clean and dry, it’s time to start polishing. Here are the steps to follow:
Step 1: Attach the appropriate grit diamond-polishing pad to your polishing machine or hand-held polisher. The grit you start with will depend on the condition of your marble surface. If it’s in good condition, you can start with a higher grit (e.g., 2000). If there are scratches or dull spots, start with a lower grit (e.g., 400).
Step 2: Wet the diamond-polishing pad with water from your water source. This will lubricate the pad and prevent it from overheating during the polishing process.
Step 3: Start polishing by moving the machine or polisher in a back-and-forth motion over the marble surface. Apply even pressure and make sure to cover the entire area.
Step 4: Check the progress regularly. As you polish, you’ll notice that the marble surface becomes smoother and more shiny. If necessary, switch to a higher grit diamond-polishing pad to achieve the desired level of polish.
Step 5: Continue polishing until you’re satisfied with the results. Make sure to keep the diamond-polishing pad wet throughout the process to prevent it from becoming clogged or damaged.
Step 6: Once you’re done polishing, rinse the marble surface again with clean water to remove any residue from the polishing process. Use a microfiber mop or soft cloth to dry the surface thoroughly.
Frequently Asked Questions:
Q: How long does it take to polish marble floors?
A: The time it takes to polish marble floors depends on various factors such as the size of the area, the condition of the marble, and your experience with polishing. It can range from a few hours for a small room to multiple days for larger areas.
Q: Can I polish my marble floors by hand instead of using a machine?
A: Yes, if you prefer a hand-held polisher or do not have access to a machine, you can still achieve good results. However, it may require more time and effort compared to using a machine.
4. Applying Marble Sealer
After polishing, it’s important to apply a marble sealer to protect your floors from future damage. Here’s how:
Step 1: Ensure the marble surface is clean and dry.
Step 2: Follow the manufacturer’s instructions on the marble sealer bottle for application. Typically, you’ll need to pour a small amount of sealer onto the floor and spread it evenly using a clean cloth or mop.
Step 3: Allow the sealer to penetrate the marble surface for the recommended time (usually around 10-15 minutes).
Step 4: Use a clean cloth or mop to wipe away any excess sealer from the surface.
Step 5: Let the sealer cure according to the manufacturer’s instructions before allowing any foot traffic on the floor.
Frequently Asked Questions:
Q: How often should I apply marble sealer?
A: The frequency of applying marble sealer depends on various factors such as foot traffic and usage. As a general guideline, it’s recommended to reapply sealer every 6-12 months for optimal protection.
Q: Can I use any type of marble sealer?
A: It’s important to choose a marble sealer that is specifically formulated for use on marble surfaces. Using the wrong type of sealer can lead to discoloration or damage to your floors.
Following these steps and guidelines will help you effectively polish and maintain your marble floors, keeping them looking beautiful for years to come.