While you're getting answers to all those questions, understand that if you have the flooring professionally installed, you are going to save relationships which you have together with the family and friends that you had been gon na demand to aid you with this project. You will find many different types of real wood flooring, every one with a look that's entirely its own.
Images about Wood Floor Tile Border

You can put in built wood flooring that's just as gorgeous and lasts just as long as a good wood floor without the excessive price as well as the high maintenance that hard wood flooring can require. Today's laminate floor surfaces are created using a photographic picture of wood, marble, or tile which is bonded to fiberboard, backed with melamine plastic and coated with light weight aluminum oxide.
Different wood floors in house with glass tile border Living

Having said that, if you are able to manage it, strong oak wood floors are perfect and over time offers the very best value. An added benefit is the fact that wood flooring fits with any decor both tomorrow and today! It should come as no real shock that wood is one of the most popular fashion among homeowners but despite the popularity, few individuals know how to properly clean and keep wood floors.
Oshkosh Designs – Wood Flooring Inlays for Award Winning Homes

Pin on Pictures

Decorative Ceramic Tile Borders – Ideas on Foter Wood tile

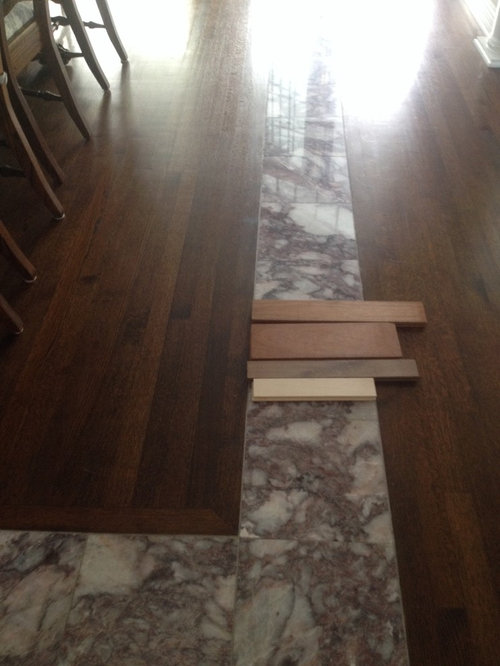
What wood to use in my hardwood floor border?
Mud room floor. Wood tile border Flooring, Tile floor, Tile

Top 70 Best Tile To Wood Floor Transition Ideas – Flooring Designs
![]()
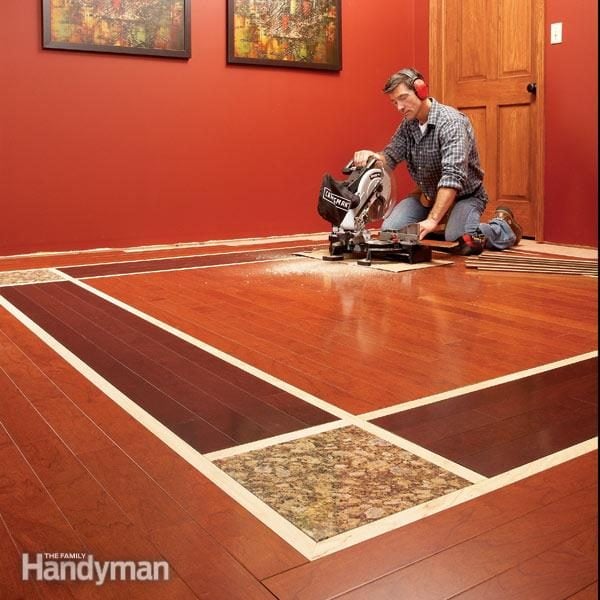
DIY Hardwood Floors: Lay a Contrasting Border Family Handyman
Rooms have hard hardwood floors with a tile border. Attractive

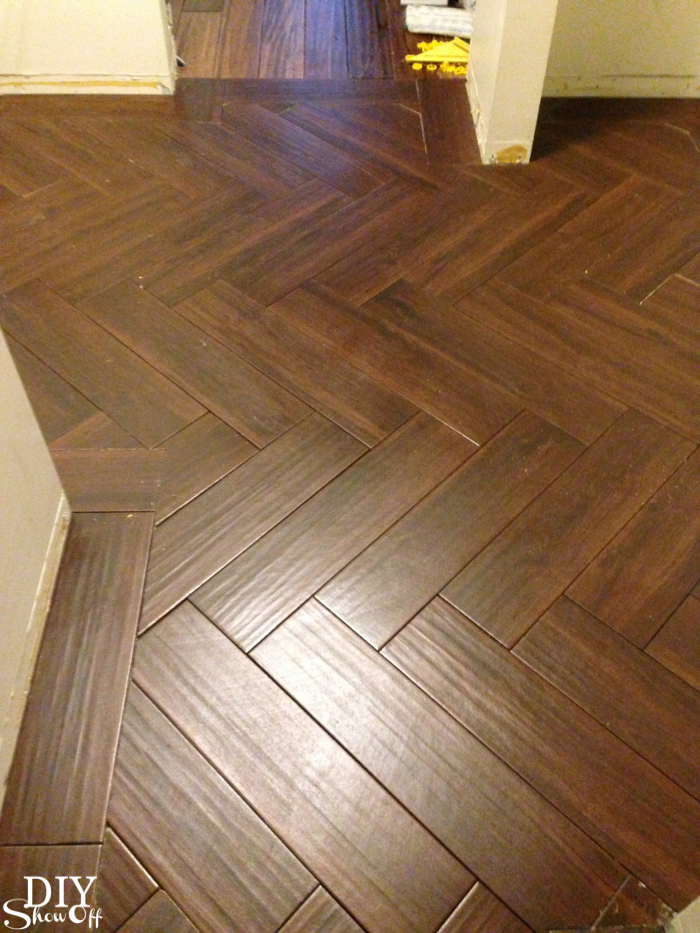
Laundry Room Herringbone Pattern Tile Floor Details – DIY Show Off
Tips for Effective Hardwood Floor Border Placement u2013 Oshkosh Designs

Handling Flooring Transitions: Wood to Tile, Carpet to Tile
![]()
Adding a Border to a Hardwood Floor JLC Online

Related Posts:
- Canadian Maple Engineered Wood Flooring
- Bordeaux Pine Wood Flooring
- Reclaimed Wood Flooring Ideas
- White Wood Floor Bathroom
- Outdoor Wood Flooring Planks
- Wood Floor Sealing Options
- Bamboo Solid Wood Flooring Reviews
- Wood Floors White Baseboards
- Can You Use Engineered Wood Flooring In A Bathroom
- Wood Floor Out Of Pallets
Wood Floor Tile Border: Enhancing the Beauty of Your Flooring
Introduction:
Wood floor tile borders are an exquisite addition to any flooring, adding a touch of elegance and sophistication. Whether you have hardwood, laminate, or vinyl flooring, a wood floor tile border can transform your space and create a stunning visual impact. In this article, we will explore the various aspects of wood floor tile borders, from their installation process to maintenance tips and everything in between. So, let’s dive in and discover how you can enhance the beauty of your flooring with a wood floor tile border.
1. Understanding Wood Floor Tile Borders:
A wood floor tile border is an inlay technique that involves using different types of wood to create decorative patterns or designs along the edges of your flooring. These borders can be installed in a variety of configurations, such as straight lines, mosaics, or intricate geometric patterns. The purpose of a wood floor tile border is to add contrast, depth, and visual interest to your flooring while seamlessly blending with the overall aesthetics of the room.
FAQs:
Q: Can I install a wood floor tile border on any type of flooring?
A: Yes, you can install a wood floor tile border on hardwood, laminate, engineered wood, or vinyl flooring. However, it is important to ensure that your subfloor is properly prepared and level before installation.
Q: How wide should a wood floor tile border be?
A: The width of the wood floor tile border depends on personal preference and the size of the room. Generally, borders ranging from 2 to 6 inches wide are most commonly used.
2. Installation Process:
Installing a wood floor tile border requires precision and attention to detail. Here is a step-by-step guide on how to install a wood floor tile border:
Step 1: Prepare the Subfloor – Ensure that your subfloor is clean, dry, and level. Remove any existing baseboards or moldings.
Step 2: Measure and Plan – Measure the dimensions of your room and determine the layout and design of your wood floor tile border. Mark the border lines using chalk or masking tape.
Step 3: Cut the Tiles – Cut the wood tiles according to your desired design using a miter saw or a table saw. Sand the edges to ensure a smooth finish.
Step 4: Apply Adhesive – Apply a thin layer of adhesive to the backside of each wood tile using a notched trowel. Press them firmly onto the subfloor within the marked border lines.
Step 5: Fill in the Gaps – Once all the wood tiles are in place, use wood filler or epoxy resin to fill in any gaps between the tiles. Sand down any excess filler for a seamless finish.
Step 6: Finish with Sealant – Apply a protective sealant over the entire wood floor tile border to enhance its durability and longevity. Allow it to dry completely before walking on the floor.
FAQs:
Q: Can I install a wood floor tile border myself, or should I hire a professional?
A: While it is possible to install a wood floor tile border yourself, it requires precise measurements and cutting skills. Hiring a professional installer is recommended for achieving flawless results.
Q: How long does it take to install a wood floor tile border?
A: The installation time may vary depending on the size of the room and complexity of the design. On average, it takes about one to three days to complete the installation process.
3. Maintenance Tips :
– Regularly sweep or vacuum the wood floor tile border to remove dirt and debris.
– Wipe up spills immediately to prevent staining or damage to the wood.
– Use a damp mop or cloth with a mild cleaner specifically designed for wood floors to clean the surface. Avoid using excessive water or harsh chemicals.
– Place doormats at entryways to minimize the amount of dirt and grit brought onto the wood floor tile border.
– Avoid dragging heavy furniture across the border, as it can scratch or dent the wood.
– Use furniture pads or coasters under furniture legs to protect the border from scratches.
– Periodically check for any loose tiles and re-adhere them using adhesive if necessary.
– Avoid prolonged exposure to direct sunlight, as it can cause fading or discoloration of the wood.
– Consider reapplying a protective sealant every few years to maintain the durability and appearance of the wood floor tile border.
By following these maintenance tips, you can ensure that your wood floor tile border remains in excellent condition for years to come. Installing a wood floor tile border can be a great way to add visual interest and elegance to your space. Here are the steps to follow for installation:
1. Prepare the Subfloor – Ensure that the subfloor is clean, dry, and level. Remove any existing flooring or carpeting and repair any cracks or uneven areas.
2. Plan the Design – Determine the layout and design of your wood floor tile border. Mark the border lines using chalk or masking tape.
3. Cut the Tiles – Cut the wood tiles according to your desired design using a miter saw or a table saw. Sand the edges to ensure a smooth finish.
4. Apply Adhesive – Apply a thin layer of adhesive to the backside of each wood tile using a notched trowel. Press them firmly onto the subfloor within the marked border lines.
5. Fill in the Gaps – Once all the wood tiles are in place, use wood filler or epoxy resin to fill in any gaps between the tiles. Sand down any excess filler for a seamless finish.
6. Finish with Sealant – Apply a protective sealant over the entire wood floor tile border to enhance its durability and longevity. Allow it to dry completely before walking on the floor.
FAQs:
Q: Can I install a wood floor tile border myself, or should I hire a professional?
A: While it is possible to install a wood floor tile border yourself, it requires precise measurements and cutting skills. Hiring a professional installer is recommended for achieving flawless results.
Q: How long does it take to install a wood floor tile border?
A: The installation time may vary depending on the size of the room and complexity of the design. On average, it takes about one to three days to complete the installation process.
Maintenance Tips:
– Regularly sweep or vacuum the wood floor tile border to remove dirt and debris.
– Wipe up spills immediately to prevent staining or damage to the wood.
– Use a damp mop or cloth with a mild cleaner specifically designed for wood floors to clean the surface. Avoid using excessive water or harsh chemicals.
– Place doormats at entryways to minimize the amount of dirt and grit brought onto the wood floor tile border.
– Avoid dragging heavy furniture across the border, as it can scratch or dent the wood.
– Use furniture pads or coasters under furniture legs to protect the border from scratches.
– Periodically check for any loose tiles and re-adhere them using adhesive if necessary.
– Avoid prolonged exposure to direct sunlight, as it can cause fading or discoloration of the wood.
– Consider reapplying a protective sealant every few years to maintain the durability and appearance of the wood floor tile border.
By following these maintenance tips, you can ensure that your wood floor tile border remains in excellent condition for years to come.