A polished concrete floor does not require regular cleaning, meaning that you can cleanse them alternatively or whenever you're absolutely free. Concrete is extremely long-lasting and hardly ever needs to be replaced though you might need to touch up the finish that is a pretty easy and inexpensive task. Along with these advantages, one of the main advantages of concrete floors is the pricing of its.
Images about Fixing Timber To Concrete Floor
While concrete sprucing up shines concrete to an excessive gloss, it opens up the skin pores in the concrete. Polished concrete floors makes perfect sense for those who own a business that need an appealing floor that doesn't have to be waxed at the end of each day. Polished concrete flooring is an affordable option to other floorings and can give you the identical mirror as finish.
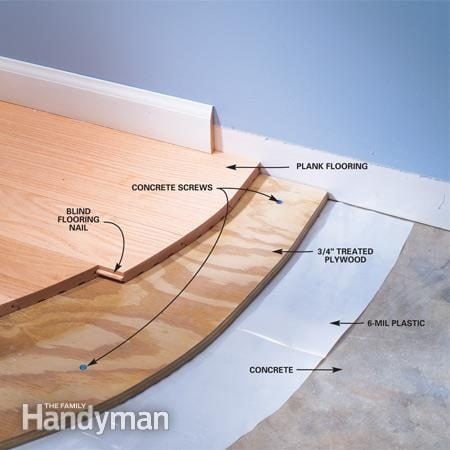
Installing Wood Flooring Over Concrete (DIY)
The benefits that a single may buy from the polished concrete floors are extremely numerous and several of them include the fact that the polished concrete floors provide a real very low cost solution to the notion of floors as a well as giving a good choice in terms of environmentally friendly alternatives.
Drop the right anchor! – PlaceMakers
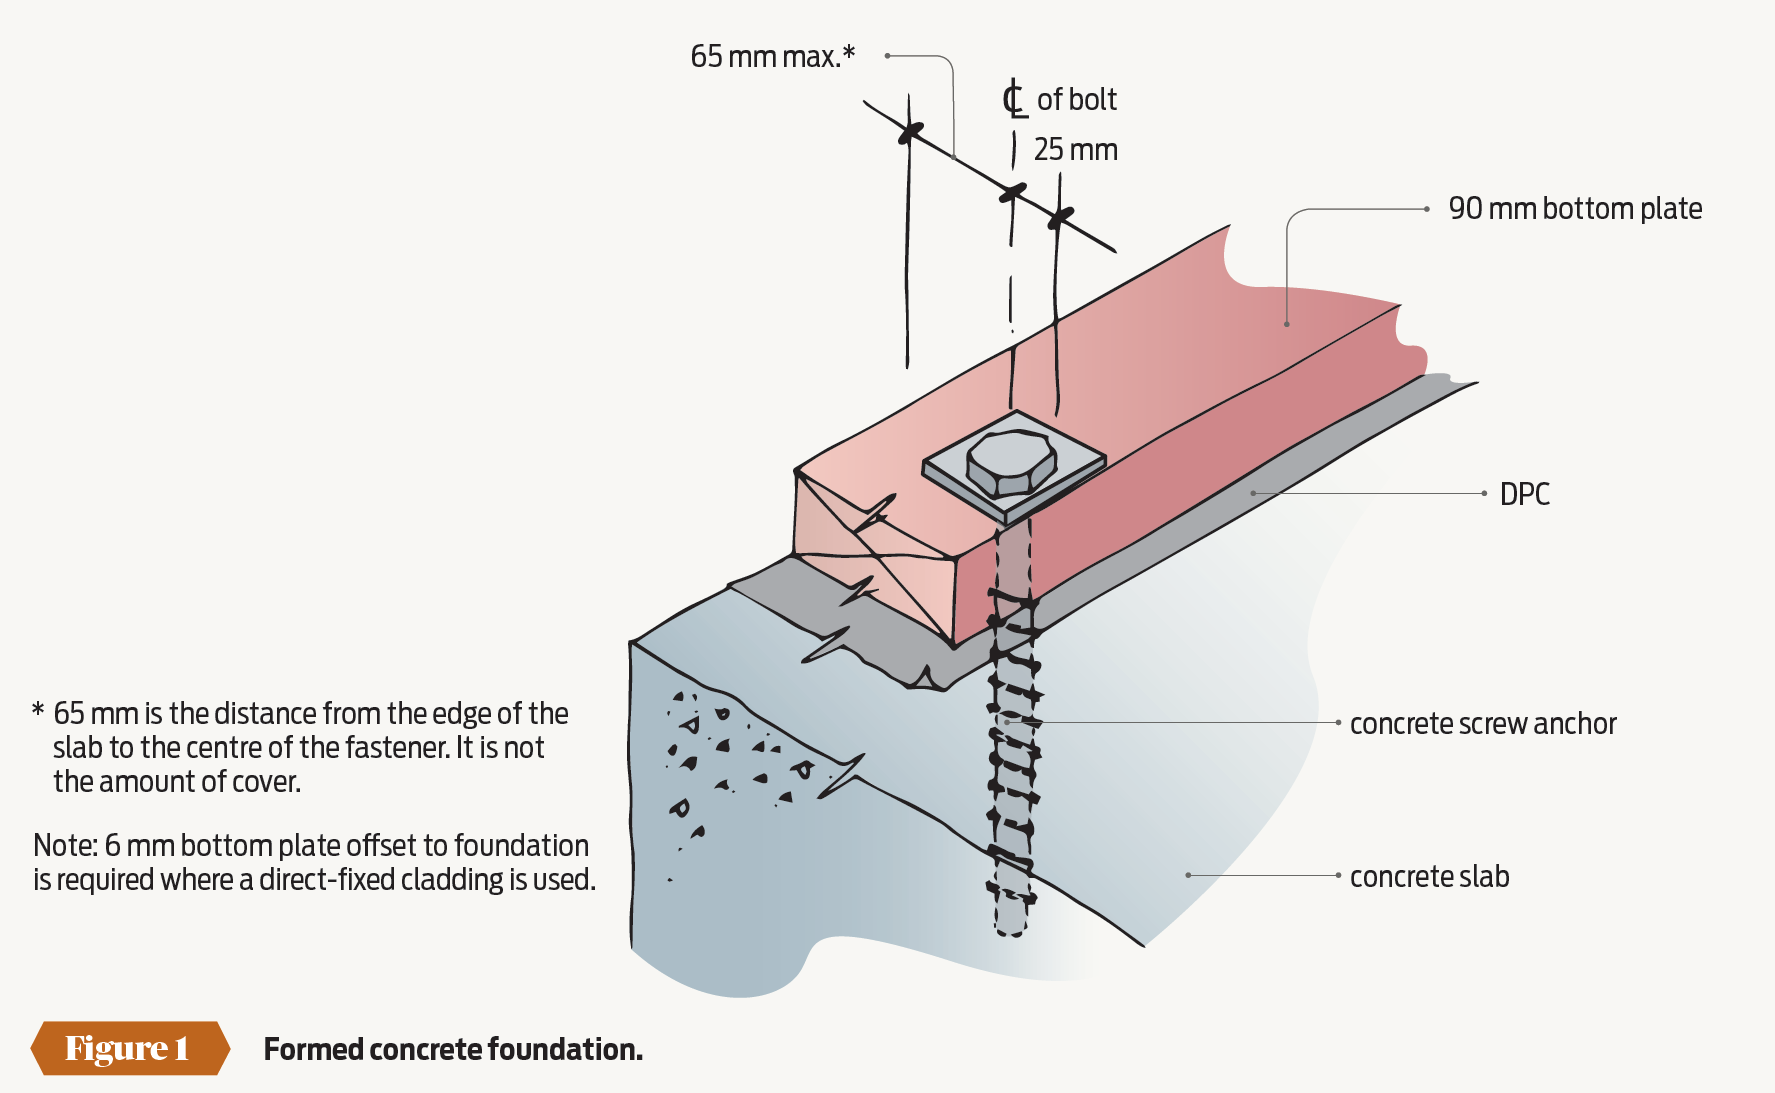
Screw-type anchors for bottom plates BRANZ Build

7 Ways to Fasten an Interior Wall to Concrete for a Secure Hold

Masonry/Concrete to Timber – Timber Frame HQ

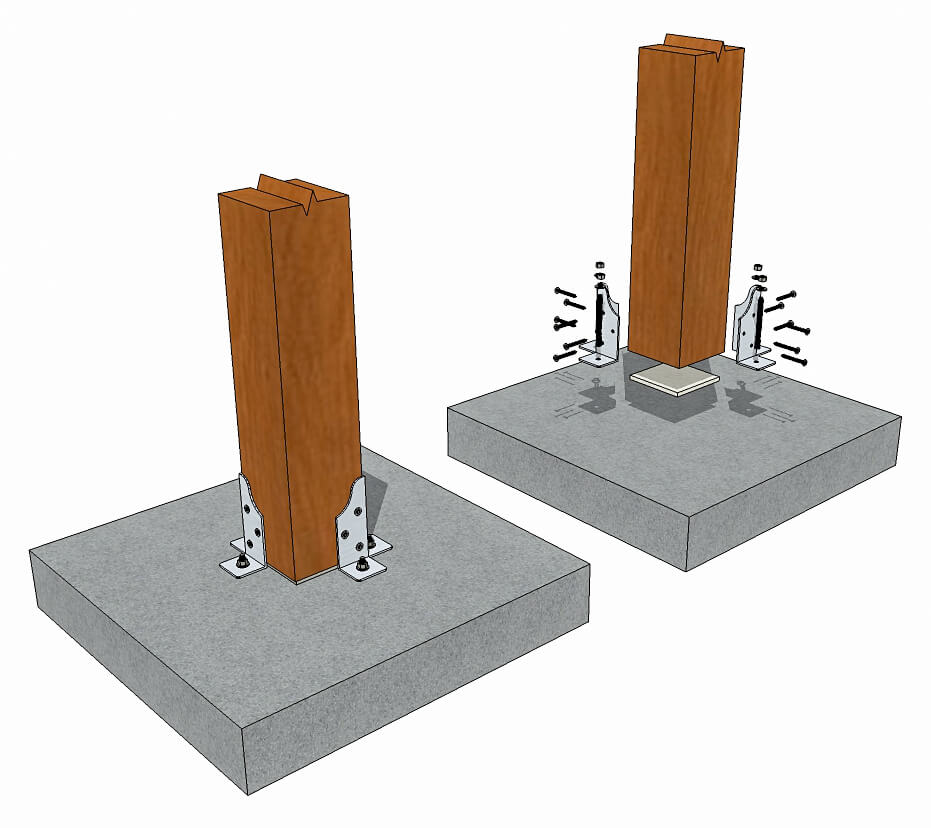
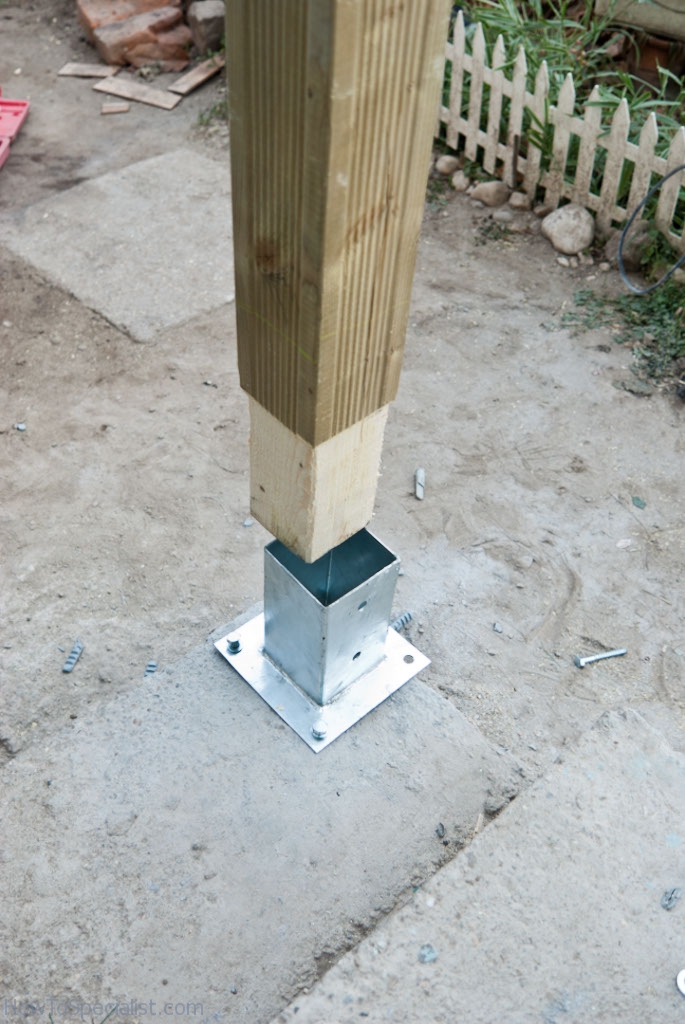
How to anchor post to concrete HowToSpecialist – How to Build
How to Attach Wood to Concrete Without Drilling

Installing a Hardwood Floor Over a Concrete Slab – American
Fitting Hardwood Floor To Concrete – Wood and Beyond Blog

Carpenter drilling. Carpenter fixing a timber framework into a

How To Fasten Wood To Concrete
View topic – Fixing timber battens to concrete u2022 Home Renovation

7 Ways to Fasten an Interior Wall to Concrete for a Secure Hold

Related Posts:
- Behr Epoxy Concrete Floor Paint
- Concrete Floor Preparation For Wood Flooring
- Epoxy Paint For Concrete Floors Colors
- Rent Concrete Floor Cleaner
- Heated Concrete Floor Tubing
- Concrete Floor Staining Process
- Concrete Floor Interior Design
- Concrete Floors In Your Home
- Cost Of Poured Concrete Floor
- Outdoor Polished Concrete Floors
Fixing Timber to Concrete Floor
When it comes to renovating or building a new space, one of the common challenges is fixing timber to a concrete floor. Whether you want to install timber flooring or build a wooden structure on top of the concrete, it is essential to know the correct methods and techniques to ensure a secure and long-lasting bond. In this article, we will explore the step-by-step process of fixing timber to a concrete floor, along with some frequently asked questions related to this topic.
I. Preparation
Before starting the process of fixing timber to a concrete floor, it is crucial to prepare both surfaces thoroughly. This preparation stage ensures that the timber adheres well to the concrete and minimizes any potential issues in the future.
1. Clean the Concrete Surface:
Begin by removing any dirt, debris, or loose particles from the concrete surface. Use a broom or vacuum cleaner to sweep away loose dirt, and then use a damp cloth or mop to remove any remaining dust or stains. Allow the surface to dry completely before proceeding.
2. Level the Concrete:
Check for any uneven spots or high points on the concrete floor. These irregularities can affect the stability and appearance of the timber installation. If you find any significant irregularities, consider using self-leveling compound or grinding down high spots to create a smooth and even surface.
3. Moisture Testing:
Concrete floors can retain moisture, which can lead to issues such as warping or mold growth in timber installations. Before fixing timber, it is essential to conduct a moisture test on the concrete surface. Several moisture testing methods are available, including calcium chloride tests and relative humidity tests. Choose an appropriate method based on your project’s requirements and consult with a professional if needed.
FAQs:
Q1: How long should I wait for the concrete floor to dry before fixing timber?
A1: The drying time for a concrete floor depends on various factors such as humidity levels, temperature, and thickness of the concrete. As a general guideline, it is recommended to wait at least 24-48 hours after cleaning the surface before fixing timber. However, it is crucial to conduct a moisture test to ensure the concrete is sufficiently dry.
Q2: Can I fix timber to a concrete floor with adhesive alone?
A2: While adhesive can be used to fix timber to a concrete floor, it is not recommended as the sole method of attachment. Adhesive alone may not provide enough structural support and can lead to instability or failure over time. It is best to combine adhesive with mechanical fixings such as screws or nails for a secure installation.
II. Fixing Methods
Once the preparation stage is complete, you can proceed with fixing the timber to the concrete floor. Several methods are available for securing timber, depending on the type of installation and personal preferences.
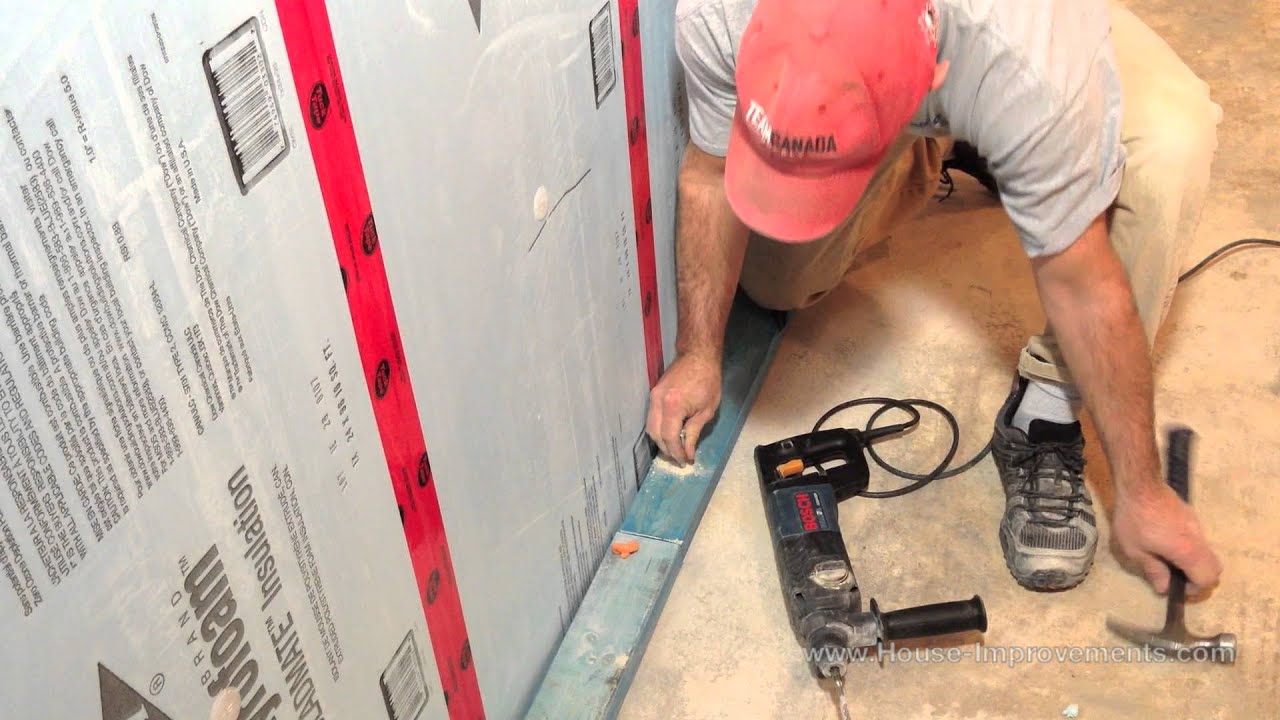
1. Direct Fixing:
Direct fixing involves attaching the timber directly to the concrete floor using mechanical fixings such as screws or nails. This method is commonly used for installing timber flooring or fixing wooden structures permanently.
To fix timber using this method, follow these steps:
a) Pre-drill Holes:
Using a masonry drill bit slightly smaller than the diameter of your screws or nails, pre-drill holes into the timber at regular intervals. Ensure that the holes are deep enough to accommodate the length of the fasteners without penetrating through the other side.
b) Mark Positions:
Mark the positions on the concrete where you will be driving in your fasteners. You can Use a pencil or chalk to make these marks. Ensure that the marks are evenly spaced and align with the pre-drilled holes in the timber.
c) Attach Timber:
Using a hammer or drill, drive in the screws or nails through the pre-drilled holes in the timber and into the marked positions on the concrete floor. Make sure to apply sufficient force to securely fasten the timber to the floor.
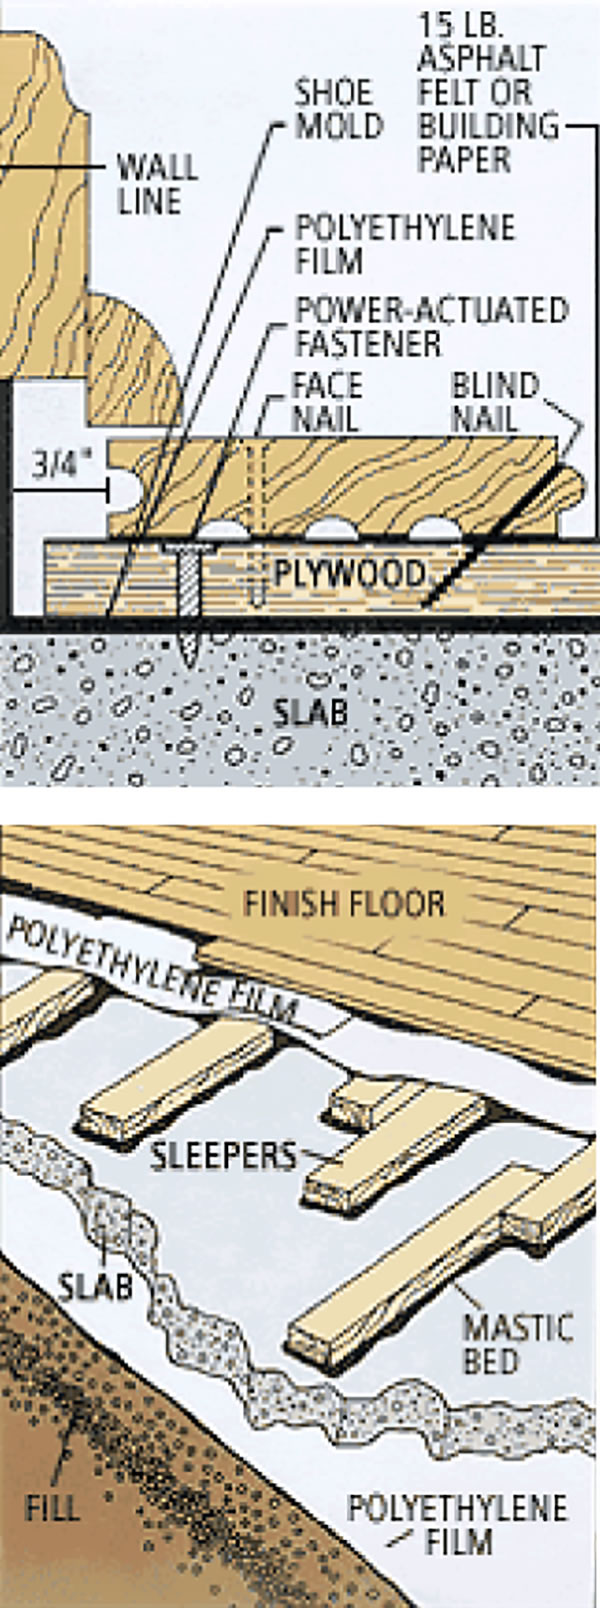
2. Floating Floor Method:
The floating floor method involves installing timber flooring without directly attaching it to the concrete floor. Instead, the timber planks are laid on top of an underlayment material, which provides cushioning and stability.
To install timber using this method, follow these steps:
a) Prepare Underlayment:
Clean and level the concrete floor, ensuring that it is free from any debris or irregularities. Install a moisture barrier over the concrete surface to prevent moisture from seeping into the timber.
b) Lay Underlayment:
Roll out the underlayment material over the entire concrete floor, ensuring that it is smooth and flat. Trim any excess material as needed.
c) Install Timber Planks:
Start laying the timber planks perpendicular to the longest wall in the room. Leave a small gap (around 1/4 inch) between each plank to allow for expansion. Use a tapping block and mallet to secure each plank together.
d) Continue Installation:
Continue laying additional rows of timber planks, ensuring that they are tightly fitted together. Use a circular saw or jigsaw to cut the planks to the desired length as needed. Leave a small gap (around 1/2 inch) between the timber and the walls to allow for expansion.
e) Finish the Installation:
Once all the timber planks are installed, install molding or trim along the edges of the room to cover any gaps and provide a finished look.