For all the choices out there, you will find tile flooring that may be fitted in any area of the home of yours. You're now ready to grout. Setting up a tile flooring is not very difficult but does call for a little patience as well as preparation. A massive amount folks wax them in order to keep them even more protected. Porcelain and ceramic tiles are commonly used in kitchens and toilets.
Images about How To Demolish Tile Floor
As you likely know already, tile floors are extremely durable no matter what the material. There are a variety of kinds of tile flooring but by far the most frequently tile used in Denver and Colorado Springs are Saltillo, slate, travertine, granite, ceramic, mosaic, porcelain, and stone. Doing the installation of ceramic tile on the house floors of yours would most likely be the best decision you ever made.
How to Remove Tile Flooring Yourself {with Tips and Tricks} All
Exactly how difficult is the tile to be put in? Relatively heavy quarry tiles, for example, might be rated for heavy duty industrial uses, nevertheless, they are often fitted in houses. When tile floor installation is completed, the finish and layout alone are worth it. There are several diverse kinds of marble tile used in residential and commercial applications.
How to Remove Ceramic Floor Tile
/removing-ceramic-floor-tile-452501-hero-8300d7b0a9c94ba6a2e844788a0225bc.jpg)
3 Easy Ways to Remove Ceramic Tile – wikiHow

How to Remove Tile (Ugh!) – The Honeycomb Home
A DIY Guide to Removing Tile Floor – Moving.com

How To Remove A Tile Floor and Underlayment
How to Remove Tile the Easy Way – Like a Pro PTR

How to Remove Tile Flooring Yourself {with Tips and Tricks} All
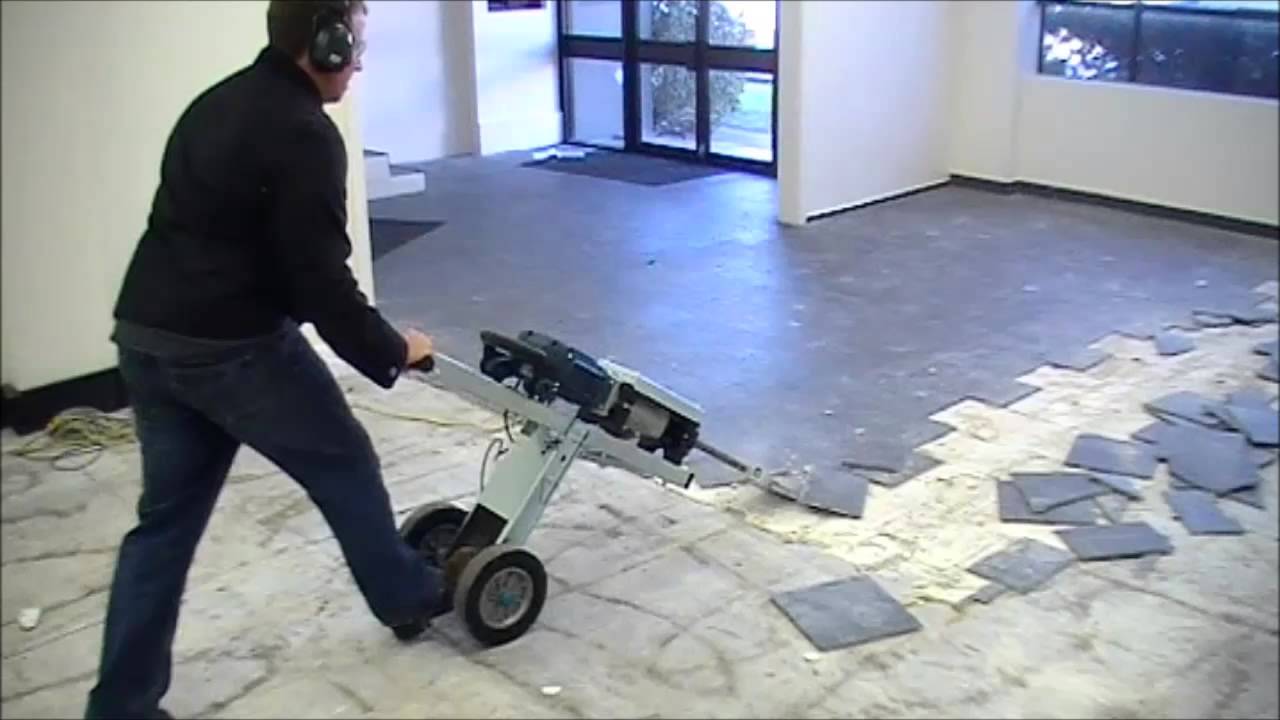
FASTEST WAY TO REMOVE FLOOR TILES
How to remove tile – easy ceramic tile removal
3 Easy Ways to Remove Ceramic Tile – wikiHow

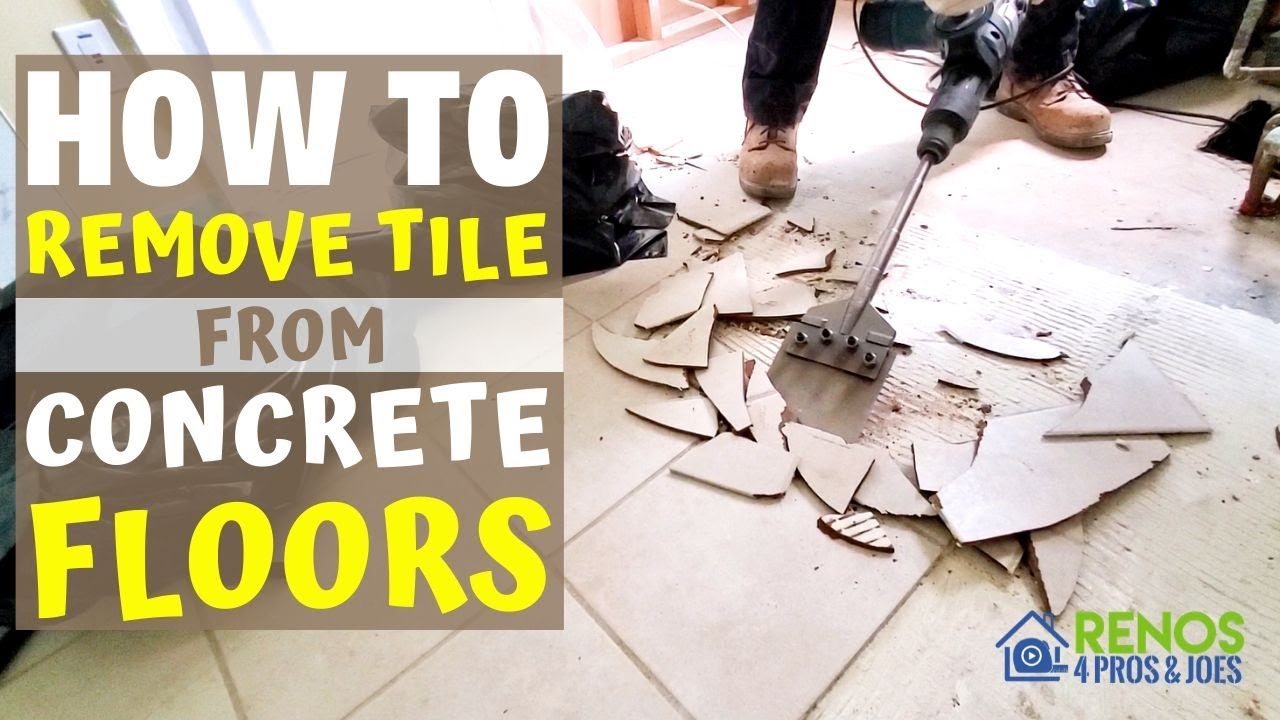
How to Remove Tile from a Concrete Floor
How to Remove a Tile Floor Tile removal, Ceramic floor tile

Related Posts:
- Bissell Tile Floor Scrubbers
- Breaking Up Tile Floor
- How To Clean Dingy Tile Floors
- Faux Ceramic Tile Flooring
- Bona Mops For Tile Floors
- Replace Toilet Flange Tile Floor
- How To Clean And Shine Ceramic Tile Floors
- Cover Bathroom Tile Floor
- Zebra Tile Flooring
- Gray Penny Tile Floor
Title: Mastering the Art of Demolishing a Tile Floor: A Comprehensive Guide
Introduction:
Removing an old tile floor can be a daunting task, but with the right knowledge and tools, it can be accomplished efficiently and effectively. Whether you’re renovating your home or preparing for a new flooring installation, this step-by-step guide will equip you with the necessary skills to demolish a tile floor like a pro. From gathering the right tools to ensuring safety precautions, let’s dive into the detailed process of demolishing a tile floor.
I. Gather the Essential Tools:
Before you embark on demolishing your tile floor, it is essential to gather all the necessary tools. Having these tools readily available will save you time and effort during the demolition process. Here are the tools you’ll need:
1. Safety Equipment: Always prioritize safety by wearing protective gear such as safety goggles, work gloves, dust mask, and knee pads.
2. Hammer and Chisel: These tools are vital for breaking up tiles and removing stubborn adhesive.
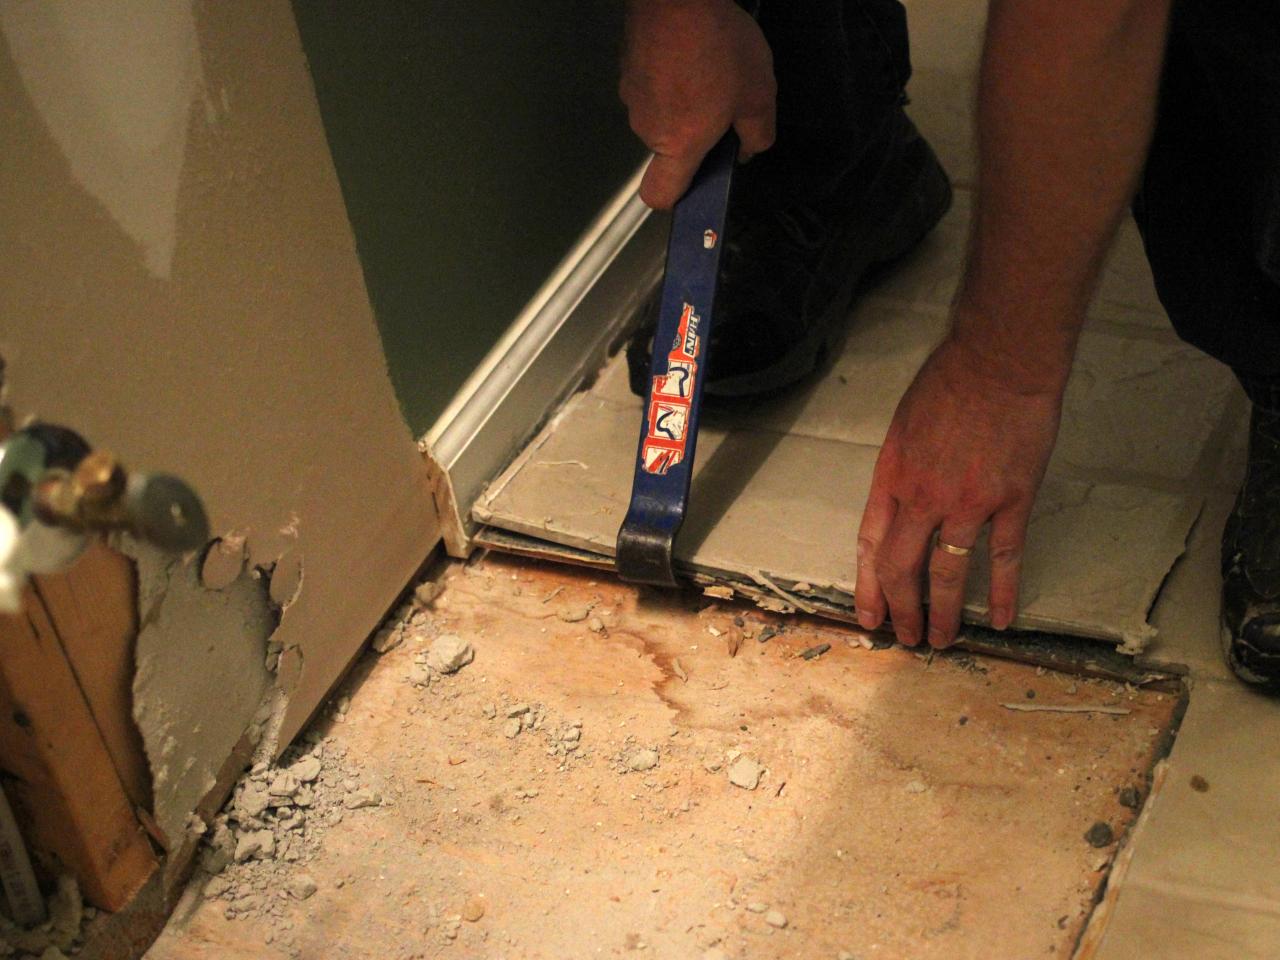
3. Pry Bar: A sturdy pry bar will help you lift tiles and remove baseboards or trim.
4. Floor Scraper: Use a heavy-duty floor scraper to remove any remaining adhesive or grout after tile removal.
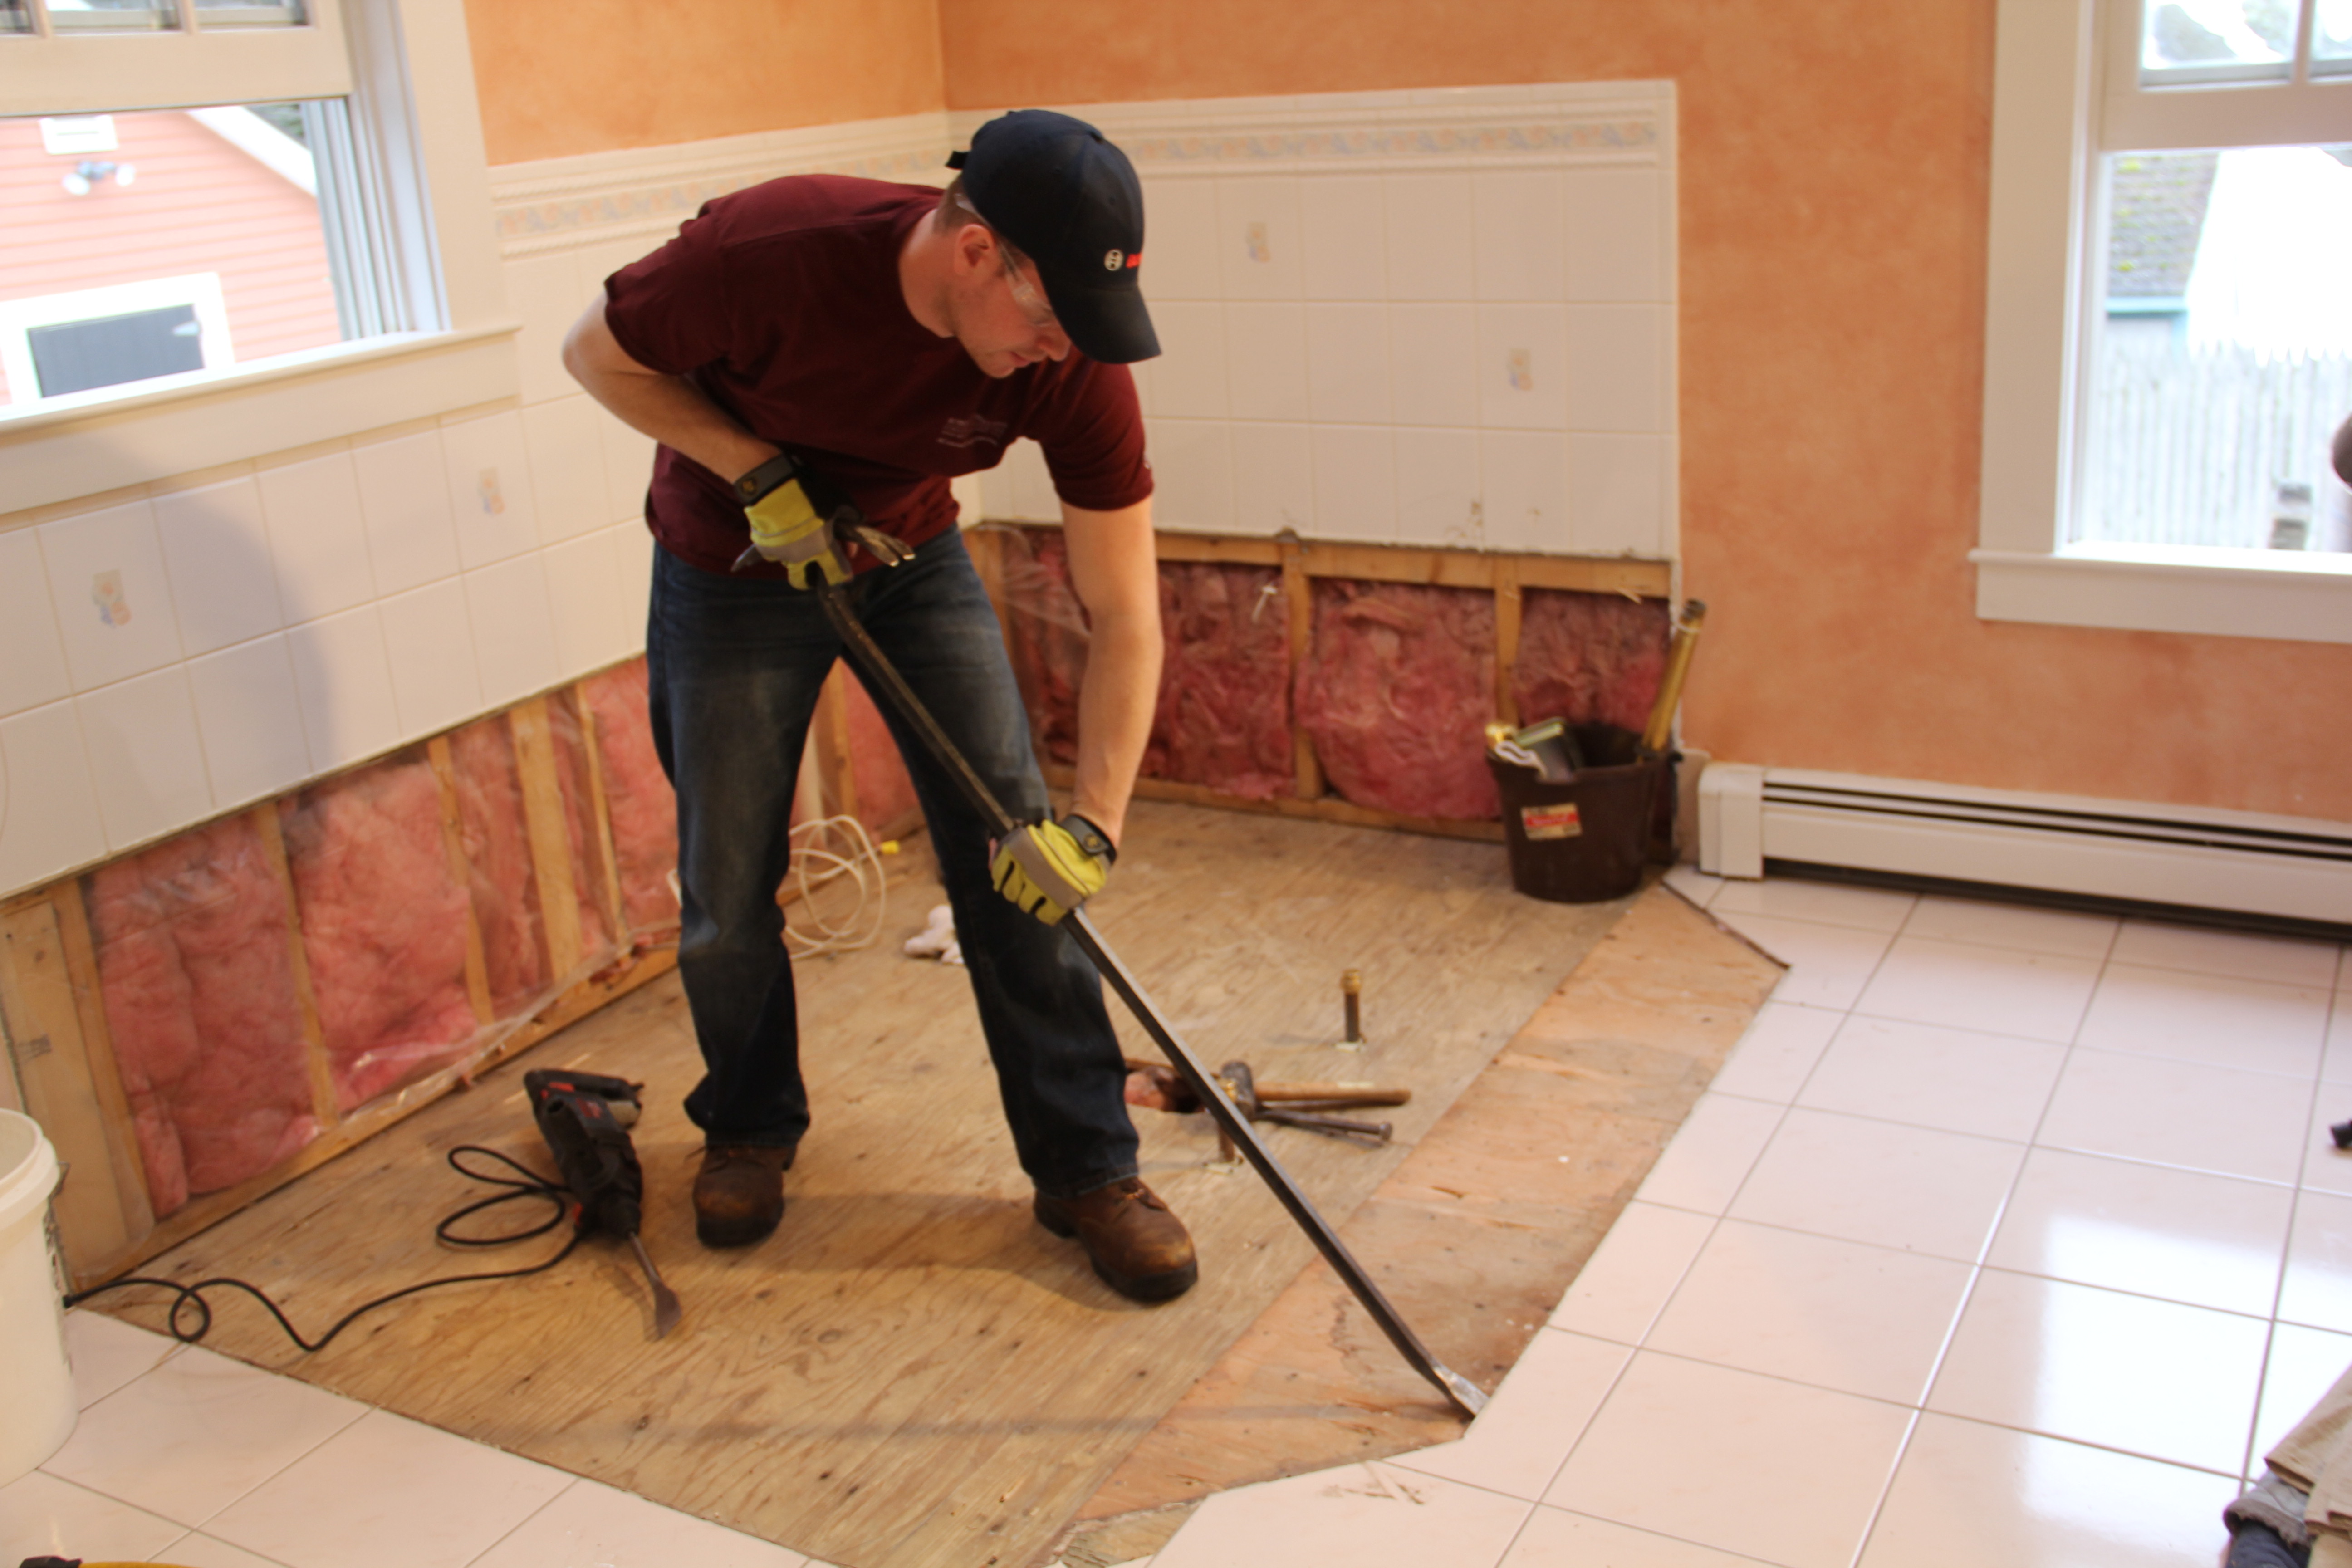
5. Sledgehammer: If you plan to remove the entire subfloor along with the tile, a sledgehammer will be necessary.
6. Dust Containment System: To minimize dust and debris spread, consider using plastic sheeting or specialized dust containment systems.
FAQs:
Q1: Can I use an electric tool instead of a hammer and chisel?
A1: While electric tools like rotary hammers or oscillating multi-tools can make the process faster, they may generate more dust and require caution while operating. Hand tools provide better control in delicate areas.
Q2: Do I really need safety equipment?
A2: Safety equipment is essential as it protects you from flying debris, dust, and potential injuries. Prioritizing safety should always be a top priority.
II. Preparing the Area:
Before starting the demolition process, it is crucial to prepare the area to minimize damage and facilitate clean-up. Follow these steps:
1. Clear the Space: Remove all furniture, appliances, and any other items from the room.
2. Protect Adjacent Areas: Cover nearby surfaces, cabinets, and fixtures with plastic sheeting or drop cloths to prevent damage during demolition.
3. Turn Off Utilities: Shut off water, gas, or electricity connections linked to the area where you’ll be working.
FAQs:
Q1: How do I protect adjacent areas effectively?
A1: Ensure that the plastic sheeting or drop cloths are securely taped or fastened to surfaces using painter’s tape to avoid shifting during the demolition process.
Q2: Can I leave heavy appliances in place during demolition?
A2: It is highly recommended to remove all appliances as their weight may cause damage to the tiles or hinder your access to certain areas.
III. Removing the Tiles:
Now that you have all the necessary tools and have prepared the area, follow these steps to remove the tiles effectively:
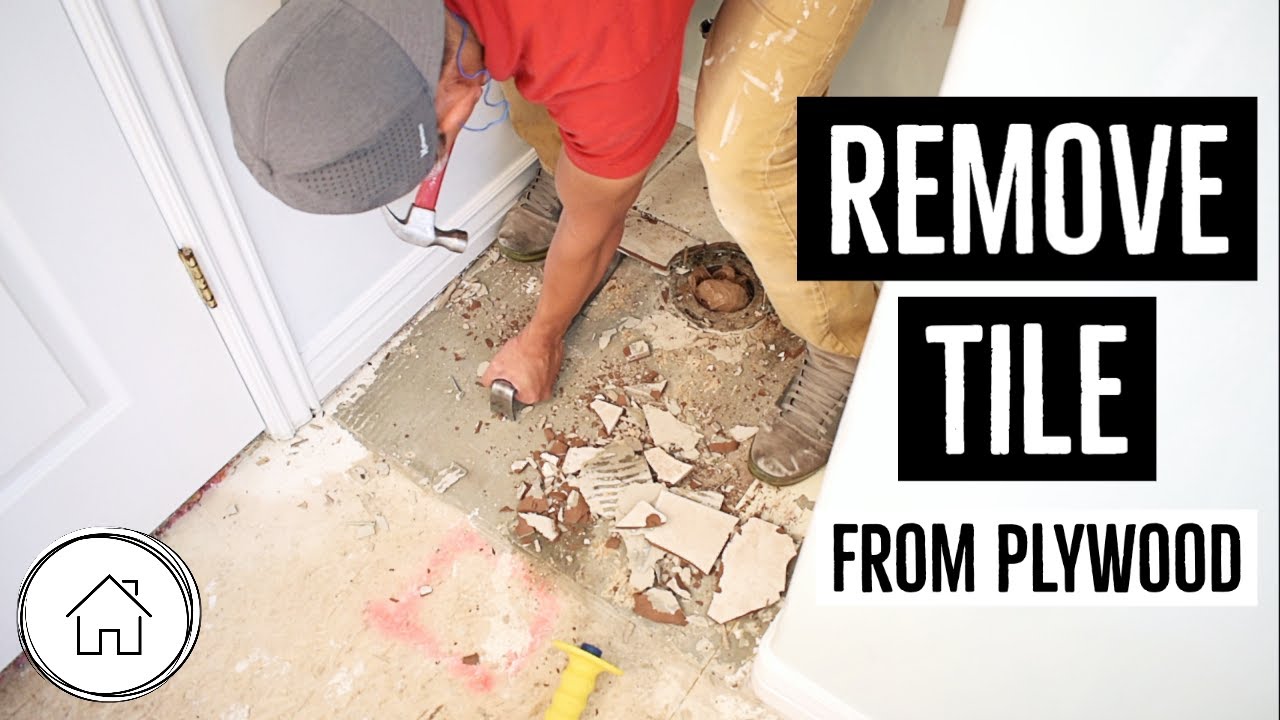
1. Start at an Edge: Begin at a corner or edge of the room by inserting a chisel under a tile, slightly angling it towards you. Tap it gently with a hammer until it starts lifting.
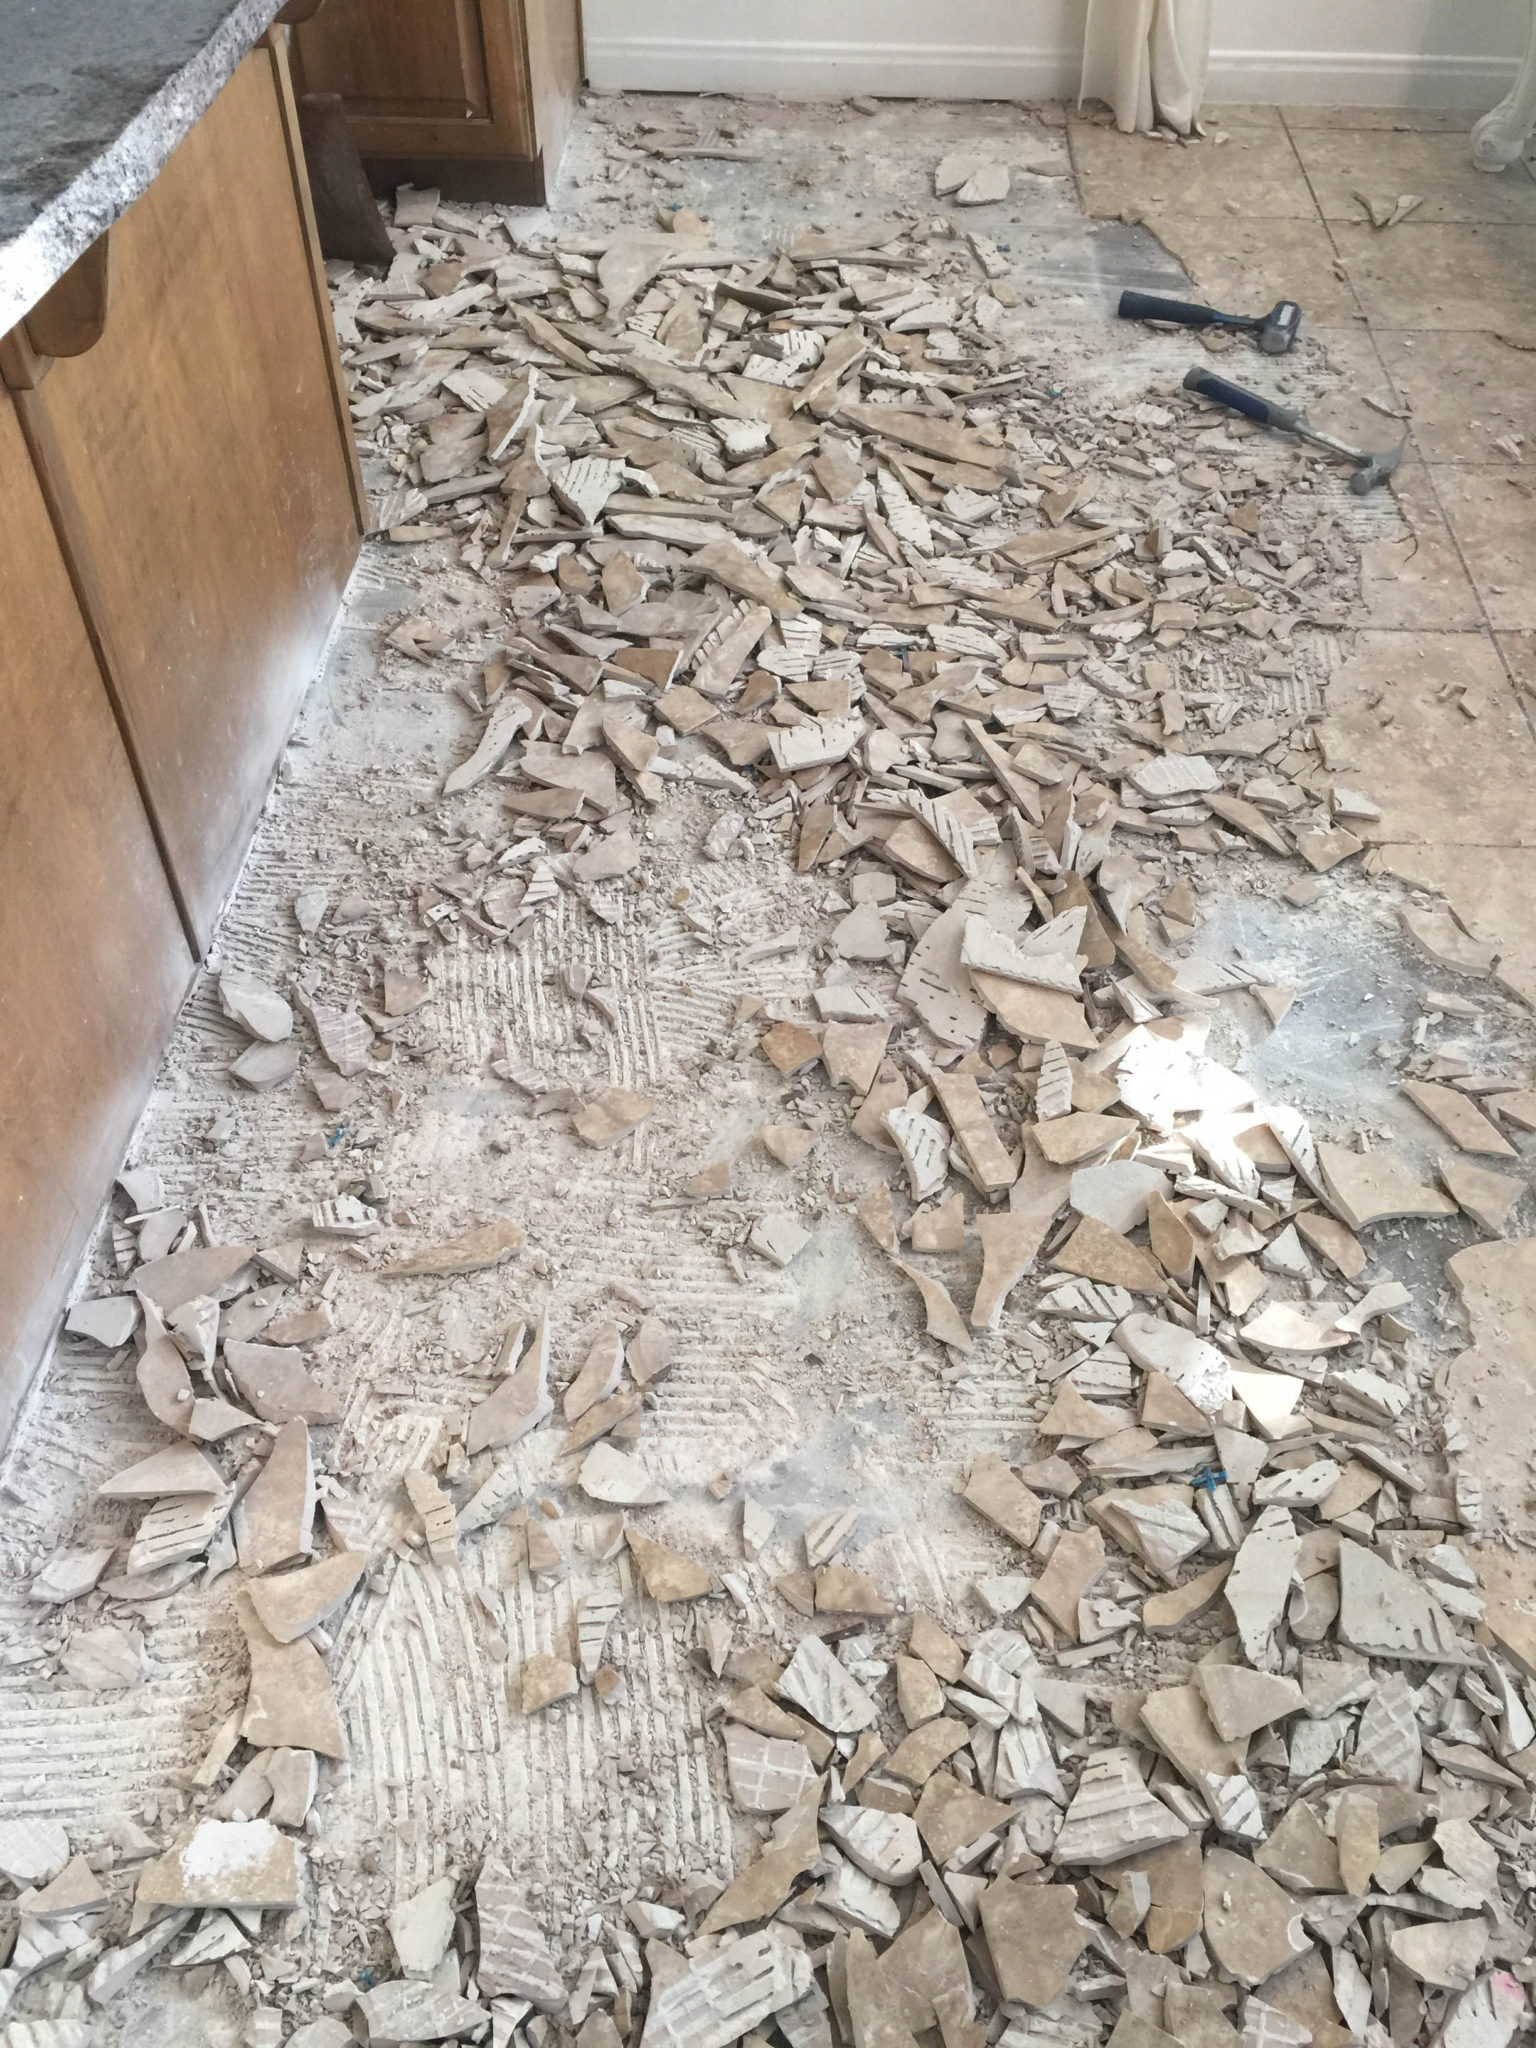
2. Continue Lifting Tiles: Gradually work your way along rows of tiles, carefully lifting each one with the pry Bar. Use the hammer and chisel to break up any stubborn tiles or adhesive.
3. Remove Baseboards or Trim: Use the pry bar to carefully remove any baseboards or trim that may be in the way.
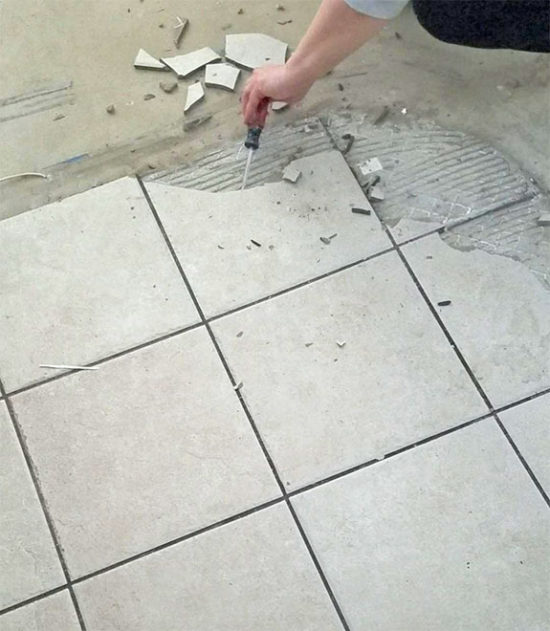
4. Scrape off Adhesive or Grout: Once all the tiles are removed, use a heavy-duty floor scraper to scrape off any remaining adhesive or grout from the subfloor. Be careful not to damage the subfloor in the process.
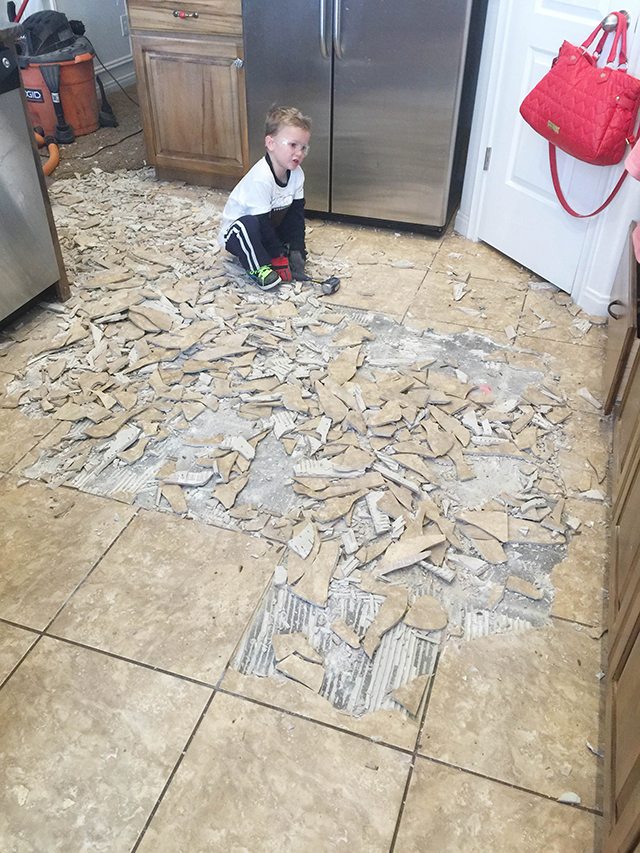
5. Dispose of Debris: Gather all the broken tiles, adhesive, and grout debris and dispose of them properly according to local regulations.
FAQs:
Q1: How can I prevent damaging the subfloor while removing adhesive?
A1: Take your time and use a gentle scraping motion with the floor scraper. Avoid using excessive force that could damage the subfloor.
Q2: What should I do with the broken tiles?
A2: Check with your local waste management facility for proper disposal methods. Some areas allow you to dispose of broken tiles in regular trash bins, while others may require you to take them to a specific facility.
Q3: How do I remove adhesive or grout from the subfloor?
A3: Use a heavy-duty floor scraper to gently scrape off the adhesive or grout. You may also use a solvent or adhesive remover to soften the residue before scraping it off. Be careful not to damage the subfloor in the process.
Q4: Can I reuse the tiles after removing them?
A4: It depends on the condition of the tiles. If they are undamaged and still in good shape, you may be able to reuse them. However, keep in mind that removing tiles can often cause them to break or chip, so it’s best to have replacements ready if needed.