These are the traits which make ceramic flooring the most sought-after flooring information, but if you are a homeowner looking for an alternative style, there are other kitchen flooring materials offered in the market that could capture the flavor of yours. There are many models of species of these flooring materials and they come in various shades of colors.
Images about Adhesive Kitchen Floor Tiles

There's a lot of points you need to consider during the buying process. Nevertheless, damp tiles are incredibly slippery, and if you've little children this might be a problem; also, keep in mind that in case you drop something on a ceramic tile, the product is will break. There are not many inexpensive kitchen flooring options as popular as laminate.
How to Use Peel and Stick Vinyl Tile to Transform Your Floors

It might be difficult to place stones on the floor because of the unusual shapes of theirs but nothing looks as alluring and as different as shimmering stone floors. As kitchens have become a really important room of the living space, same goes with the kitchen flooring. No waxing or polishing and that even includes the hardwood choices offered. The humble kitchen floor of yours is capable of much more tired linoleum patterns for their easy maintenance.
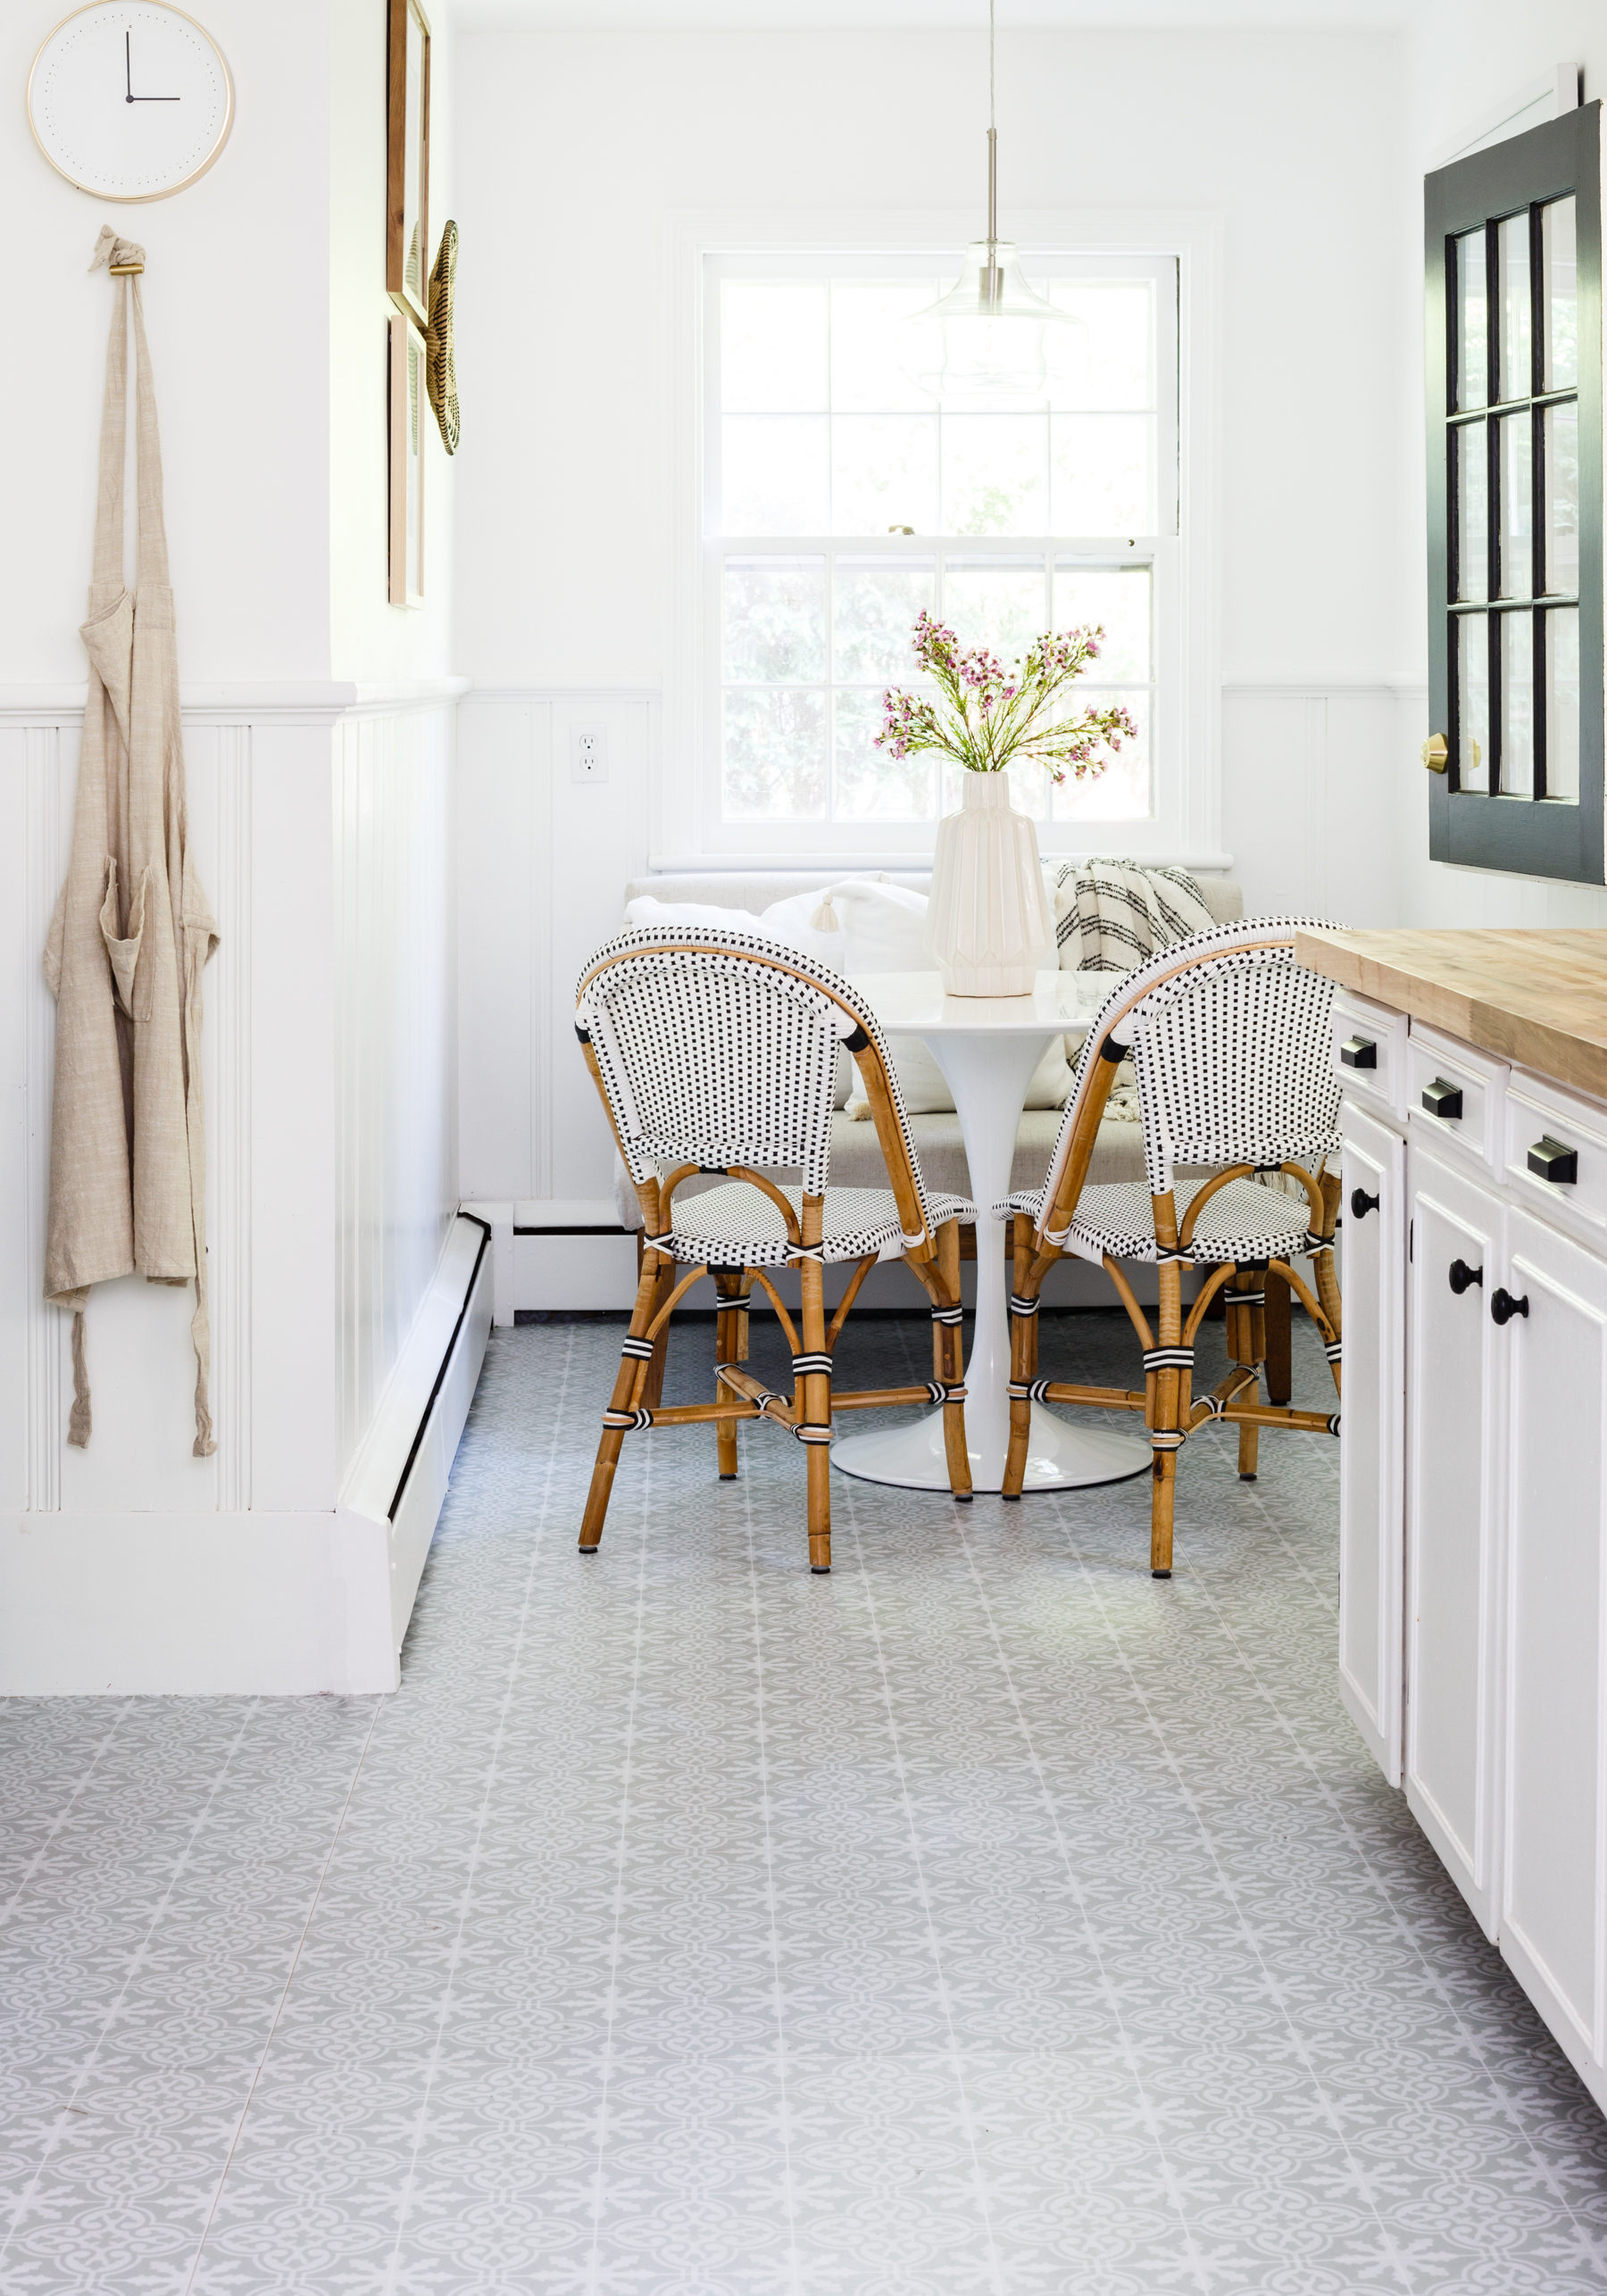
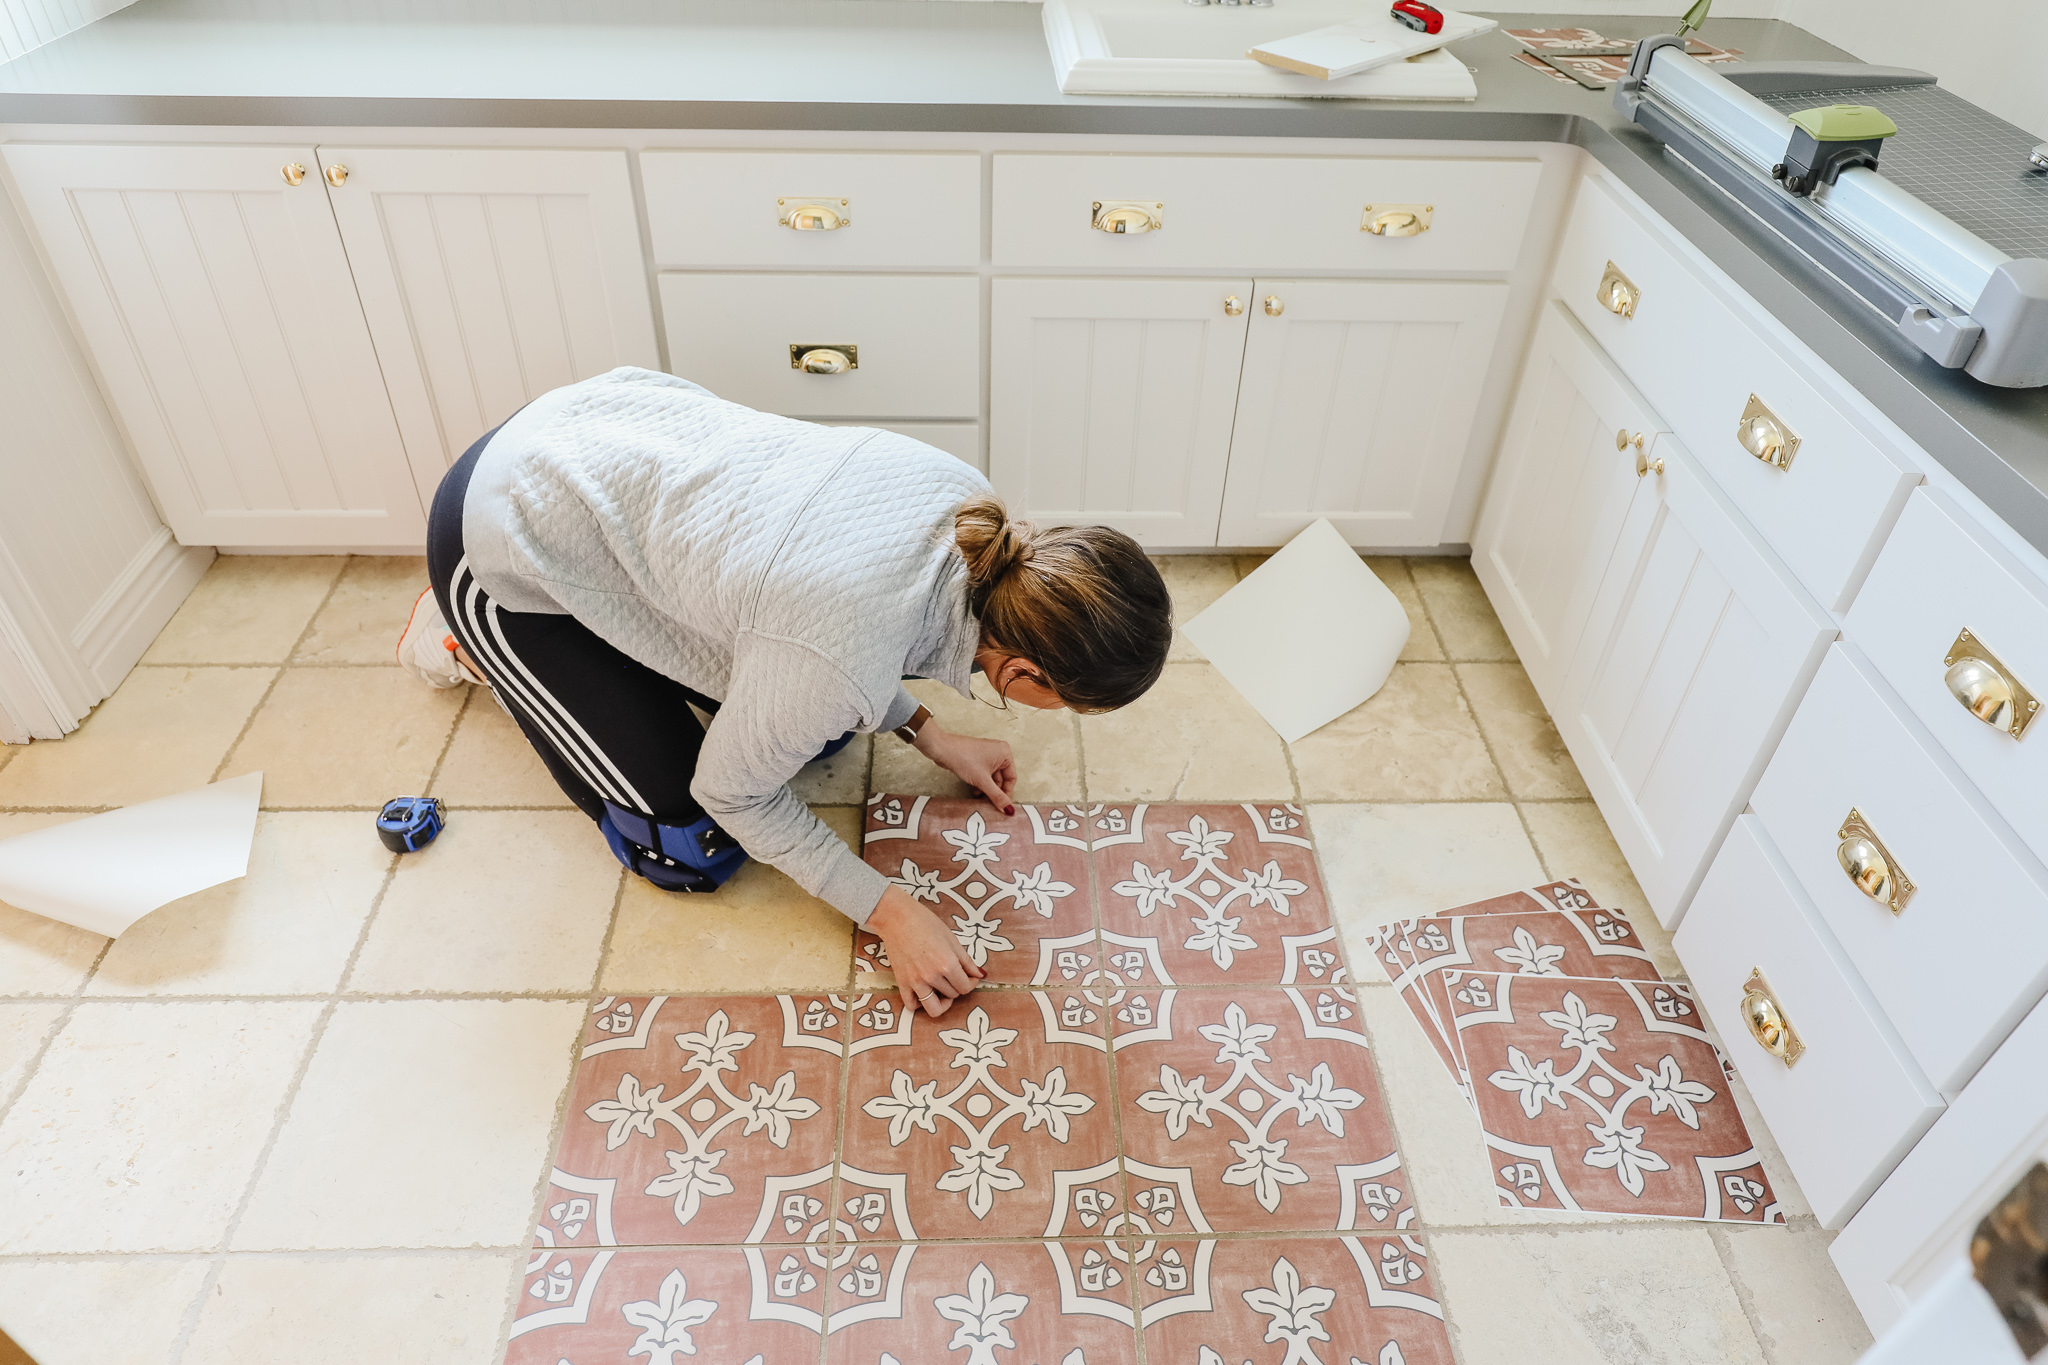
The Low Down on my Peel and Stick Kitchen Floors
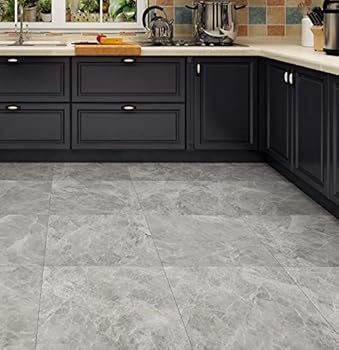
Livelynine Concrete Grey Peel and Stick Floor Tile 12X12 Inch 16 Pack Vinyl Flooring Peel and Stick Waterproof Self Adhesive Floor Tiles for Bathroom
10 × Floor Tiles Self Adhesive Peel and Stick Art Bathroom Kitchen Flooring eBay
How to lay vinyl floor tiles u0026 revamp a tired kitchen Dove Cottage
![]()
The Low Down on my Peel and Stick Kitchen Floors
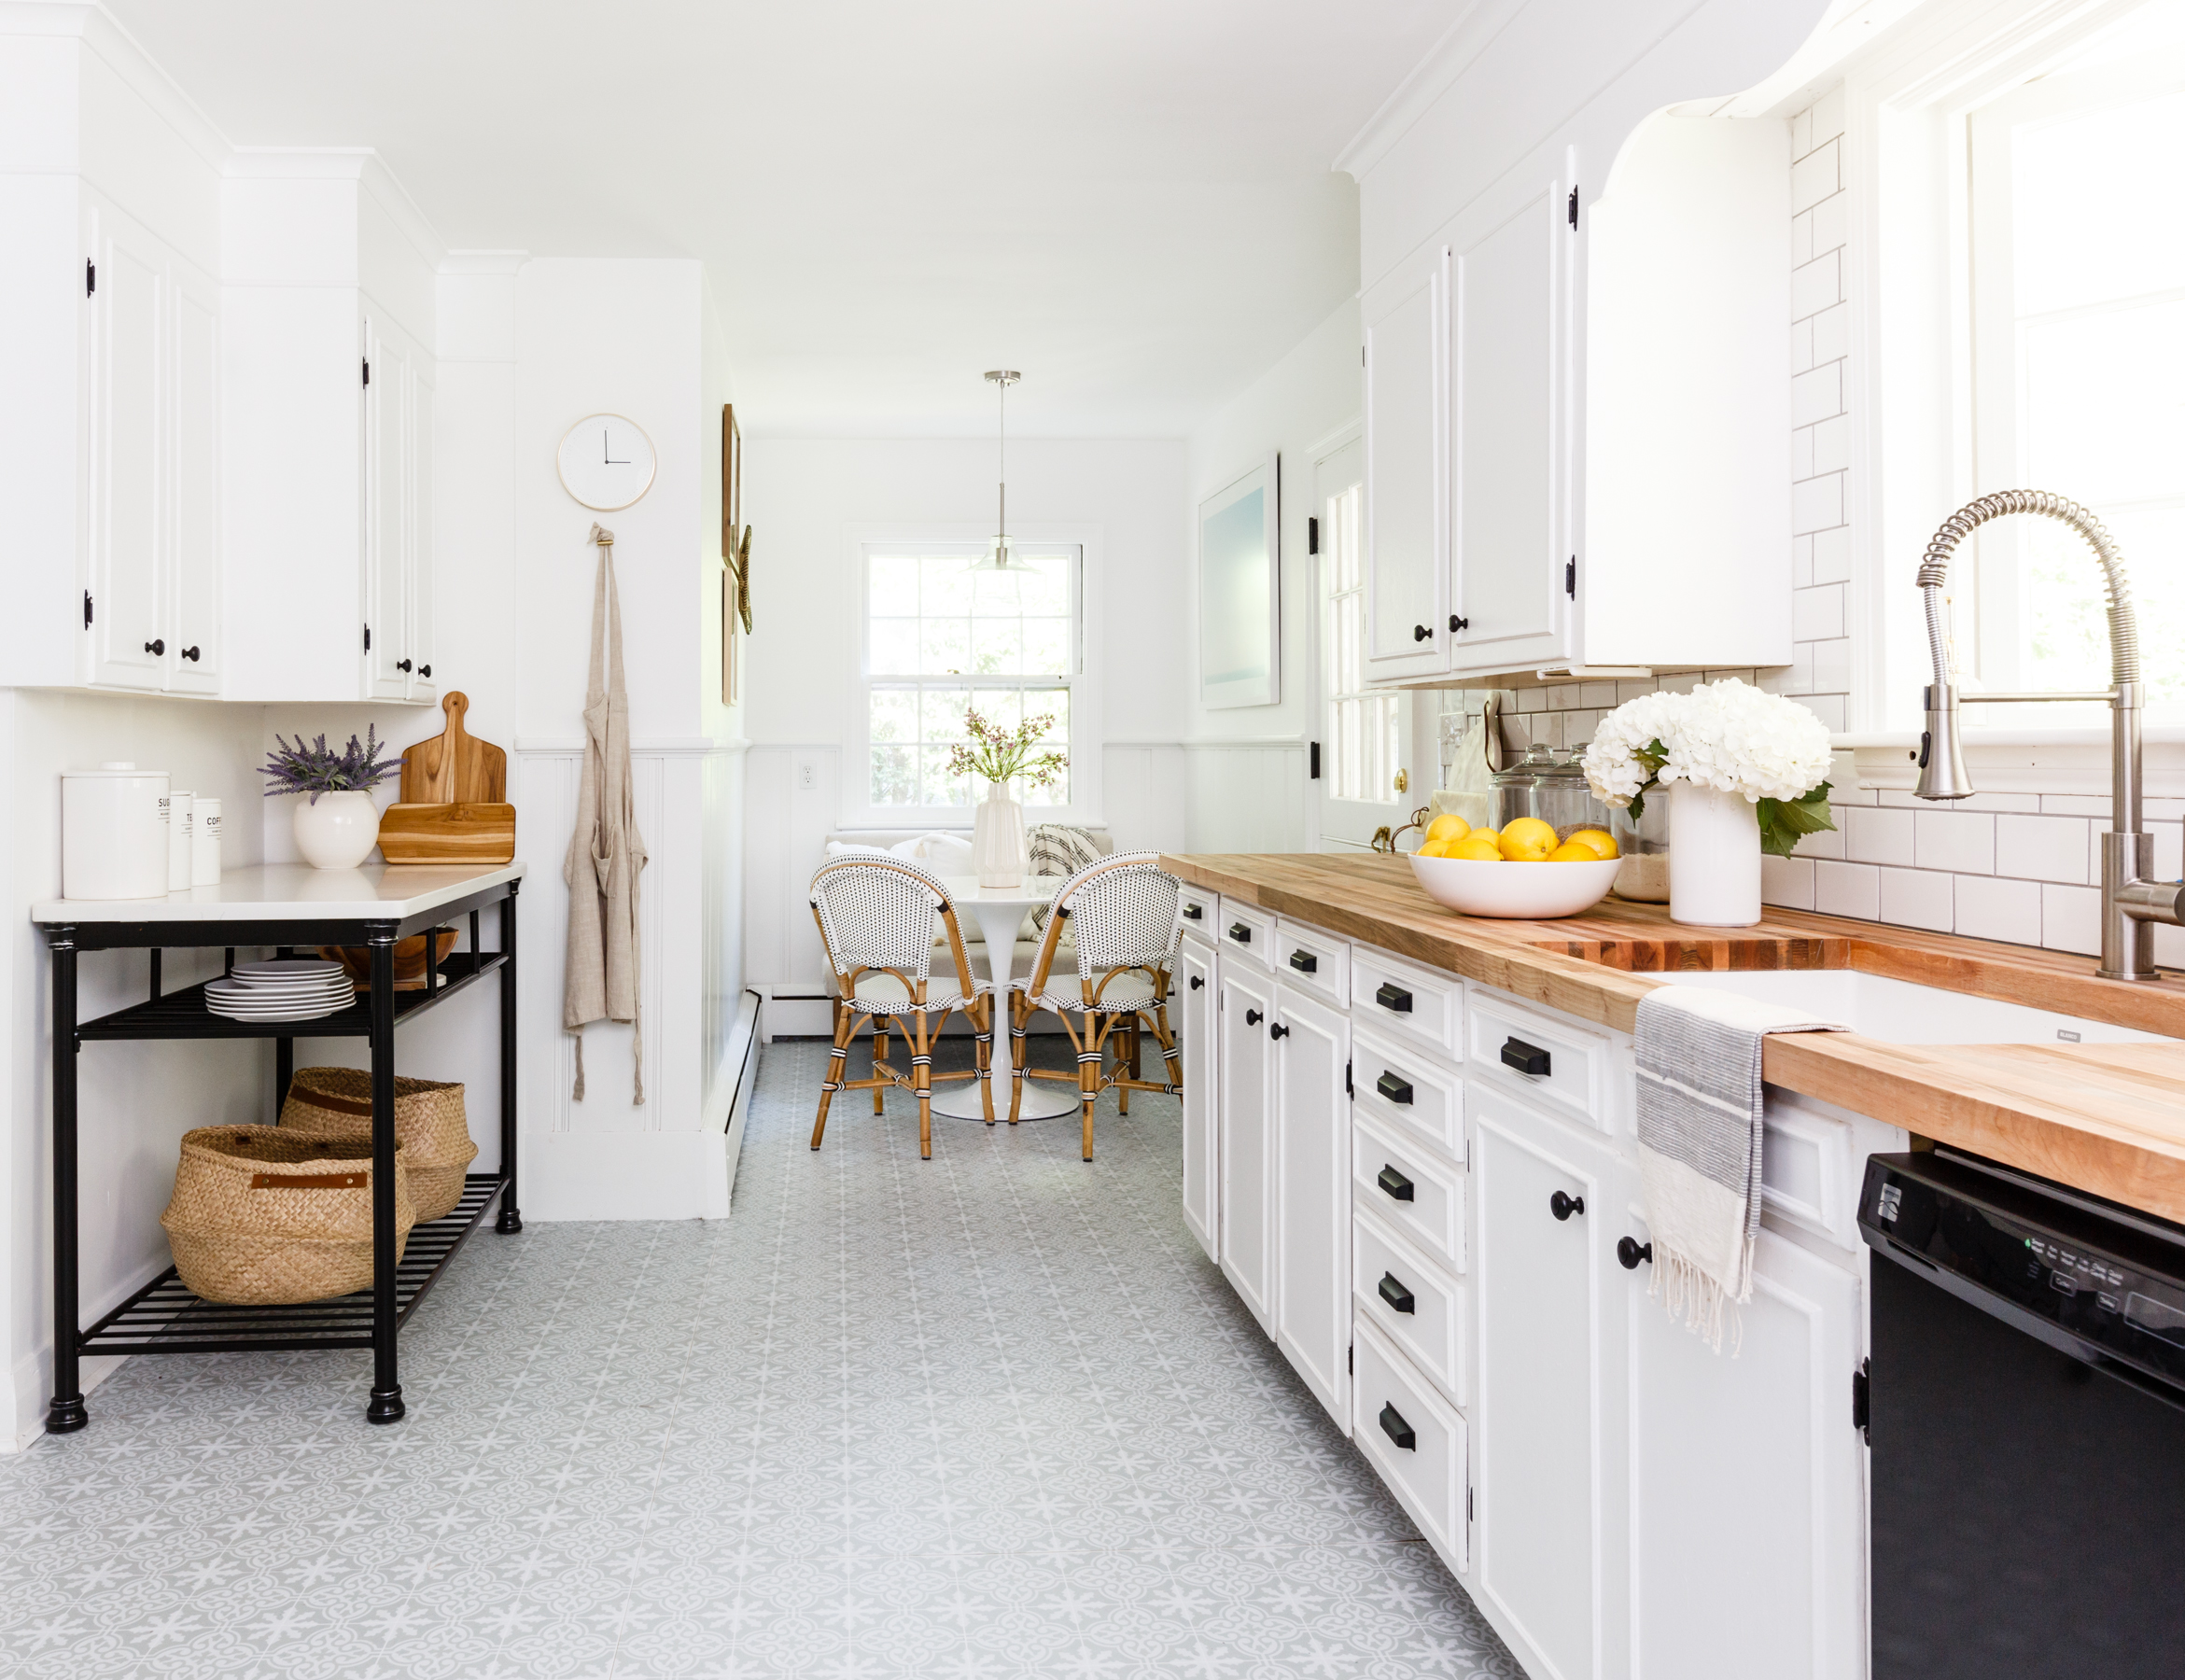
These peel and stick floor tiles will give your kitchen a very

Style Selections Obsidian 7-3/4-in x 9-in Groutable Water

How To: Laying Peel and Stick Tile over the Bathroom Floor
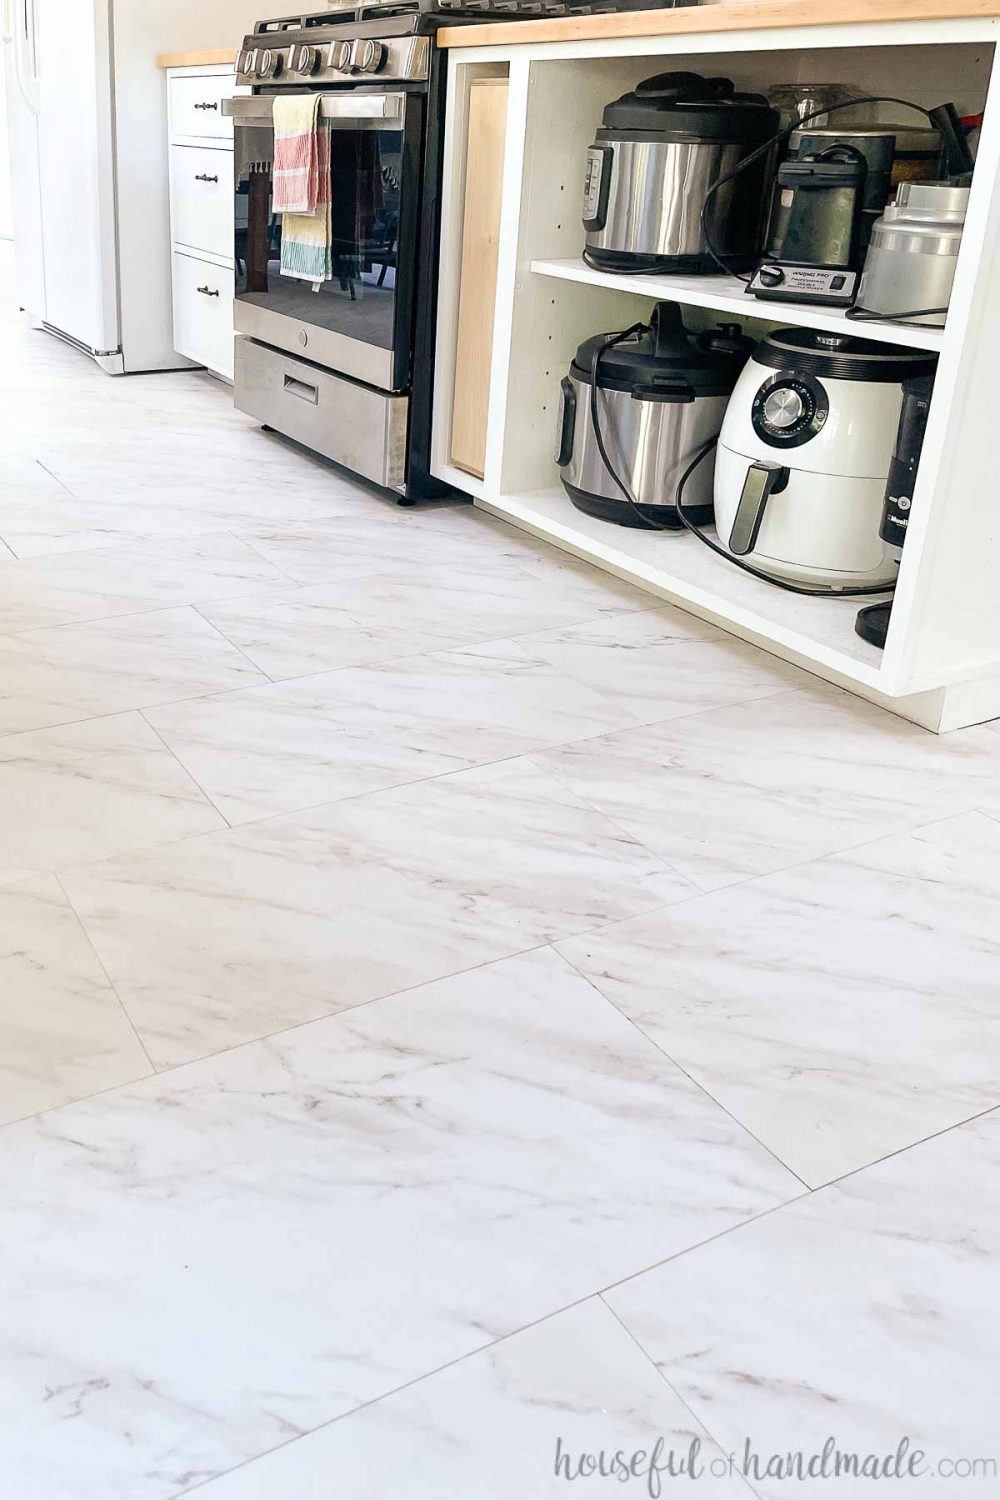
How to Install Peel and Stick Vinyl Tiles – Houseful of Handmade
Livelynine Concrete Grey Peel and Stick Floor Tile 12X12 Inch 16 Pack Vinyl Flooring Peel and Stick Waterproof Self Adhesive Floor Tiles for Bathroom
How to Remove Peel and Stick Floor Tile – A Butterfly House

Peel And Stick Floor Tile in the Kitchen: A Gorgeous Budget

Related Posts:
- Home Floor And Kitchens
- Floor Tiles White Kitchen
- Cracked Tiles In Kitchen Floor
- Clean My Kitchen Floor
- Is Marble Floor Good For Kitchen
- Can You Put Kitchen Cabinets On Top Of Laminate Flooring
- Ikea Kitchen Floor To Ceiling Cabinets
- Bamboo Flooring In Kitchen Reviews
- Best Non Slip Kitchen Flooring
- Patterned Kitchen Floor
Adhesive Kitchen Floor Tiles: The Perfect Solution for Easy and Affordable Kitchen Renovations
Introduction:
When it comes to kitchen renovations, choosing the right flooring can make a significant difference in the overall aesthetic appeal and functionality of the space. Adhesive kitchen floor tiles have gained immense popularity in recent years due to their ease of installation, affordability, and durability. These self-adhesive tiles offer a practical and cost-effective solution for homeowners looking to revamp their kitchen floors without breaking the bank. In this article, we will delve into the world of adhesive kitchen floor tiles, exploring their benefits, installation process, maintenance requirements, and frequently asked questions.
Benefits of Adhesive Kitchen Floor Tiles:
1. Easy Installation:
One of the most significant advantages of adhesive kitchen floor tiles is their simple installation process. Unlike traditional tiles that require professional assistance and grouting, adhesive floor tiles can be installed by anyone with basic DIY skills. These self-adhesive tiles come with a peel-and-stick backing that eliminates the need for additional adhesives or tools. Simply remove the protective film and press them onto a clean and dry surface.
2. Affordability:
Renovating a kitchen can be an expensive endeavor, but adhesive floor tiles offer an affordable alternative to costly flooring options. These tiles are available in a wide range of prices, allowing homeowners to choose according to their budget constraints. Additionally, since they can be installed without professional help, you can save on labor costs as well.
3. Durability:
Kitchen floors endure heavy foot traffic, spills, and constant movement of appliances and furniture. Adhesive kitchen floor tiles are designed to withstand these everyday challenges with their high-quality materials and construction. They are resistant to scratches, stains, water damage, and fading caused by sunlight exposure. With proper maintenance, these tiles can maintain their appearance and functionality for years to come.
Installation Process:
1. Preparation:
Before installing adhesive kitchen floor tiles, it is essential to prepare the surface properly. Start by removing any existing flooring and ensuring the subfloor is clean, dry, and smooth. Repair any cracks or imperfections to create an even surface for the tiles.
2. Layout:
Plan the layout of the tiles by marking the center point of the room and working outward. This will help ensure a symmetrical and balanced look. Consider using a chalk line or a straightedge for accurate measurements and alignment.
3. Cutting Tiles:
Measure and cut tiles as needed to fit around corners, edges, or obstacles such as cabinets or appliances. Use a utility knife or tile cutter for precise cuts. Ensure that each tile fits perfectly before proceeding with installation.
4. Installation:
Starting from the center point, remove the protective film from the back of the first tile and firmly press it onto the subfloor. Continue adding tiles in a staggered pattern, aligning their edges closely together. Apply even pressure to ensure proper adhesion.
5. Finishing Touches:
Once all the tiles are installed, use a rolling pin or a floor roller to firmly press them into place and ensure optimal adhesion. Trim any excess adhesive from the edges with a utility knife if necessary.
Maintenance Requirements:
1. Regular Cleaning:
To keep your adhesive kitchen floor tiles looking their best, regular cleaning is essential. Sweep or vacuum the floor regularly to remove dirt and debris. Use a damp mop with mild detergent or a specially formulated vinyl floor cleaner for deeper cleaning.
2. Stain Removal:
In case of stains, tackle them promptly by using a Mild cleaning solution and a soft cloth or sponge. Avoid using abrasive cleaners or scrub brushes, as they can damage the surface of the tiles.
3. Protection:
To prevent scratches and damage to your adhesive kitchen floor tiles, place protective pads or mats under heavy furniture or appliances. Avoid dragging heavy objects across the floor, as this can cause scratches or tears.
4. Sealant:
Consider applying a sealant to your adhesive kitchen floor tiles to provide an extra layer of protection against stains and moisture. Consult the manufacturer’s instructions for recommended sealants and application methods.
By following these installation and maintenance guidelines, you can enjoy the affordability, durability, and visual appeal of adhesive kitchen floor tiles for years to come. These guidelines provide step-by-step instructions for preparing the surface, planning the layout, cutting and installing the tiles, and completing finishing touches. Additionally, they offer tips for maintaining the tiles to keep them looking their best.
To summarize, here are the main points:
1. Surface Preparation:
– Remove any existing flooring and ensure the subfloor is clean, dry, and smooth.
– Repair any cracks or imperfections to create an even surface.
2. Layout:
– Mark the center point of the room and work outward for a symmetrical look.
– Consider using a chalk line or straightedge for accurate measurements and alignment.
3. Cutting Tiles:
– Measure and cut tiles as needed to fit around corners, edges, or obstacles.
– Use a utility knife or tile cutter for precise cuts.
– Ensure each tile fits perfectly before proceeding with installation.
4. Installation:
– Start from the center point and press the first tile firmly onto the subfloor after removing its protective film.
– Continue adding tiles in a staggered pattern, aligning their edges closely together.
– Apply even pressure to ensure proper adhesion.
5. Finishing Touches:
– Use a rolling pin or floor roller to firmly press all tiles into place.
– Trim excess adhesive from edges if necessary.
For maintenance:
1. Regular Cleaning:
– Sweep or vacuum regularly to remove dirt and debris.
– Use a damp mop with mild detergent or vinyl floor cleaner for deeper cleaning.
2. Stain Removal:
– Tackle stains promptly with a mild cleaning solution and a soft cloth or sponge.
– Avoid abrasive cleaners or scrub brushes that can damage the tiles.
3. Protection:
– Place protective pads or mats under heavy furniture or appliances to prevent scratches.
– Avoid dragging heavy objects across the floor to avoid scratches or tears.
4. Sealant:
– Consider applying a sealant for extra protection against stains and moisture.
– Follow manufacturer’s instructions for recommended sealants and application methods.
By following these guidelines, you can enjoy the affordability, durability, and visual appeal of adhesive kitchen floor tiles for years to come.