It is not just because of design and also the decor of your home that you have to contemplate using kitchen floor flooring for your floor but additionally you are looking at durability and toughness in the sense that your floor can take the spills and splashes that can happen frequently in a hectic kitchen.
Images about Floor Tiles White Kitchen

Keep in mind that the main things to consider while choosing upon the type of kitchen flooring shouldn't constantly be the strategy you want the floor to appear but give attention to the materials durability, ease of maintenance as well as strength before you think about the spending budget. Locating the best buys on bamboo kitchen flooring is not difficult when you are on the Internet.
Which Kitchen Floor Tiles Are Best? Top 10 Kitchen Design Ideas

All these has its pros and cons, so when you are selecting the flooring of yours you have to take a look at factors like the models & colours that will suit your kitchen, just how easy the flooring will be to maintain, whether the flooring gives quality which is high as well as durability, and if the flooring fits in with the budget of yours.
Kitchen Flooring That Will Endure the Test of Time
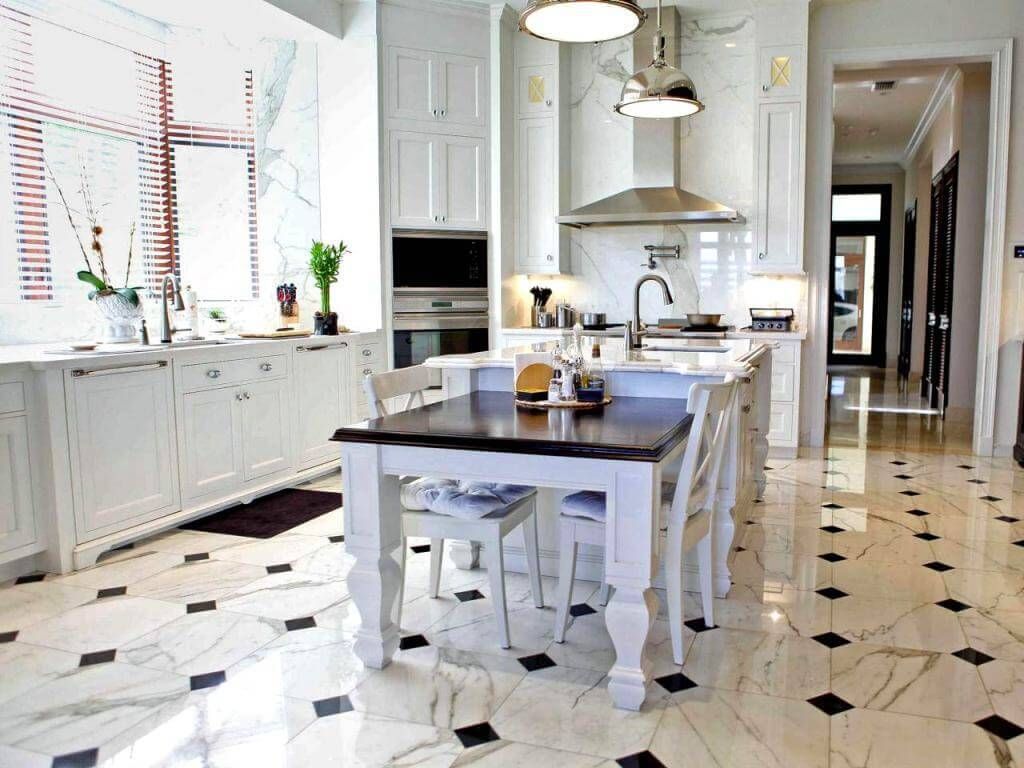
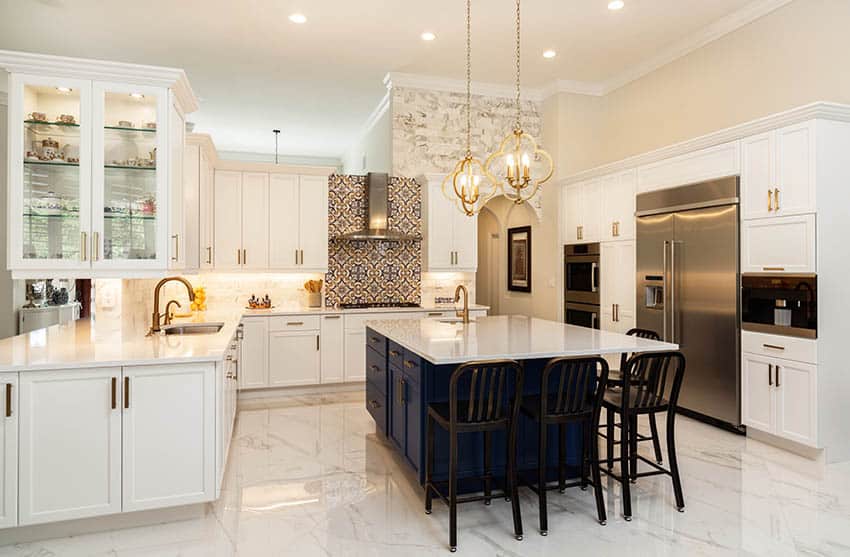
Kitchen White Cabinets Ceramic Tile Floors Design Photos and Ideas

10 Timeless Kitchen Floor Tile Ideas Youu0027ll Love
:max_bytes(150000):strip_icc()/Ginny_Macdonald_Cement_Tile-1-7e924d265eac46d8816f785376d89a4f.jpeg)
How to Clean Tile Floors

Kitchen Tile Flooring Options How to Choose the Best Kitchen

Livelynine Peel and Stick Floor Tile White 12X12 Inch 32 Pack Self Adhesive Vinyl Flooring Peel and Stick Tiles for Kitchen Bedroom Rental Waterproof
Designing With White Tile on Suncoast View – Tile Outlets of America
Pros and Cons of Marble Flooring in Kitchens
/GettyImages-1005153640-80de5a4b5baa40d4bc91e7c388927467.jpg)
Muted Grey Tile Floor Kitchen and White Tile Kitchen Backsplash

Kitchen Flooring That Will Endure the Test of Time

Types of Kitchen Floor Tiles (Design Guide) – Designing Idea
23 White Kitchens Without Wood Floors – Down Leahu0027s Lane
Related Posts:
- Home Floor And Kitchens
- Floor Tiles White Kitchen
- Cracked Tiles In Kitchen Floor
- Clean My Kitchen Floor
- Can You Put Kitchen Cabinets On Top Of Laminate Flooring
- Is Marble Floor Good For Kitchen
- Ikea Kitchen Floor To Ceiling Cabinets
- Bamboo Flooring In Kitchen Reviews
- Best Non Slip Kitchen Flooring
- Patterned Kitchen Floor
Floor Tiles White Kitchen: A Timeless and Elegant Choice for Your Kitchen Renovation
Introduction:
A kitchen is the heart of any home, and when it comes to kitchen renovations, choosing the right flooring is crucial. One option that has stood the test of time is floor tiles, specifically white ones. In this article, we will delve into the world of floor tiles for white kitchens and discover why they are a popular choice among homeowners. We will explore their benefits, different types available in the market, installation process, and answer some frequently asked questions to help you make an informed decision.
Benefits of Floor Tiles in White Kitchens:
1. Timeless Elegance:
White has always been associated with elegance and sophistication. By choosing white floor tiles for your kitchen, you can create a timeless and classic look that never goes out of style. The clean and bright appearance of white floor tiles can instantly uplift the overall aesthetic of your kitchen space.
2. Versatility:
White floor tiles offer unparalleled versatility when it comes to interior design. They can effortlessly blend with any color scheme or style, making them a perfect choice for those who love experimenting with different decor themes. Whether you have a modern, traditional, or eclectic kitchen, white floor tiles will seamlessly complement your chosen style.
3. Enhances Natural Light:
If your kitchen lacks natural light or feels cramped, white floor tiles can be a game-changer. White reflects light more effectively than any other color, creating an illusion of spaciousness and brightness. By installing white floor tiles in your kitchen, you can make even the smallest space appear larger and more inviting.
4. Easy Maintenance:
One significant advantage of white floor tiles is their low maintenance requirements. White surfaces are less likely to show stains or dirt compared to darker colors, which makes them easier to clean and maintain. Regular sweeping and occasional mopping are usually sufficient to keep them looking pristine.
Types of Floor Tiles for White Kitchens:
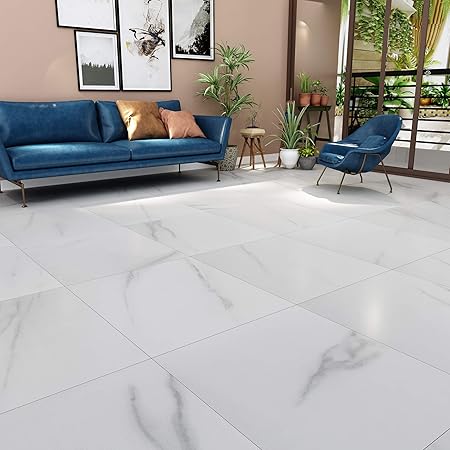
1. Porcelain Tiles:
Porcelain tiles are a popular choice for kitchen flooring due to their durability and resistance to moisture. They are made from dense clay that is baked at high temperatures, resulting in a hard and durable material. Porcelain tiles come in various shades of white, allowing you to choose the perfect hue that suits your kitchen’s style.
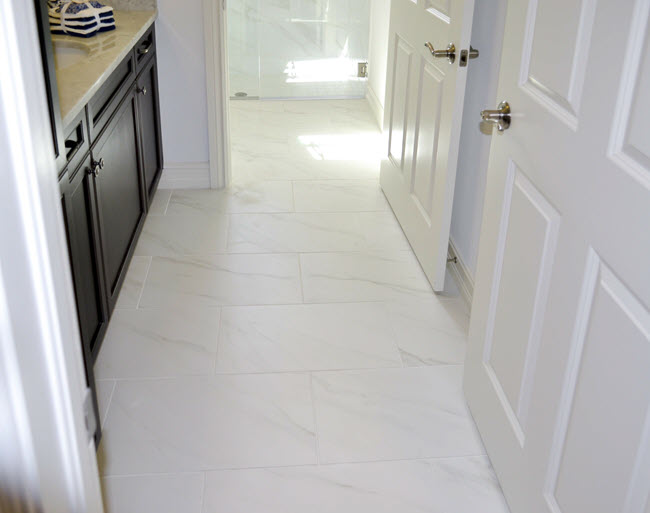
2. Ceramic Tiles:
Similar to porcelain tiles, ceramic tiles are also made from clay but are fired at lower temperatures. While they may not be as durable as porcelain, ceramic tiles offer a wide range of design options and are more budget-friendly. White ceramic tiles with intricate patterns or textures can add visual interest to your kitchen space.
3. Marble Tiles:
For those who desire a luxurious and opulent kitchen, marble floor tiles are an ideal choice. Known for their natural veining patterns and timeless beauty, white marble tiles exude elegance like no other material. However, it’s important to note that marble requires regular sealing and maintenance to preserve its pristine appearance.
4. Vinyl Tiles:
Vinyl floor tiles have gained popularity in recent years due to their affordability and versatility. They come in a plethora of designs, including white options that mimic the look of natural stone or ceramic tiles. Vinyl tiles are easy to install, water-resistant, and offer excellent durability, making them an excellent choice for high-traffic kitchens.
Installation Process for Floor Tiles in White Kitchens:
1. Preparation:
Before installing floor tiles in your white kitchen, proper preparation is essential. Remove any existing flooring materials and ensure the sub Floor is clean, dry, and leveled. This will provide a smooth and stable base for the tiles.
2. Measure and Plan:
Measure the dimensions of your kitchen to determine the amount of tiles needed. Create a layout plan to ensure that the tiles are evenly distributed and aligned. Consider starting from the center of the room and working your way outwards for a balanced look.
3. Apply Adhesive:
Using a trowel, apply adhesive to a small section of the subfloor at a time. Spread it evenly, making sure to cover the entire area where the tile will be placed.
4. Lay the Tiles:
Carefully place each tile onto the adhesive, pressing it firmly to ensure proper adhesion. Use spacers between tiles to maintain consistent spacing. Continue this process until all tiles are laid.
5. Cut Tiles:
If needed, use a tile cutter or wet saw to cut tiles that don’t fit properly along edges or corners. Take measurements carefully and make precise cuts for a seamless finish.
6. Grouting:
After allowing sufficient time for the adhesive to dry, mix grout according to the manufacturer’s instructions. Use a grout float to spread the grout over the tiles, making sure to fill in all gaps between them.
7. Clean Excess Grout:
Once the grout has set slightly, use a damp sponge or cloth to wipe away excess grout from the surface of the tiles. Rinse the sponge frequently to avoid smearing grout onto clean tiles.
8. Seal (if necessary):
If you have chosen natural stone tiles like marble, it is recommended to apply a sealer after grouting to protect them from stains and moisture. Follow the sealer manufacturer’s instructions for application.
9. Finishing Touches:
Allow the grout to fully cure before walking on the tiles or placing any furniture. Clean the tiles regularly using a gentle cleaner to maintain their pristine white appearance.
By following these steps, you can successfully install white floor tiles in your kitchen and achieve a beautiful, stylish, and functional space.