It also can have a beating from other kitchen and storage bins equipment that is placed or rolled around on it. They are by far the most affordable of all of the types of kitchen flooring available and are very simple to put in. Give some thought to the needs of yours and your family's needs when you are selecting tiles for your kitchen floor.
Images about How To Clean The Grout On My Kitchen Floor
Laminate features a thick plastic coating making it easy to clean up and keep. One of the primary appeals of laminate is the fact that it can mimic many other kitchen flooring selection with ease and at a considerably lower cost. You should additionally stay away from using household cleaners on your bamboo kitchen floor. Don't forget to make an actual layout to finalize the kitchen flooring layout of yours before permanently attaching them on the floor.
3 (Top Secret) Tricks for Cleaning with Vinegar – Making Lemonade
Kitchen flooring is able to set the mood for the entire room. Cork flooring does not cause rotting even in case it remains wet for a very long time and it also has a natural resistance to flame hence, it will not burn very easily. In mind, you are able to get the best kind of kitchen floor tiles installed in your house that not only looks fabulous but is a wonderful complement to your lifestyle.
How to Clean Grout (Easy Household Cleaning Ideas That Save Time u0026 Money) Clean My Space

The Ultimate Guide to Cleaning Grout: 10 DIY Tile u0026 Grout Cleaners
My Momu0027s Kitchen – The Magic Of Making Old Grout Look New Again
How to Clean Grout
The Down and Dirty of Cleaning Tile and Grout – Clean Mama

5 Ways to Clean Grout Between Floor Tiles – wikiHow

5 Brilliant Ways to Clean Floor Grout without Scrubbing

Cleaning Tip: How to clean tile floors and white grout linesFast and easy!

The 5 Best Grout Cleaners – This Old House
/cdn.vox-cdn.com/uploads/chorus_image/image/66784688/Grout_Cleaner_iStock_1186431301.0.jpg)
Does Cleaning Grout with Baking Soda and Vinegar Really Work?
The Only Way We Got Our Stained Grout White Again Young House Love
How to Clean Grout Cleaning Grout Stains HGTV
Related Posts:
- Home Floor And Kitchens
- Floor Tiles White Kitchen
- Cracked Tiles In Kitchen Floor
- Clean My Kitchen Floor
- Can You Put Kitchen Cabinets On Top Of Laminate Flooring
- Is Marble Floor Good For Kitchen
- Bamboo Flooring In Kitchen Reviews
- Ikea Kitchen Floor To Ceiling Cabinets
- Best Non Slip Kitchen Flooring
- Patterned Kitchen Floor
How to Clean the Grout on My Kitchen Floor
Introduction:
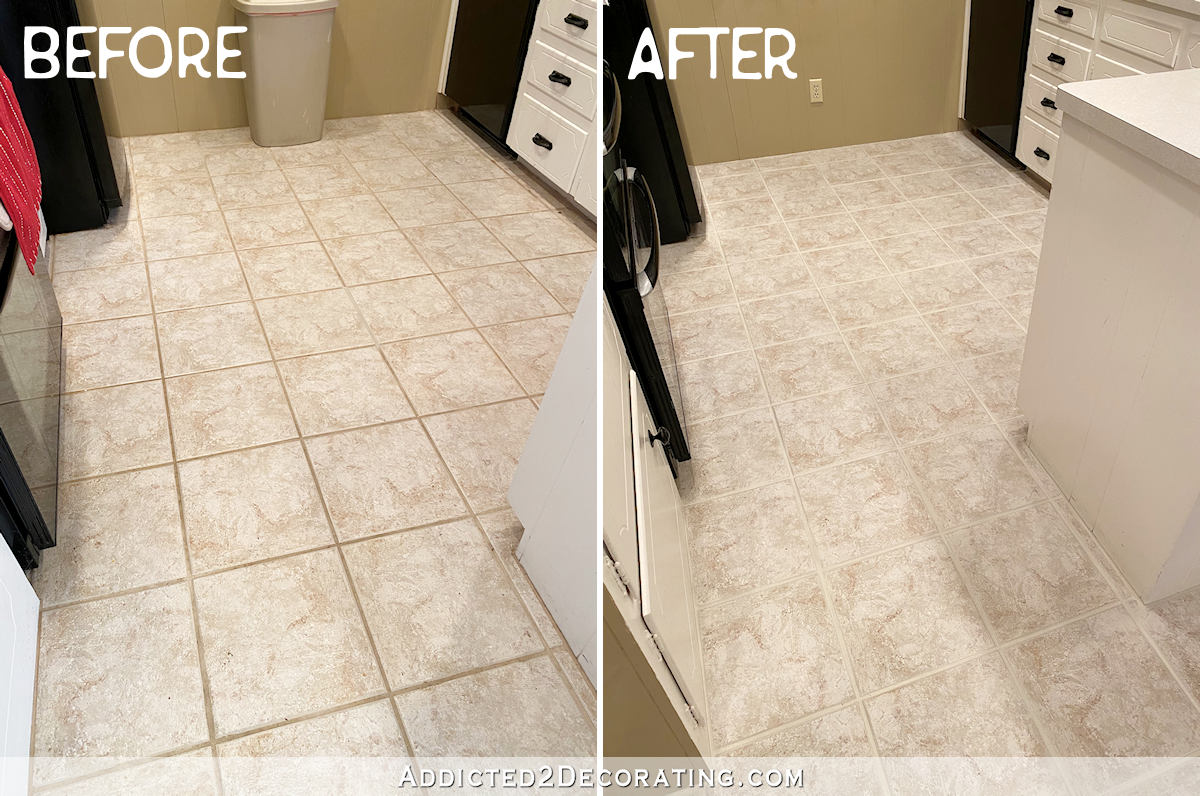
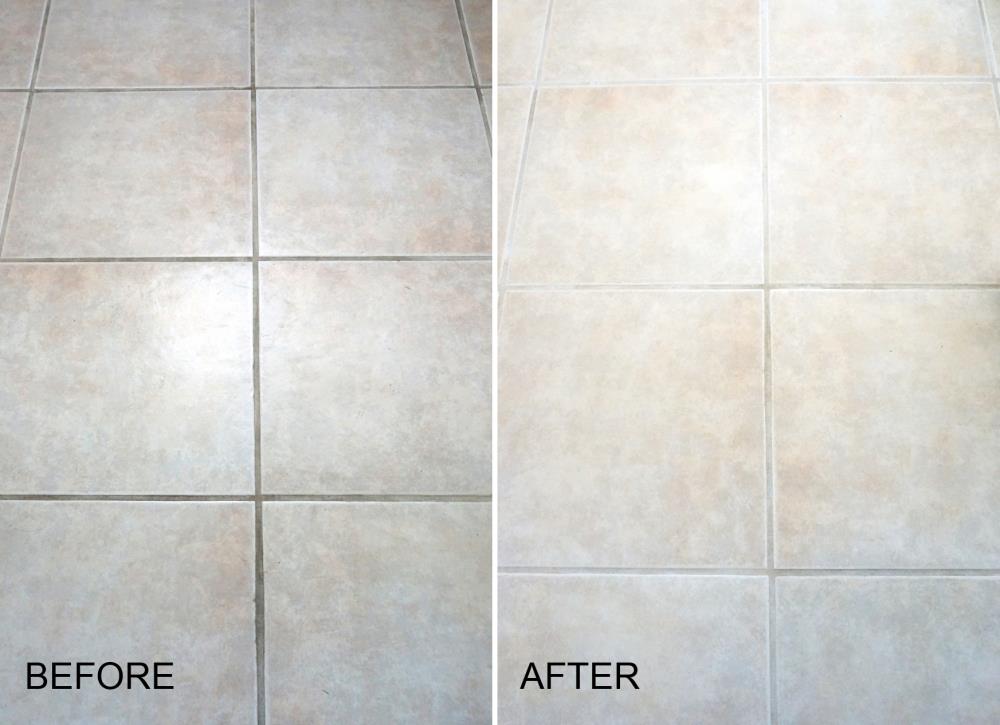
Maintaining a clean and hygienic kitchen is essential for the health and well-being of your family. One aspect of kitchen cleaning that often gets overlooked is the grout on the kitchen floor. Over time, grout can accumulate dirt, stains, and grime, making it look dull and unappealing. However, with the right techniques and tools, you can restore your grout to its original pristine condition. In this article, we will guide you through a step-by-step process on how to clean the grout on your kitchen floor effectively.
I. Understanding Grout and its Composition:
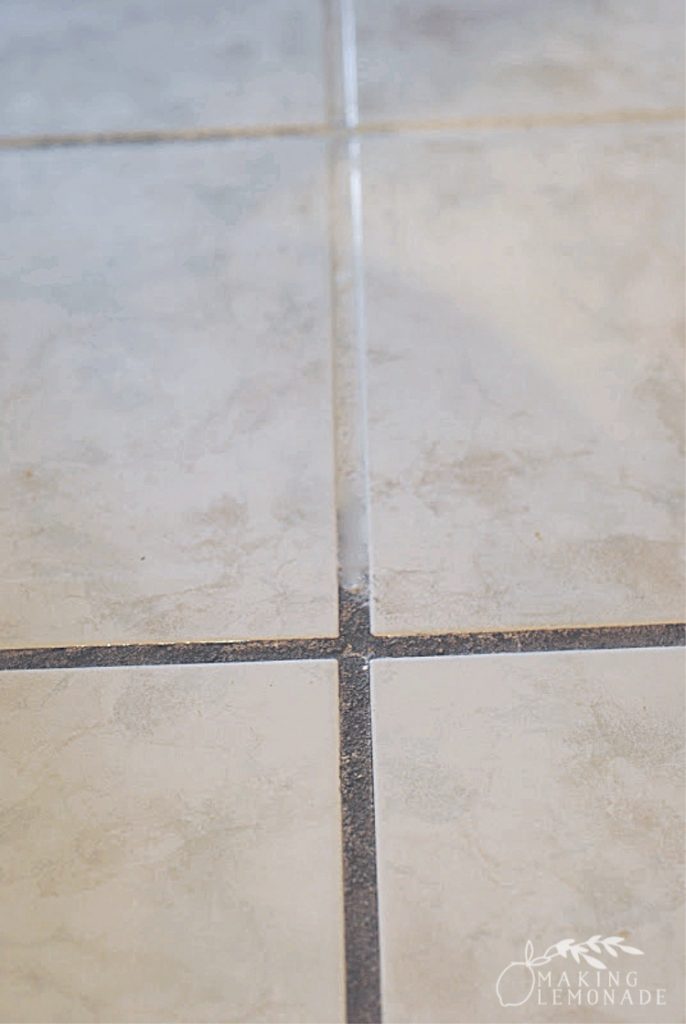
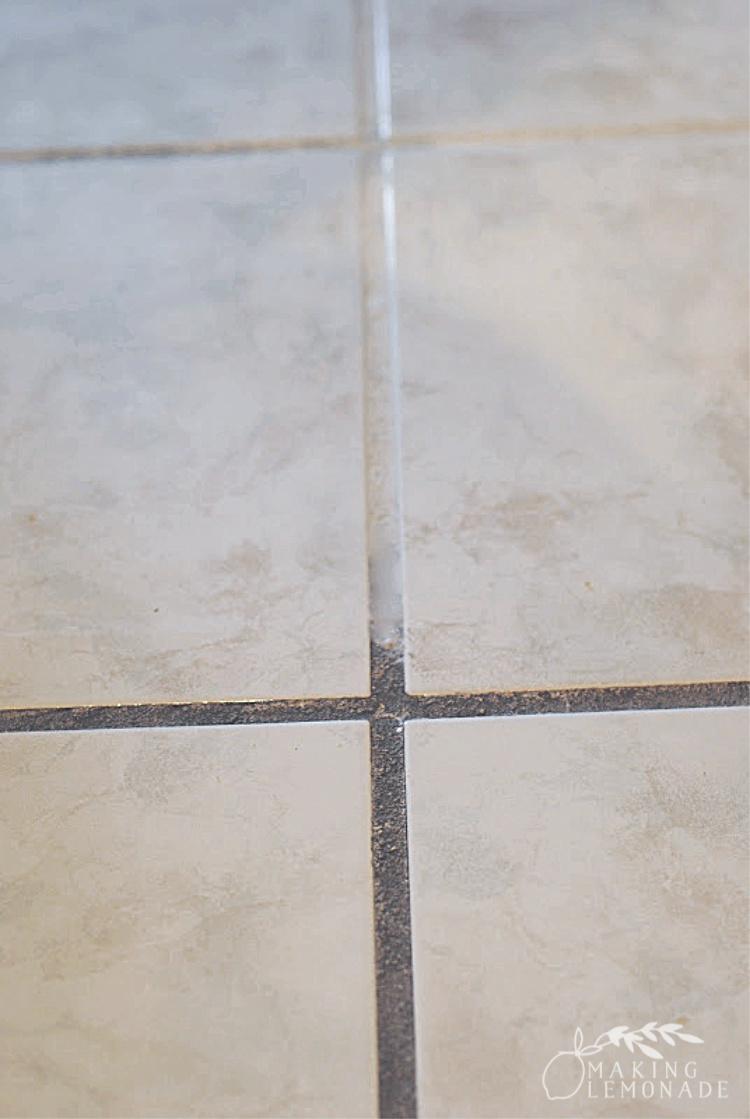
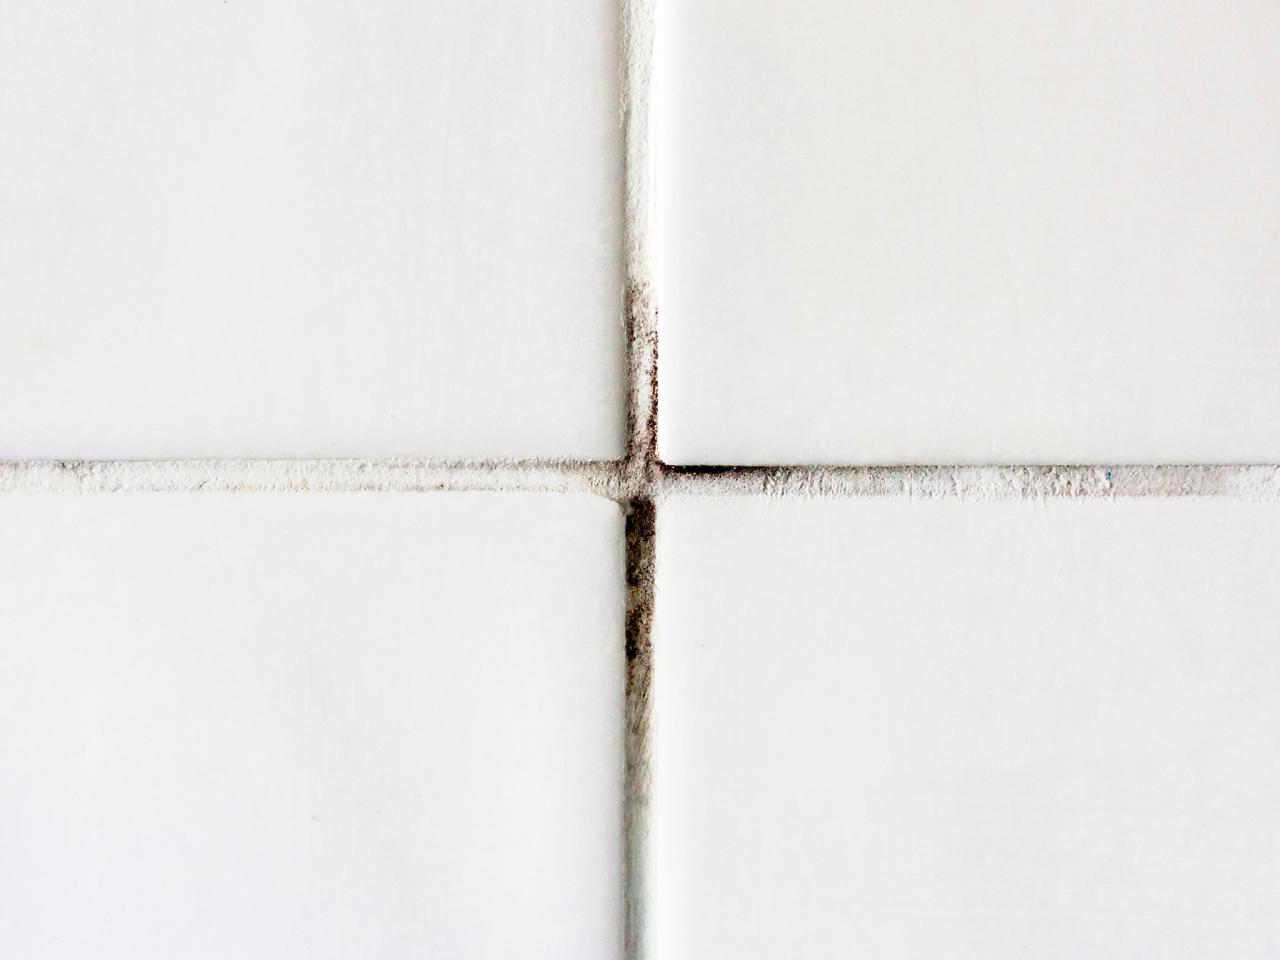
Before diving into the cleaning process, it’s important to understand what grout is and how it’s composed. Grout is a mixture of cement, sand, and water that is applied between tiles to fill gaps and provide stability. It acts as a sealant that prevents water from seeping through the tiles and causing damage. However, due to its porous nature, grout easily absorbs liquids, dirt particles, and stains.
FAQ: Why does grout get dirty?
Grout can become dirty due to various reasons such as spills, foot traffic, cooking grease, and inadequate cleaning. Regular mopping may not be enough to remove embedded dirt from the porous surface of grout lines.
II. Gathering Required Tools and Materials:
To efficiently clean the grout on your kitchen floor, you’ll need a few essential tools and materials. Here’s what you’ll need:
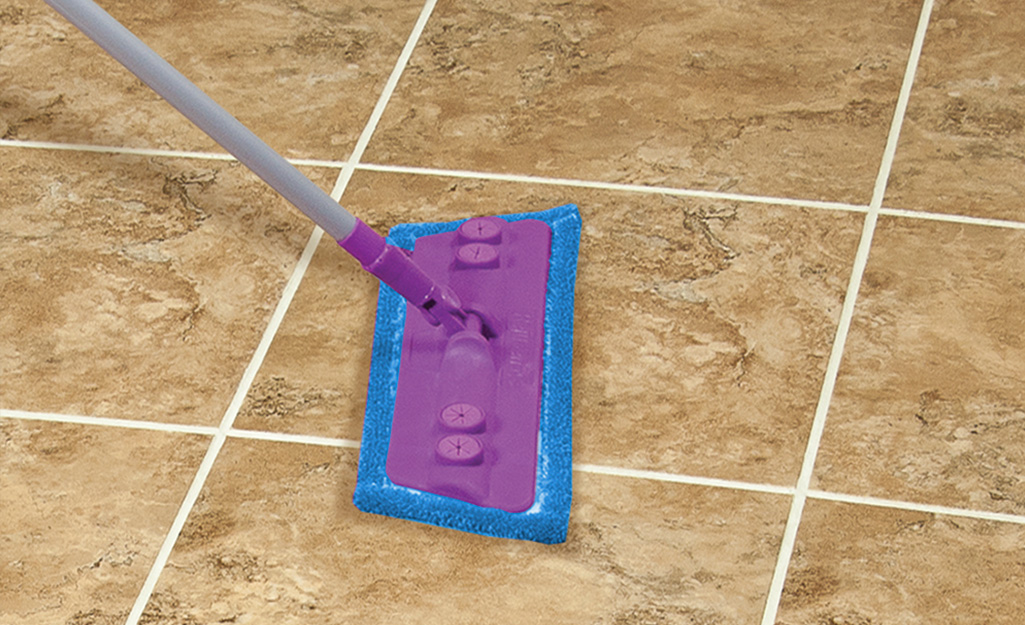
1. Stiff-bristled brush: A stiff-bristled brush will help in loosening dirt particles embedded in the grout lines.
2. Oxygen bleach or hydrogen peroxide: These cleaning agents are effective in removing stains from grout without causing discoloration.
3. Baking soda: This mild abrasive substance aids in scrubbing away tough stains and dirt.
4. Vinegar: Vinegar, mixed with water, serves as a natural cleaning solution that helps to dissolve grime and disinfect the grout.
5. Spray bottle: A spray bottle will allow you to apply cleaning solutions evenly on the grout lines.
6. Microfiber cloth or mop: These are ideal for wiping away excess moisture and cleaning residues.
FAQ: Can I use bleach to clean grout?
While bleach can be effective in removing stains from grout, it may also cause discoloration. Oxygen bleach or hydrogen peroxide are safer alternatives that provide similar results without the risk of fading or damaging the grout.
III. Preparing the Grout:
Before you start cleaning, it’s crucial to prepare the grout by removing loose dirt and debris. Follow these steps:
1. Sweep or vacuum the floor: Remove any loose dirt, crumbs, or debris from the kitchen floor using a broom or vacuum cleaner.
2. Dilute vinegar with water: Mix equal parts of vinegar and water in a spray bottle and shake well.
IV. Cleaning Process:
Now that you’ve prepared the grout, it’s time to initiate the cleaning process! Follow these steps for effective results:
1. Spray the vinegar solution: Liberally spray the vinegar solution onto the grout lines, ensuring they are thoroughly saturated. Allow it to sit for 10-15 minutes to break down dirt and stains.
2. Scrub with a stiff-bristled brush: Using a stiff-bristled brush, scrub the grout lines vigorously in a back-and-forth Motion. Apply pressure to dislodge dirt and stains from the porous surface of the grout.
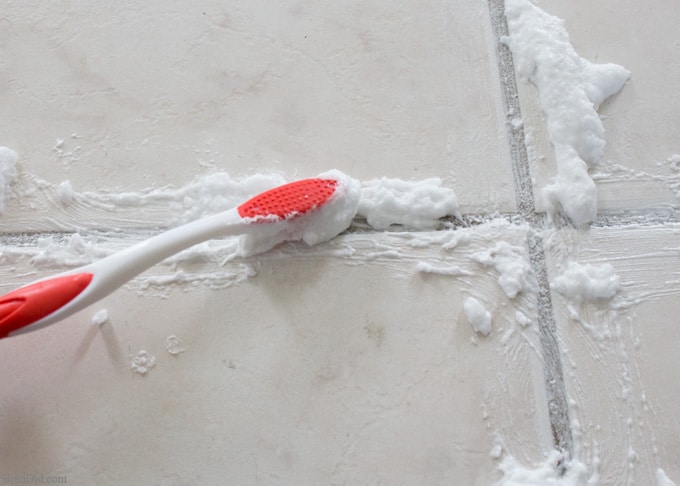
3. Make a paste with baking soda: In a small bowl, mix baking soda with water to create a thick paste. Apply the paste onto the grout lines, focusing on areas with tough stains. Let it sit for a few minutes to allow the baking soda to penetrate and lift the stains.
4. Scrub again: Using the stiff-bristled brush, scrub the grout lines once more, this time focusing on the areas with baking soda paste. The abrasive nature of baking soda will help to further remove stubborn stains.
5. Rinse with water: After scrubbing, rinse the grout lines thoroughly with water. Use a damp microfiber cloth or mop to wipe away any residue or excess cleaning solution.
6. Allow to dry: Let the grout lines air dry completely before walking on them or applying any sealant.
FAQ: How often should I clean my grout?
The frequency of grout cleaning depends on various factors such as foot traffic, cooking habits, and overall cleanliness. However, it is recommended to clean grout at least once every few months or as needed to prevent dirt buildup and staining.
V. Sealing the Grout:
To protect your newly cleaned grout and prevent future staining, consider sealing it. Follow these steps:
1. Choose a grout sealer: There are various types of grout sealers available in the market. Choose one that is suitable for your specific needs and follow the manufacturer’s instructions.
2. Apply the sealer: Using a small brush or roller, apply the grout sealer onto the grout lines. Ensure that the sealer is evenly distributed and covers all the grout surfaces.
3. Allow to dry: Let the sealer dry for the recommended time mentioned on the product packaging. Avoid walking on or touching the sealed grout until it is fully dry.
4. Test for effectiveness: Once the sealer is dry, test its effectiveness by dripping a few drops of water onto the grout lines. If the water beads up and does not absorb into the grout, then the sealer has been successfully applied.
FAQ: How long does grout sealer last?
The longevity of grout sealers can vary depending on factors such as foot traffic, cleaning habits, and quality of the sealer. On average, grout sealers can last anywhere from one to three years before needing to be reapplied. Regular maintenance and proper cleaning can help extend the lifespan of the sealer.