It is not only due to design as well as the decor of the home of yours that you have to think about using kitchen floor flooring for your floor but also you're watching durability and toughness in the sense your floor is able to take the spills as well as splashes that could occur regularly in a hectic kitchen.
Images about Installing Vinyl Plank Flooring In Kitchen
Tiled flooring is popular, on account of the fact that it comes in a range of different materials. If your kitchen experiences high traffic and you wish to protect against frequent spills, stone kitchen floor tiles are the greatest option of yours, followed by ceramic and porcelain. Today's choices are generally clean friendly.
How to Install Vinyl Plank Flooring as a Beginner Home

In case you decide to maintain the same flooring that you already have, you would still have to save a little extra with your capacity to pay to rehabilitate the floor into shape due to all the stressful consequences that a big build up might have on it. The same result is done by diagonally arranging floor tiles when installing it instead of installing it in such a manner that it's parallel to the walls.
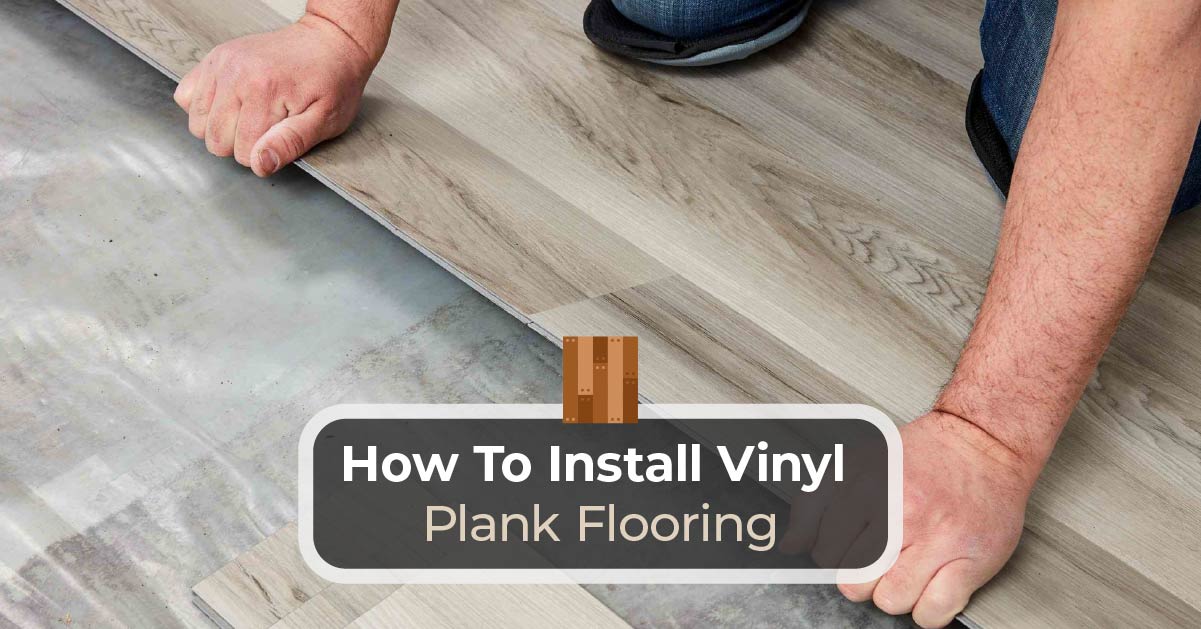
How To Install Vinyl Plank Flooring In A Kitchen And Living Room As A Beginner Home Renovation
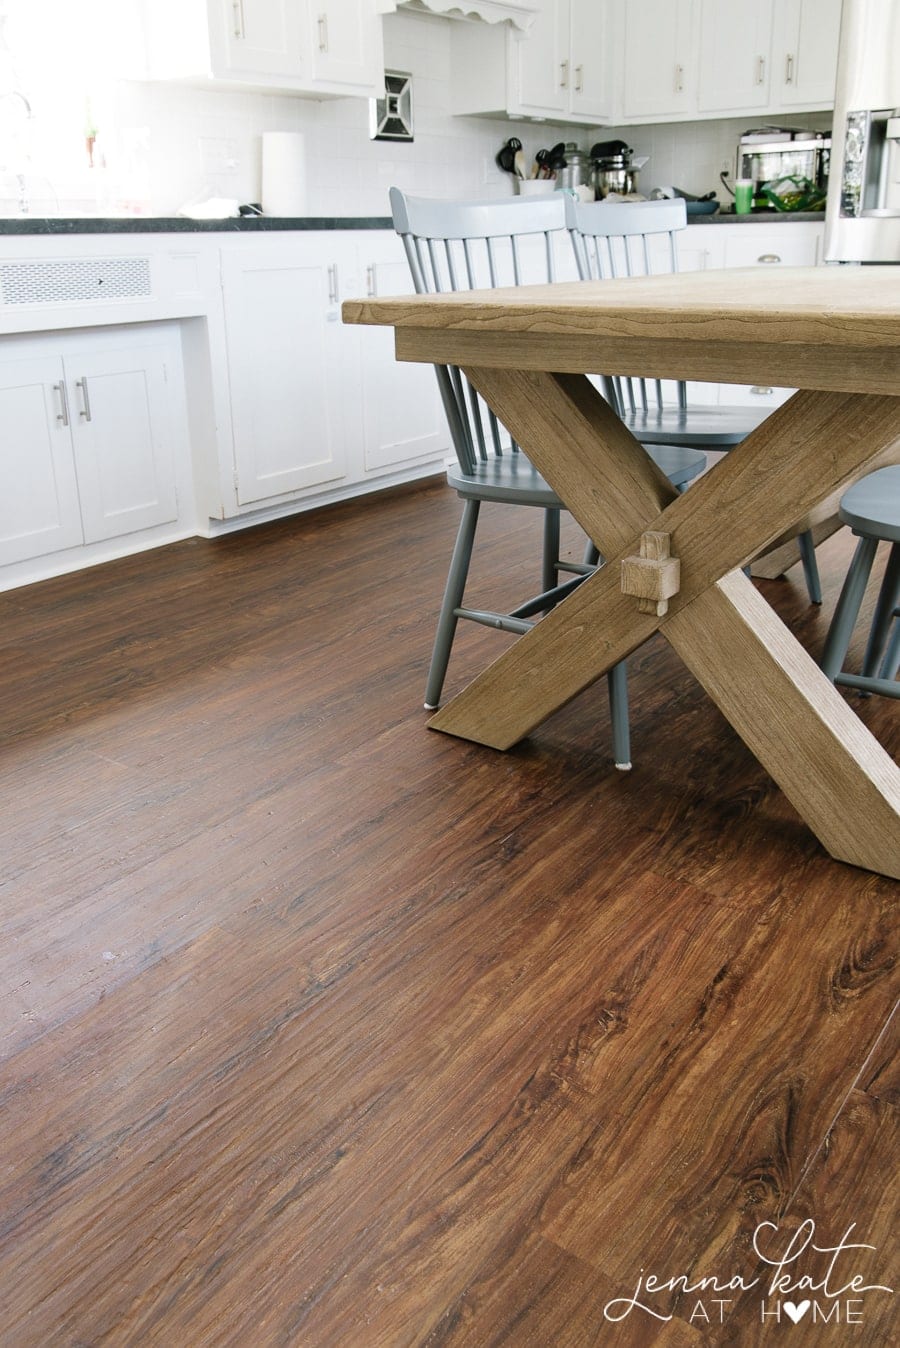
How to Install Luxury Vinyl Plank Flooring – Jenna Kate at Home
How To Install Vinyl Plank Flooring – Kitchen Infinity
How to Install Vinyl Plank Flooring – This Old House
/cdn.vox-cdn.com/uploads/chorus_asset/file/23200107/ASK_2016_VinylFlooring_SFa.jpg)
10 Kitchens With Vinyl Plank

10 Beginner Mistakes Installing Vinyl Plank Flooring – YouTube

DIY Luxury Vinyl Plank Installation –
10 Kitchens With Vinyl Plank

Why Vinyl Plank?

Installing Vinyl Plank Flooring – How To FixThisBuildThat

How to Install Vinyl Plank Flooring
/easy-install-plank-vinyl-flooring-1822808-10-6cfb7acfac434155a53e0ef80bfbc825.jpg)
How to Install Vinyl Plank Flooring
Related Posts:
- Home Floor And Kitchens
- Floor Tiles White Kitchen
- Cracked Tiles In Kitchen Floor
- Clean My Kitchen Floor
- Can You Put Kitchen Cabinets On Top Of Laminate Flooring
- Is Marble Floor Good For Kitchen
- Ikea Kitchen Floor To Ceiling Cabinets
- Bamboo Flooring In Kitchen Reviews
- Best Non Slip Kitchen Flooring
- Patterned Kitchen Floor
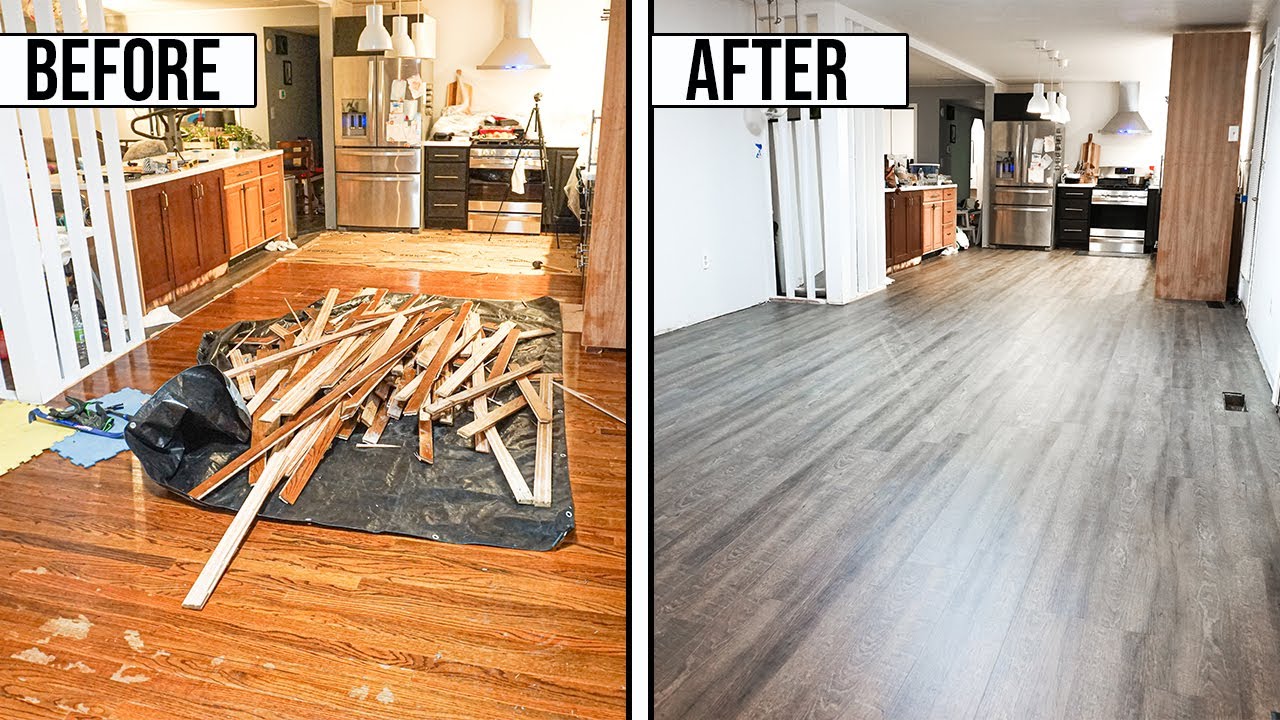
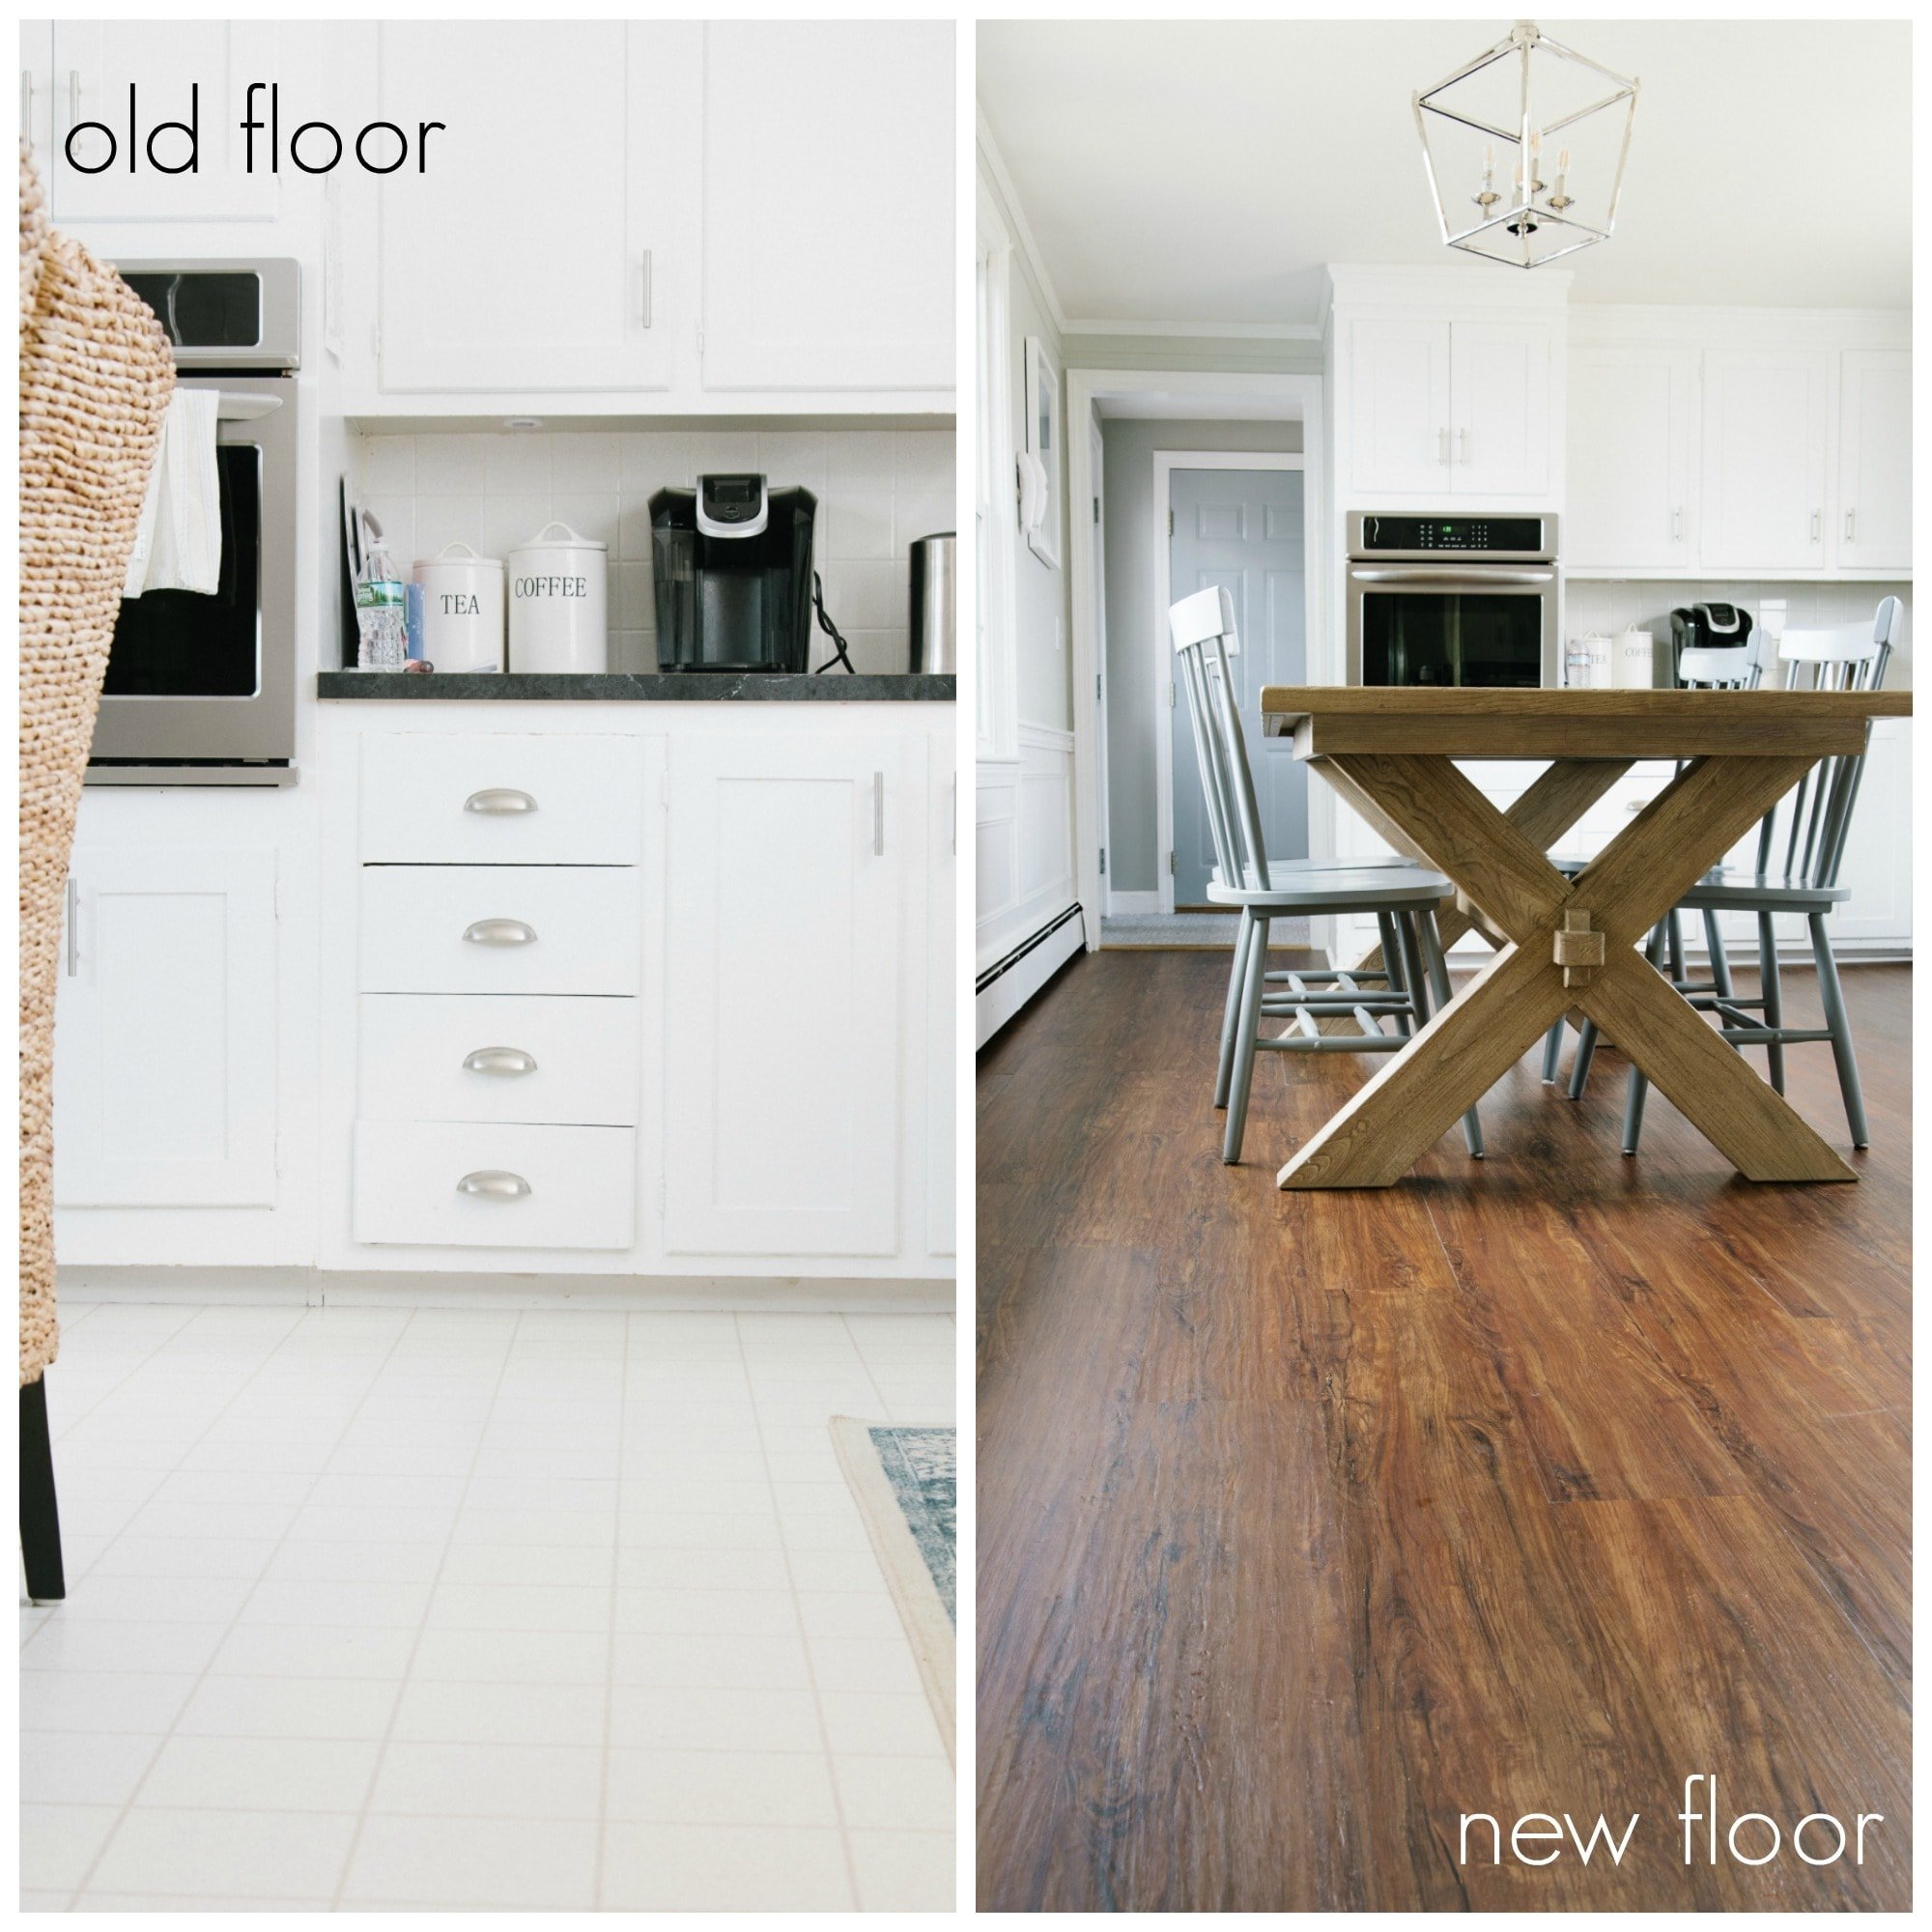
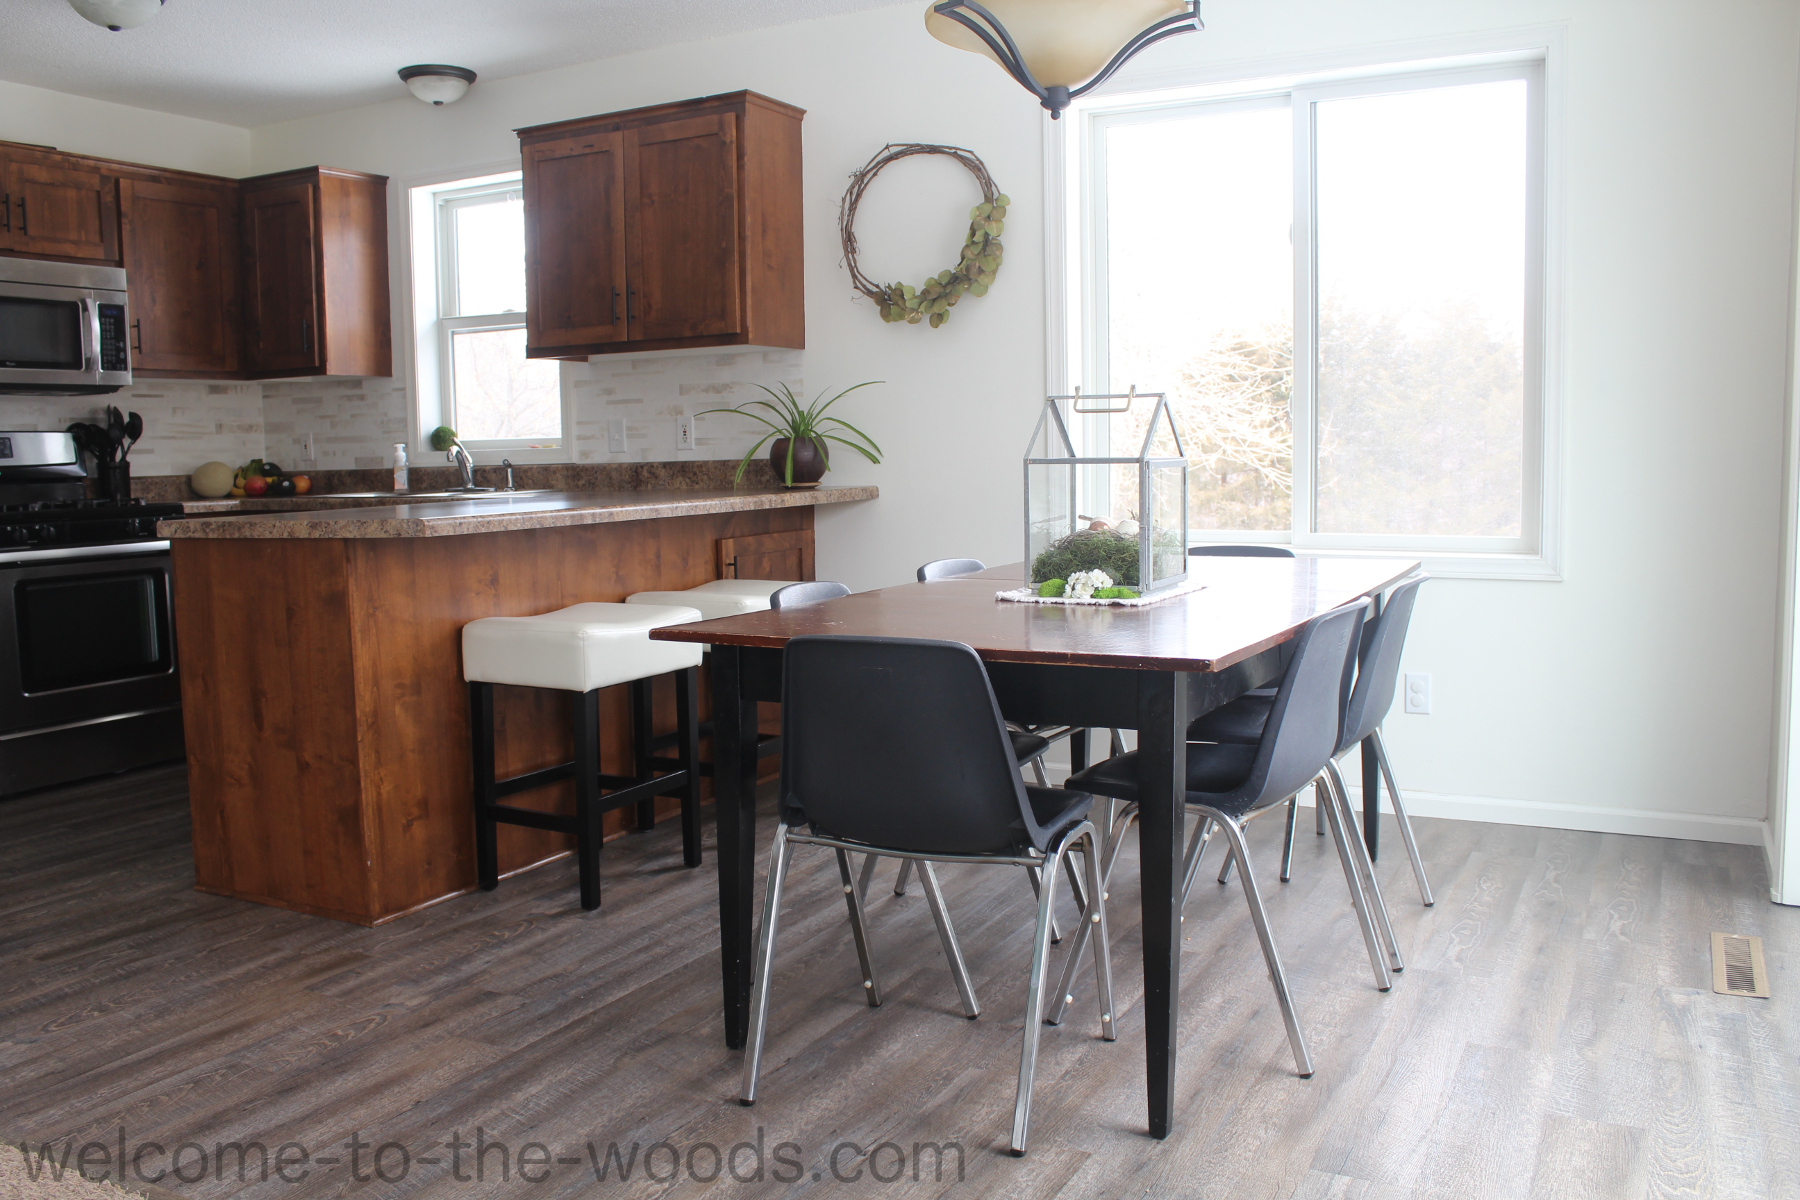
Installing Vinyl Plank Flooring In Kitchen
It is relatively easy to install a vinyl plank floor in the kitchen. This type of flooring is durable, attractive, and relatively easy to clean and maintain. It is also an economical choice for a kitchen floor. Installing vinyl plank flooring in the kitchen will help to update the look of the room and provide a long-lasting, attractive finish.
Planning for Installation
Before beginning installation, it is important to plan ahead. It is important to measure the space where the vinyl plank flooring will be installed to ensure that the right amount of material is purchased. It is also important to consider any special tools or materials that may be needed to complete the job. Additionally, it is important to make sure that the subfloor is level and dry before installation begins.
Materials Needed
The materials needed for installing vinyl plank flooring in the kitchen will vary depending on the size of the area being covered and any additional underlayment or trim required. In addition to the vinyl planks, it may also be necessary to purchase adhesive, foam underlayment, trim pieces, and a saw if necessary. It is important to purchase all of these items before beginning installation.
Preparing Subfloor
Before beginning installation, it is important to properly prepare the subfloor. This includes removing any existing baseboards or moldings and making sure that there are no loose nails or screws in the area where the planks will be installed. Additionally, it is important to make sure that all debris has been removed from the subfloor before proceeding.
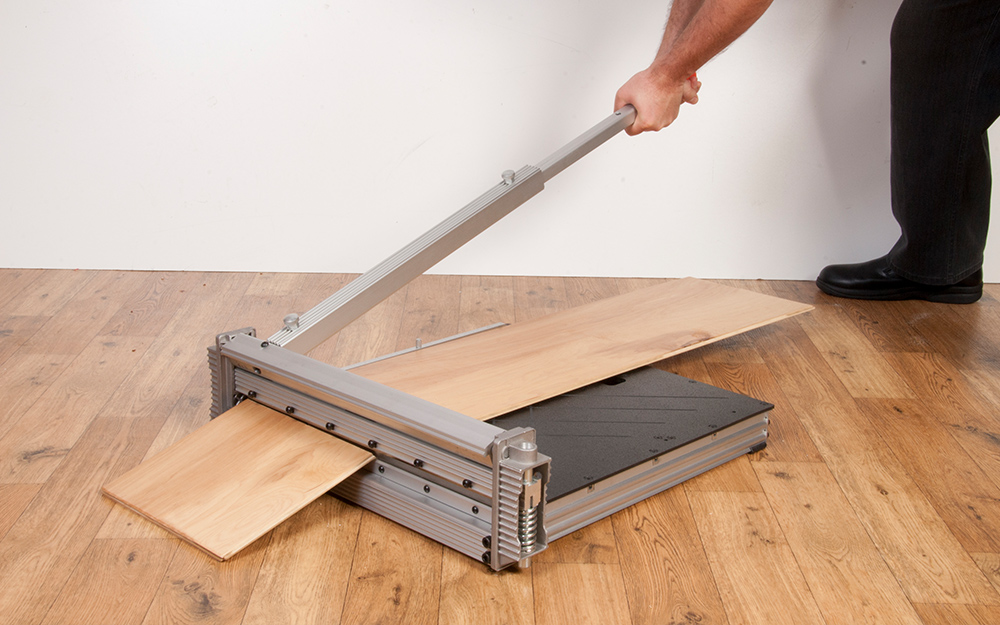
Laying Out Floor
Once all of the materials have been gathered and the subfloor has been properly prepared, it is time to begin laying out the floor. Start by laying out a few planks together in order to get an idea of how they will fit together in the space. If there are any small areas where planks need to be cut, mark them now so that they can be cut prior to installation. Once all of the planks have been laid out properly, it is time to begin installing them.
Applying Adhesive
In order for vinyl plank flooring to stay securely in place, it must be glued down using an appropriate adhesive. Begin by applying a thin layer of adhesive across one section of subfloor at a time and then lay down one plank at a time with each plank being slightly offset from each other as this helps prevent buckling over time. Once all of the planks have been glued down, use a roller to make sure that each plank has adhered properly. Allow adhesive at least 24 hours before walking on newly installed vinyl planks as this allows sufficient time for them to cure properly.
Finishing Touches
Once all of the planks have been installed, it is time for some finishing touches such as adding trim around edges or doorways and installing transition pieces between rooms or different types of flooring materials such as carpet or tile. Adding these finishing touches will help give your kitchen a finished look as well as help protect your floors from wear and tear over time.
FAQs: Install Vinyl Plank Flooring In Kitchen
Q: What type of Adhesive should I use for installing vinyl plank flooring in the kitchen?
A: For installing vinyl plank flooring in the kitchen, it is important to use an appropriate adhesive that is designed for this type of flooring. This will ensure that the planks stay securely in place and do not buckle over time.
What tools are needed to install vinyl plank flooring in a kitchen?
Tools needed to install vinyl plank flooring in a kitchen include:– Tape measure
– Utility knife
– Chalk line
– Pencil
– Hammer
– Pull bar
– Tapping block
– Mallet
– Vinyl plank flooring adhesive
– Notched trowel
– Rags or towels
– Roller For applying adhesive
– Transition pieces
– Baseboards or moldings
What type of adhesive should be used to install vinyl plank flooring in a kitchen?
The best type of adhesive to use for installing vinyl plank flooring in a kitchen is a pressure-sensitive adhesive. Pressure-sensitive adhesives are designed specifically for vinyl plank flooring and will provide strong, reliable adhesion and durability.What tools are needed to install vinyl plank flooring in a kitchen?
Tools needed to install vinyl plank flooring in a kitchen include:– Tape measure
– Utility knife
– Pencil
– Foam underlayment
– Hammer
– Chalk line
– Pull bar
– Flooring spacers
– Tapping block or rubber mallet
– Adhesive (if required)
– Notched trowel
– Roller for applying adhesive (if required)
– Transition pieces
– Baseboards or moldings