How hard will this floor be keeping its same appearance? Can it take a good deal of traffic and often will this kitchen flooring choice hold up to usage through the years. The appropriate flooring can have a big effect in a kitchen. For example flooring with light or neutral tones creates an impression of light-weight and space. With all the variety of uses, the kitchen flooring of yours should be both durable yet have to be visually impressive.
Images about Red Brick Flooring Kitchen
The flooring in the kitchen of yours is definitely the greatest feature in your kitchen which are able to really make your kitchen stand out and as a result when designing a new kitchen or remodeling an existing one, you need to commit a little while to researching the right kitchen flooring so you're able to pick the best one for your home.
75 Brick Floor Kitchen Ideas Youu0027ll Love – July, 2022 Houzz
There are lots of home improvement or maybe flooring stores that may help you make the very best kitchen flooring choice as they have trained personnel to assist you. Linoleum is the material of preference for those who care about the environment since it is constructed with all-natural materials. The ceramic tiles are best in different sizes, but the 12 to eighteen inch squares are the most popular.
Brick Flooring: Timeless Beauty in the Home Town u0026 Country Living
Kitchen Flooring Trend: Follow the Red Brick Floor u2013 The Colorado Nest
Things to Know Before Installing Brick Floors
Kitchen Flooring Trend: Follow the Red Brick Floor u2013 The Colorado

Brick Flooring Picture Gallery
:max_bytes(150000):strip_icc()/15-56a2fc4d5f9b58b7d0cffc0b-5c64680946e0fb00017dd913.jpg)
Brick Flooring Picture Gallery
:max_bytes(150000):strip_icc()/4-56a2fc555f9b58b7d0cffc56.jpg)
Tips for Installing Brick Floors – thewhitebuffalostylingco.com
75 Brick Floor Kitchen Ideas Youu0027ll Love – July, 2022 Houzz
![]()
Follow The Yellow Brick Home – Beautiful and Timeless Brick Floors

Red Brick In The Kitchen Gambrick
Kitchen Flooring Trend: Follow the Red Brick Floor u2013 The Colorado

Red Brick Herringbone Pattern Floor in Pantry – Cottage – Kitchen

Related Posts:
- Home Floor And Kitchens
- Floor Tiles White Kitchen
- Cracked Tiles In Kitchen Floor
- Clean My Kitchen Floor
- Can You Put Kitchen Cabinets On Top Of Laminate Flooring
- Is Marble Floor Good For Kitchen
- Bamboo Flooring In Kitchen Reviews
- Ikea Kitchen Floor To Ceiling Cabinets
- Patterned Kitchen Floor
- Best Non Slip Kitchen Flooring
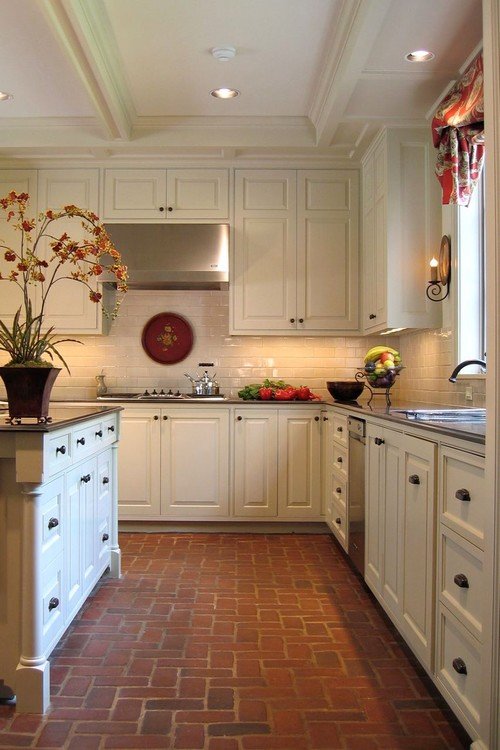
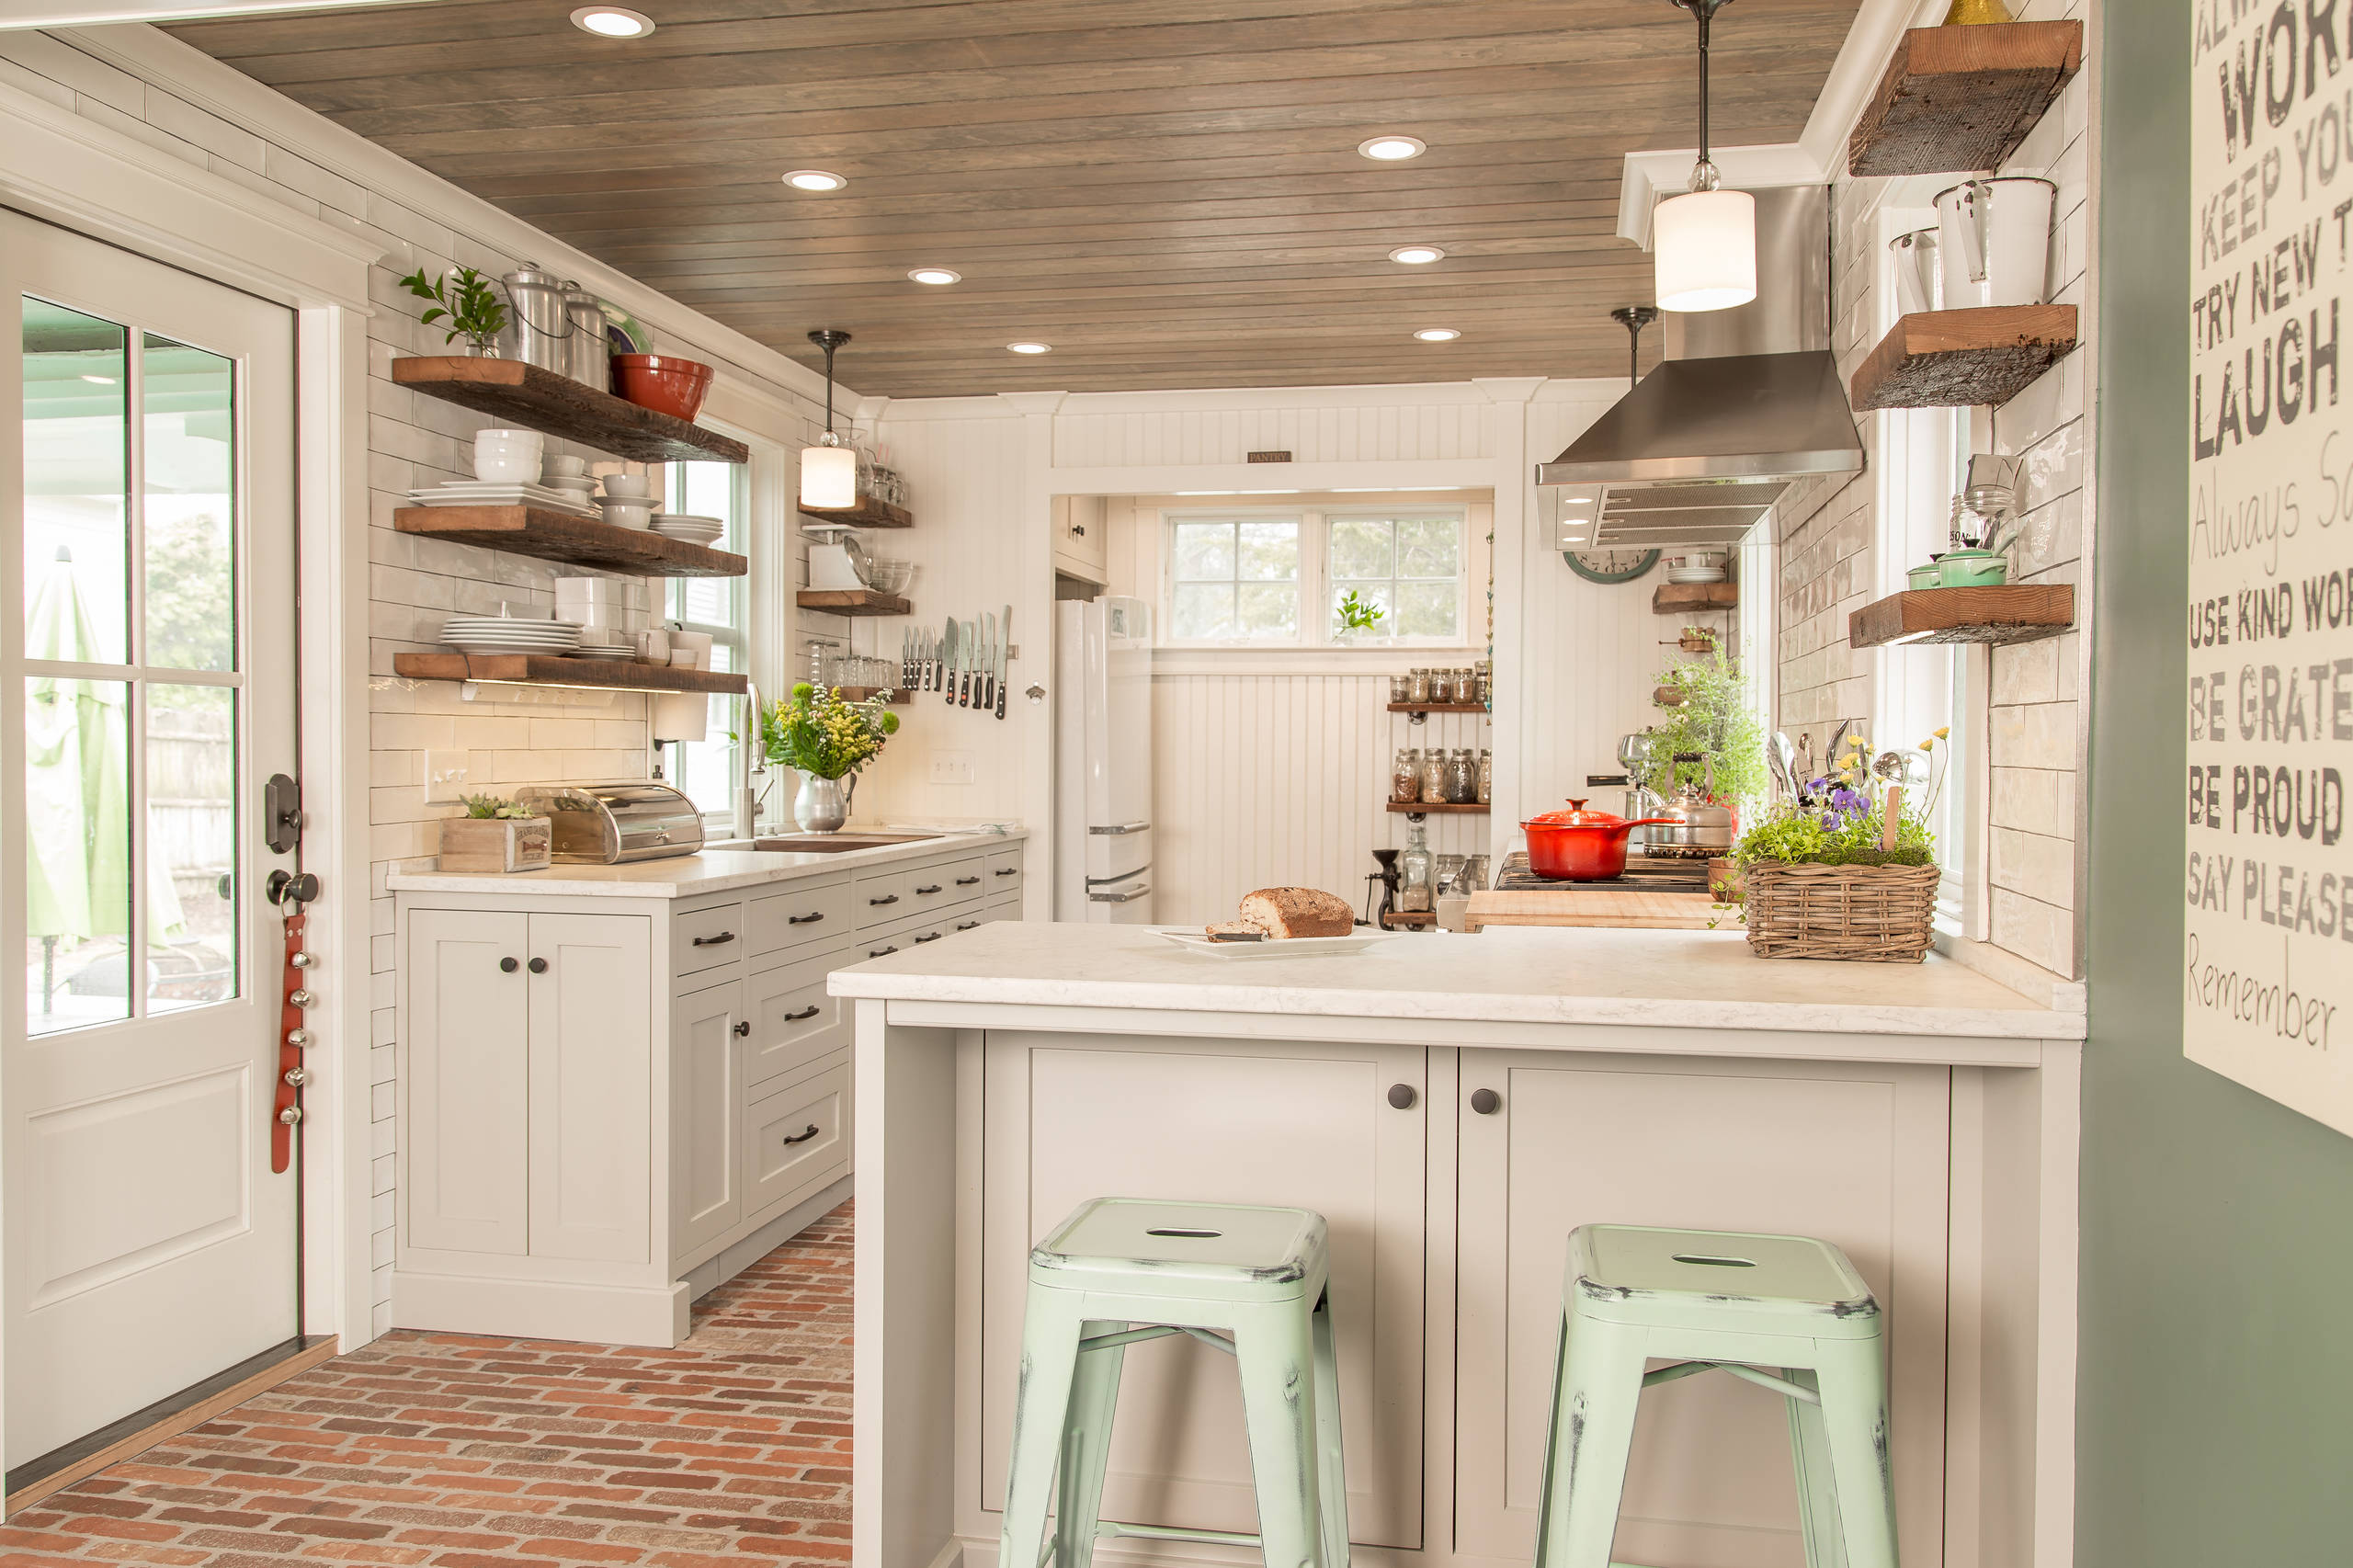
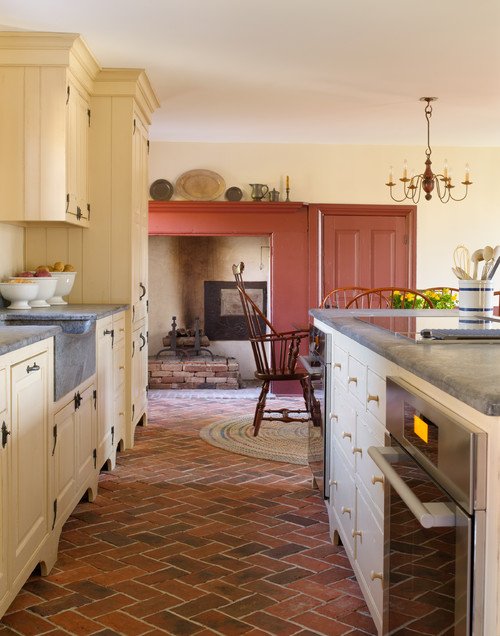
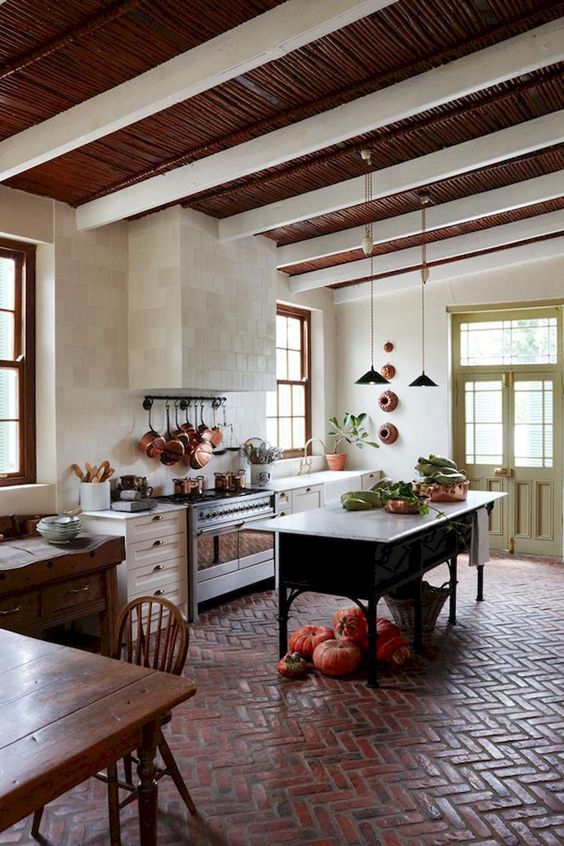
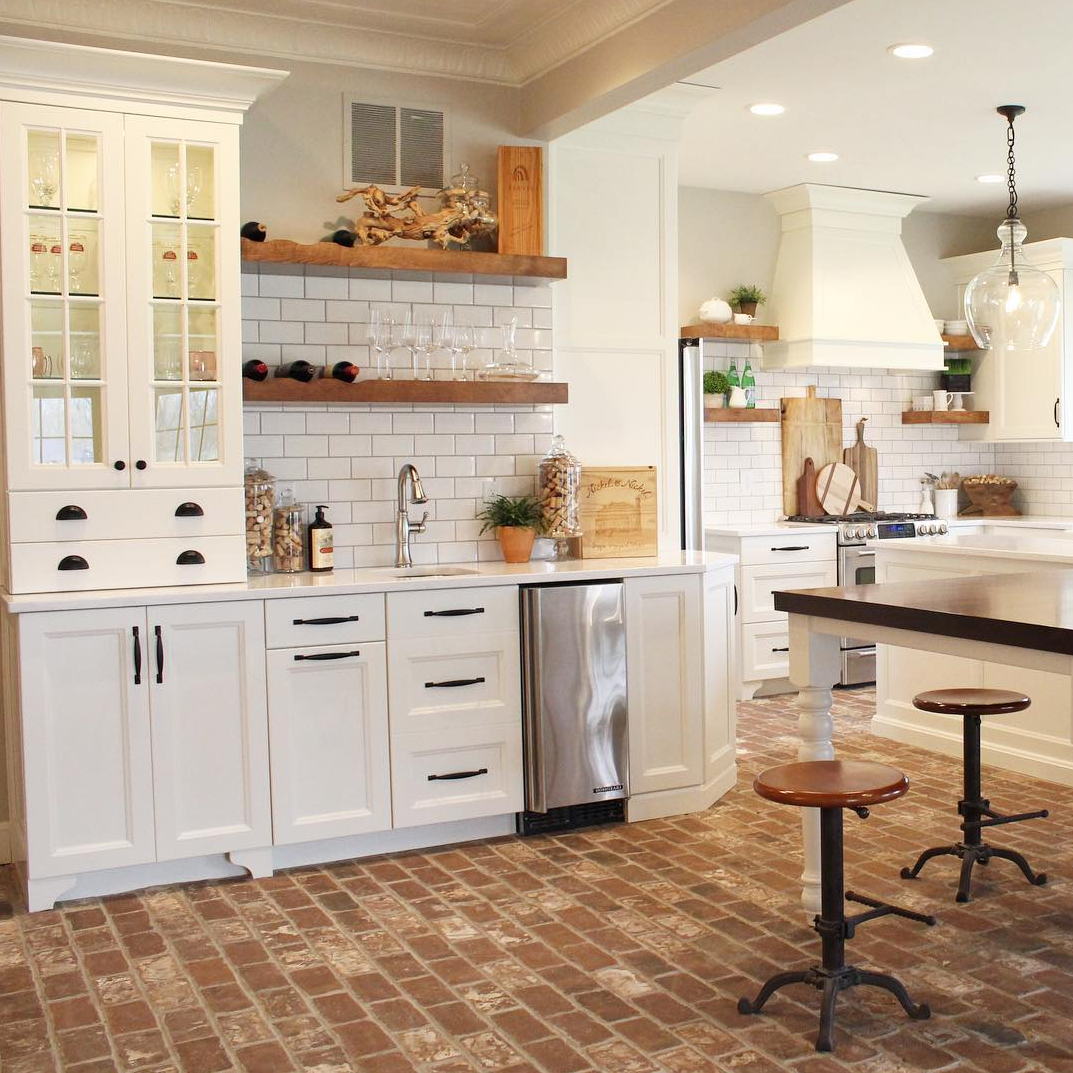
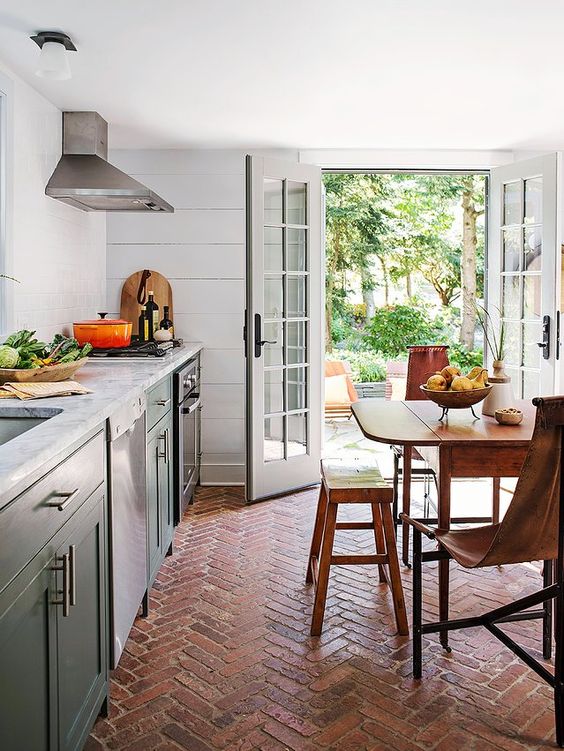
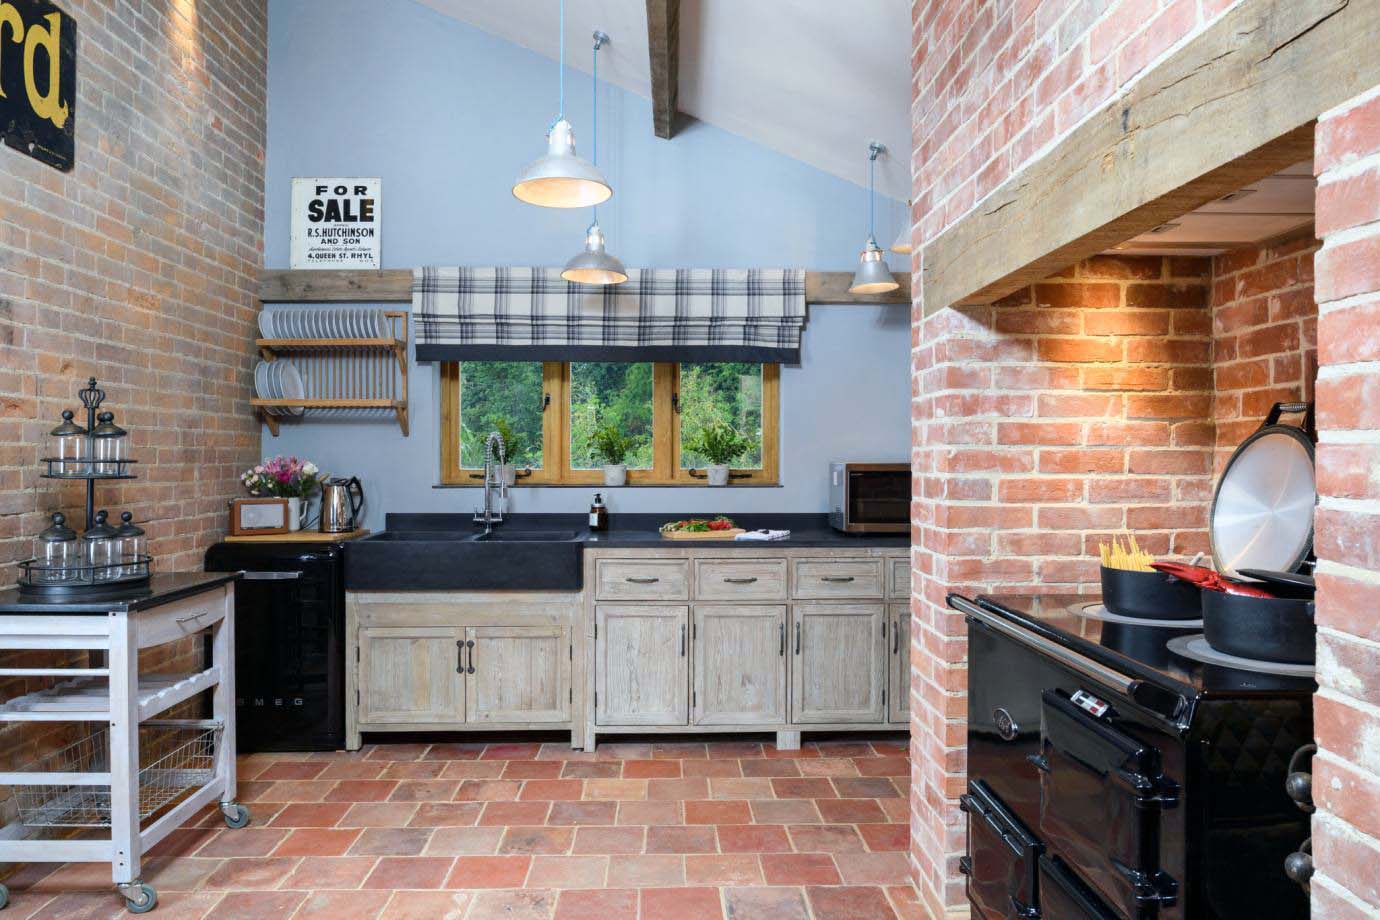
Red Brick Flooring Kitchen: A Timeless and Rustic Choice for Your Home
When it comes to designing a kitchen, homeowners often look for a flooring option that not only offers durability and functionality but also adds warmth and character to the space. Red brick flooring in the kitchen is a versatile and timeless choice that can achieve all of these goals. With its rustic charm, durability, and ability to complement various design styles, red brick flooring has become increasingly popular in kitchens across the globe.
In this article, we will explore the various aspects of red brick flooring in the kitchen, including its benefits, installation process, maintenance requirements, design ideas, and frequently asked questions.
I. The Benefits of Red Brick Flooring in the Kitchen
1. Durability: One of the primary reasons homeowners opt for red brick flooring in their kitchens is its exceptional durability. Made from natural clay materials, bricks are known for their strength and resilience. They can withstand heavy foot traffic, spills, and other everyday wear and tear without losing their charm or functionality.
2. Timeless Appeal: Red brick flooring has been used for centuries in various architectural styles due to its timeless appeal. Whether you have a traditional farmhouse kitchen or a contemporary urban loft, red brick flooring can seamlessly blend with any design style, adding a touch of warmth and character to your space.
3. Versatility: Another advantage of red brick flooring is its versatility in terms of color variations and patterns. While the classic red hue is widely popular, bricks also come in shades of brown, gray, and even white. Additionally, you can choose from different laying patterns such as herringbone or basket weave to create a unique look that suits your personal style.
4. Heat Retention: Bricks have excellent thermal properties that allow them to retain heat efficiently. In colder climates or during winter months, red brick flooring can help keep your kitchen warm by absorbing heat from sunlight or underfloor heating systems, reducing the need for additional heating sources.
5. Low Maintenance: Red brick flooring is relatively low maintenance compared to other flooring options. Regular sweeping and occasional mopping with a mild detergent are usually sufficient to keep it clean. The natural texture of bricks also helps conceal dirt and stains, making them less noticeable.
6. Eco-Friendly Choice: In an era where sustainability is a growing concern, choosing red brick flooring for your kitchen can be a step towards a greener home. Bricks are made from natural materials and have a long lifespan, reducing the need for replacements and minimizing waste in the long run.
FAQs:
Q1: Is red brick flooring suitable for high-traffic areas like kitchens?
A1: Yes, red brick flooring is highly suitable for high-traffic areas like kitchens due to its exceptional durability and strength. It can withstand heavy foot traffic without losing its charm or functionality.
Q2: Can red brick flooring be installed over existing kitchen floors?
A2: Yes, red brick flooring can be installed over certain existing kitchen floors, such as vinyl or laminate. However, it is crucial to ensure that the subfloor is level and in good condition before installation.
II. Installation Process of Red Brick Flooring
Installing red brick flooring in your kitchen requires careful planning and attention to detail. While hiring a professional installer is recommended for optimal results, some skilled DIY enthusiasts may attempt the installation themselves. Here is a step-by-step guide to installing red brick flooring:
1. Preparation: Before installation, ensure that the subfloor is clean, dry, and Level. Remove any existing flooring and repair any cracks or uneven spots in the subfloor. If necessary, apply a leveling compound to create a flat surface for the bricks.
2. Measure and Layout: Measure the dimensions of your kitchen to determine the amount of brick needed. Consider adding 10% to account for any cuts or waste. Plan the layout of the bricks, taking into consideration any patterns or designs you want to create.
3. Apply Mortar: Mix mortar according to the manufacturer’s instructions. Using a trowel, spread a layer of mortar onto the subfloor, covering an area slightly larger than one brick at a time.
4. Lay Bricks: Carefully place each brick onto the mortar, pressing it down firmly and ensuring it is level with neighboring bricks. Use spacers if desired to create even gaps between bricks for grout lines.
5. Cut Bricks: Use a wet saw or brick cutter to cut bricks as needed to fit along edges, corners, or around obstacles like cabinets or appliances.
6. Grout Joints: Once all the bricks are laid, allow the mortar to dry completely according to the manufacturer’s instructions. Then, mix and apply grout between the bricks using a grout float, filling in all the gaps and smoothing the surface.
7. Clean Excess Grout: After allowing the grout to set for a short time, use a damp sponge or cloth to wipe away excess grout from the surface of the bricks. Rinse and repeat until all excess grout is removed.
8. Seal Bricks: Apply a sealant specifically designed for brick flooring to protect it from stains and moisture. Follow the manufacturer’s instructions for application and drying time.
9. Allow for Drying: Give the floor ample time to dry before allowing foot traffic or placing heavy objects on it. This could take several days, depending on the specific mortar and grout products used.
10. Maintain and Enjoy: Regularly sweep and mop your red brick flooring to keep it clean and maintain its appearance. Avoid using harsh chemicals or abrasive cleaners that can damage the surface of the bricks.
Remember, if you’re uncertain about any step of the installation process, it’s always best to consult with a professional to ensure a successful and long-lasting result.